Schedule automatic backups, download them for safekeeping, and restore the portal data when needed.
What a backup contains
Each backup contains the CodeSign Secure logs, the Apache logs, a dump of the database and the HSM reference files used by CodeSign Secure. Private keys stay in the HSM and are not part of the backup. Back up the HSM separately with your vendor’s tools. See High Availability, Backup and Disaster Recovery.
Create a backup schedule
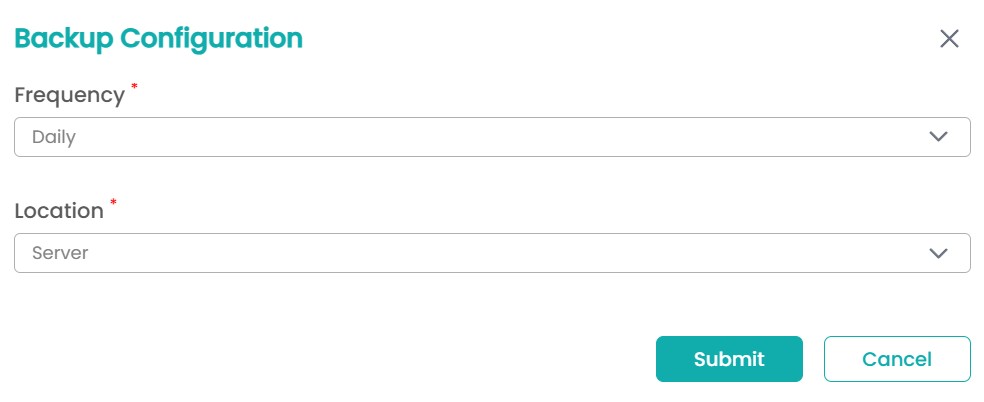
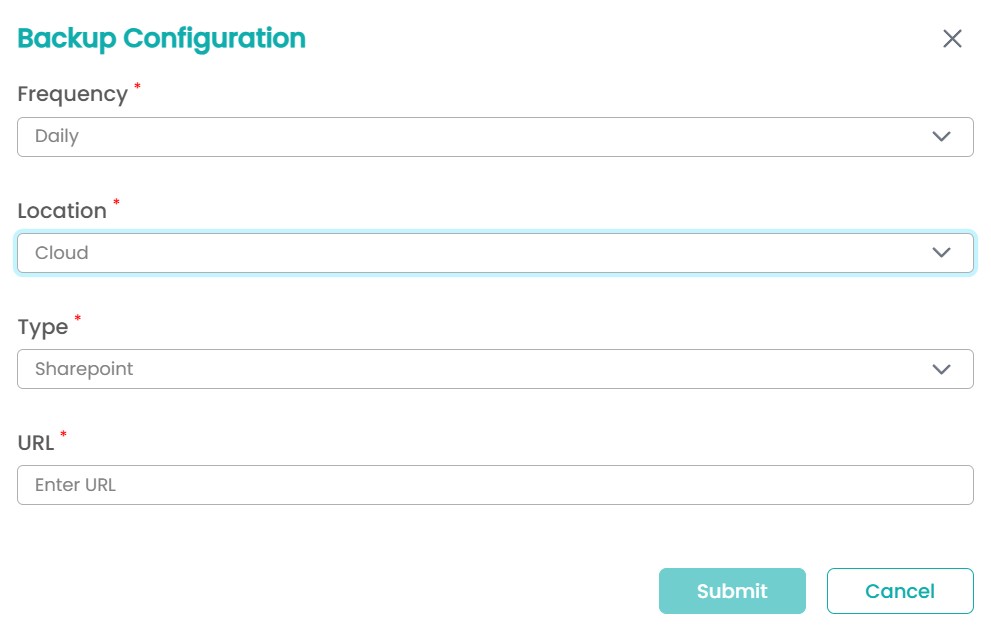
Field
Required
Options
Frequency
Yes
Daily, Weekly or Monthly
Location
Yes
Server stores the backup on the CodeSign Secure server. Cloud stores it in SharePoint.
Type (Cloud only)
Yes
SharePoint
URL (Cloud only)
Yes
The SharePoint location where backups are uploaded
Tip:
A backup kept only on the server is lost if the server is lost. Use the Cloud location, or download each backup to protected storage.
Allow uploads to SharePoint
CodeSign Secure uploads backups to SharePoint with the same Azure AD app registration used for sign-in. That registration needs a Microsoft Graph Application permission.
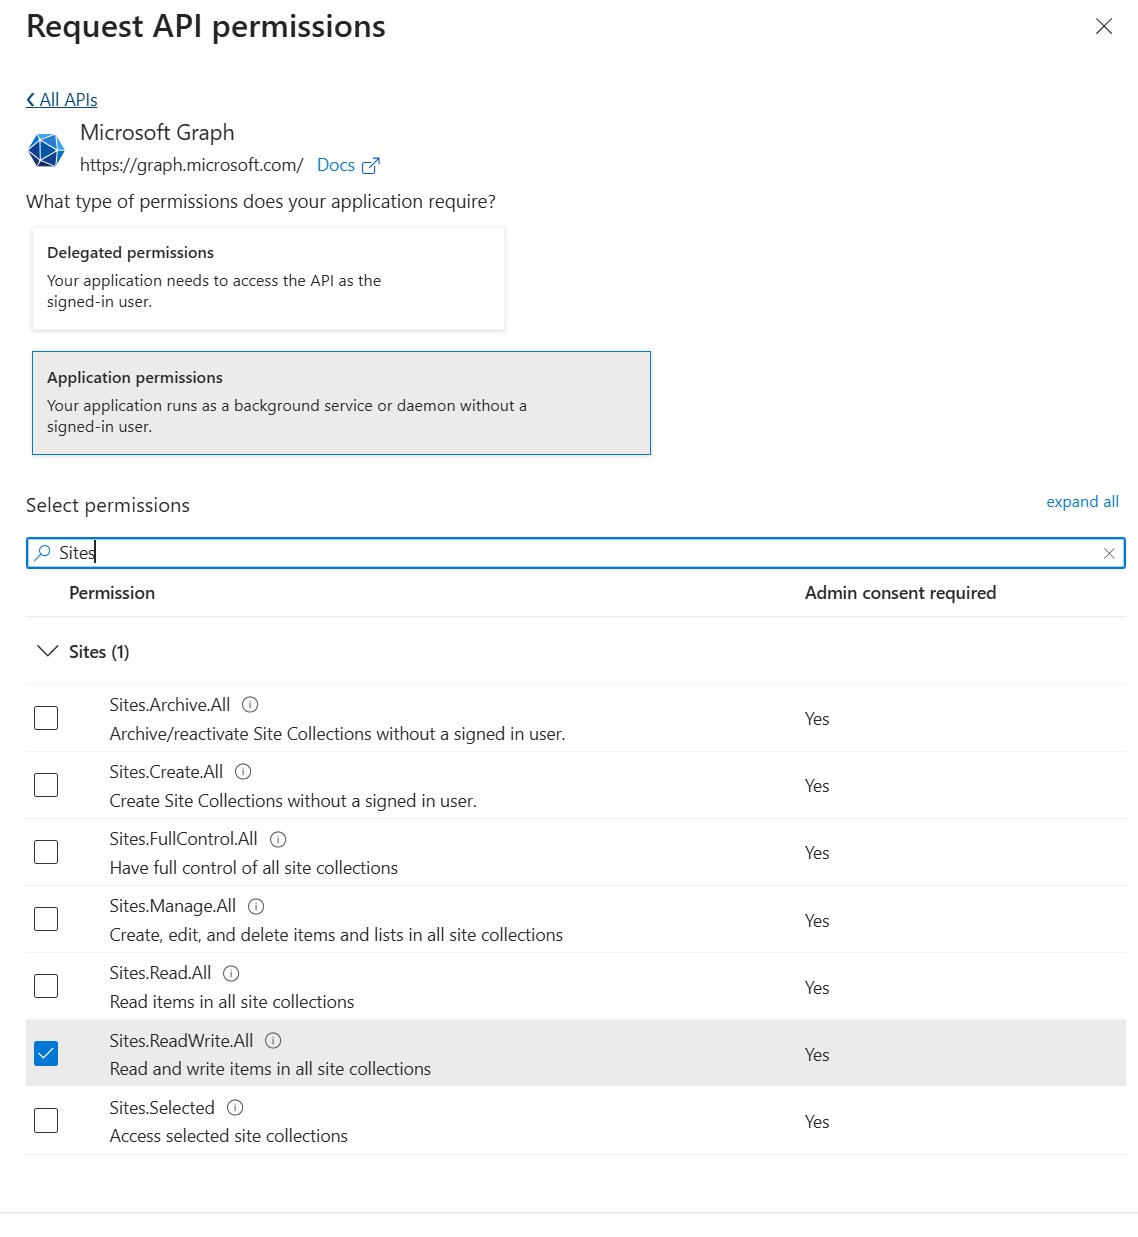
In the Azure portal, open App registrations, select your CodeSign Secure registration and open API permissions.
Select Add a permission > Microsoft Graph > Application permissions > Sites.
Select Sites.ReadWrite.All to allow uploads to every site in the organization, or Sites.Selected to allow uploads to one site only. To set up Sites.Selected, see Microsoft’s Sites.Selected guidance.
Select Grant admin consent and check that the Status column shows Granted.
Download or restore a backup
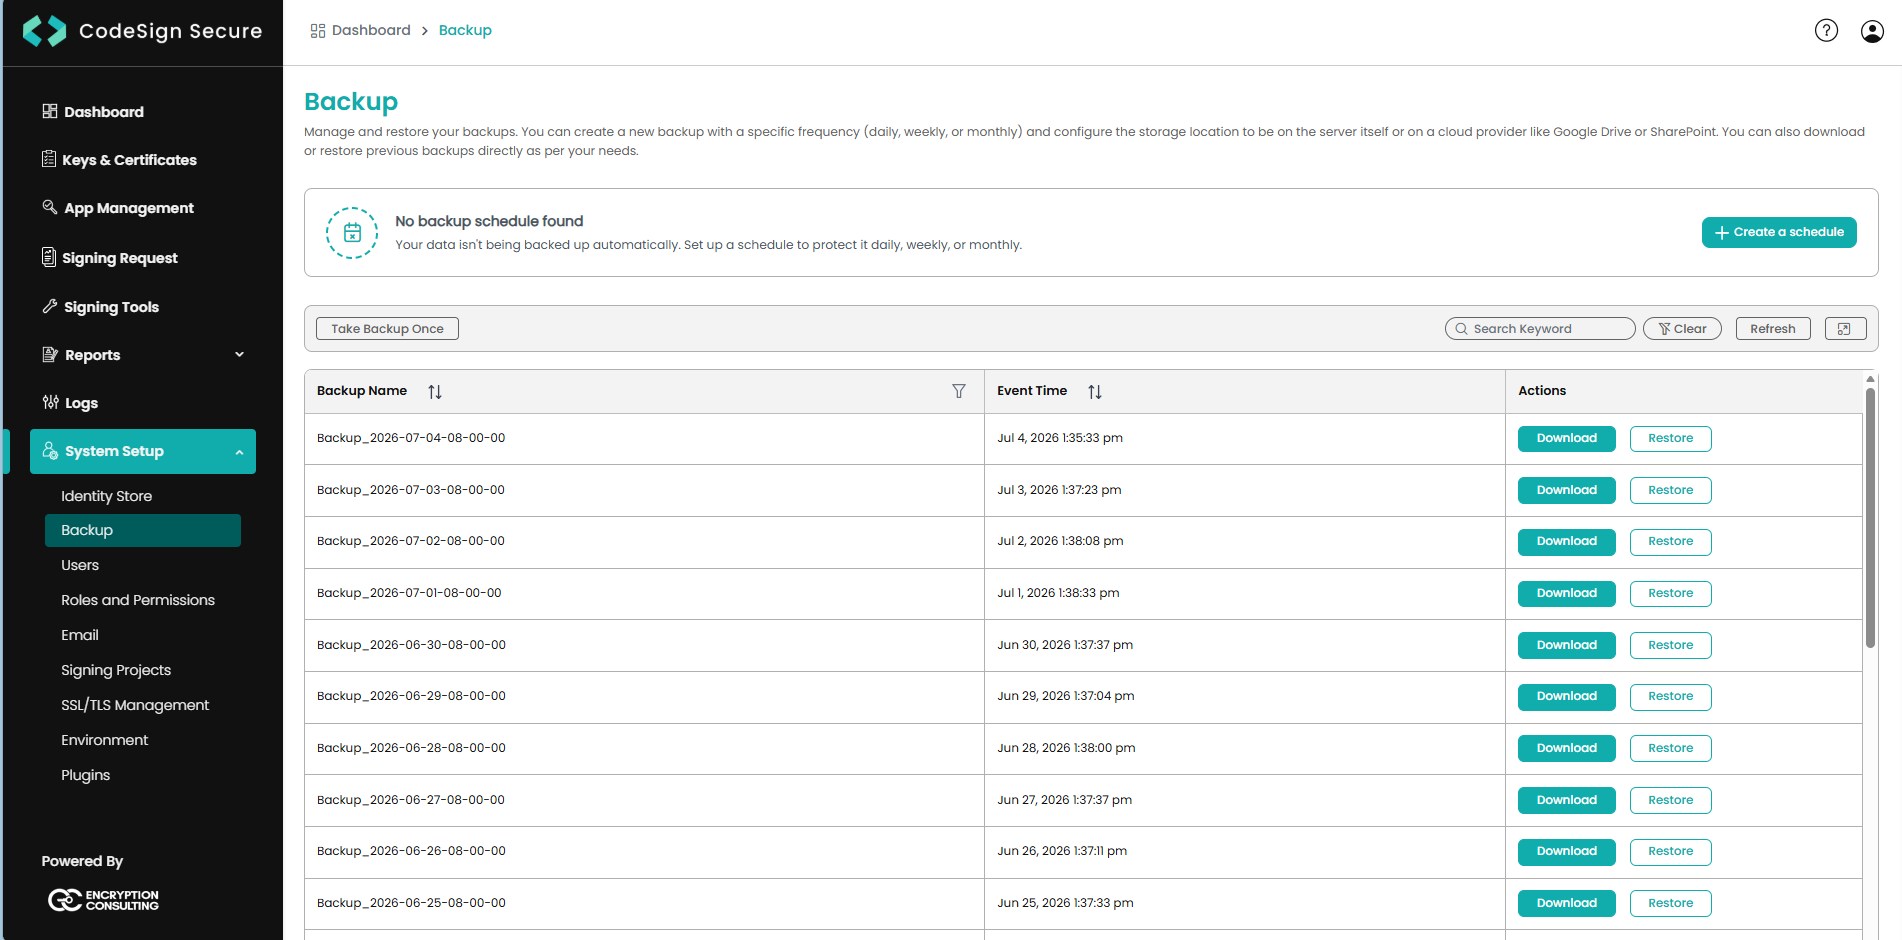
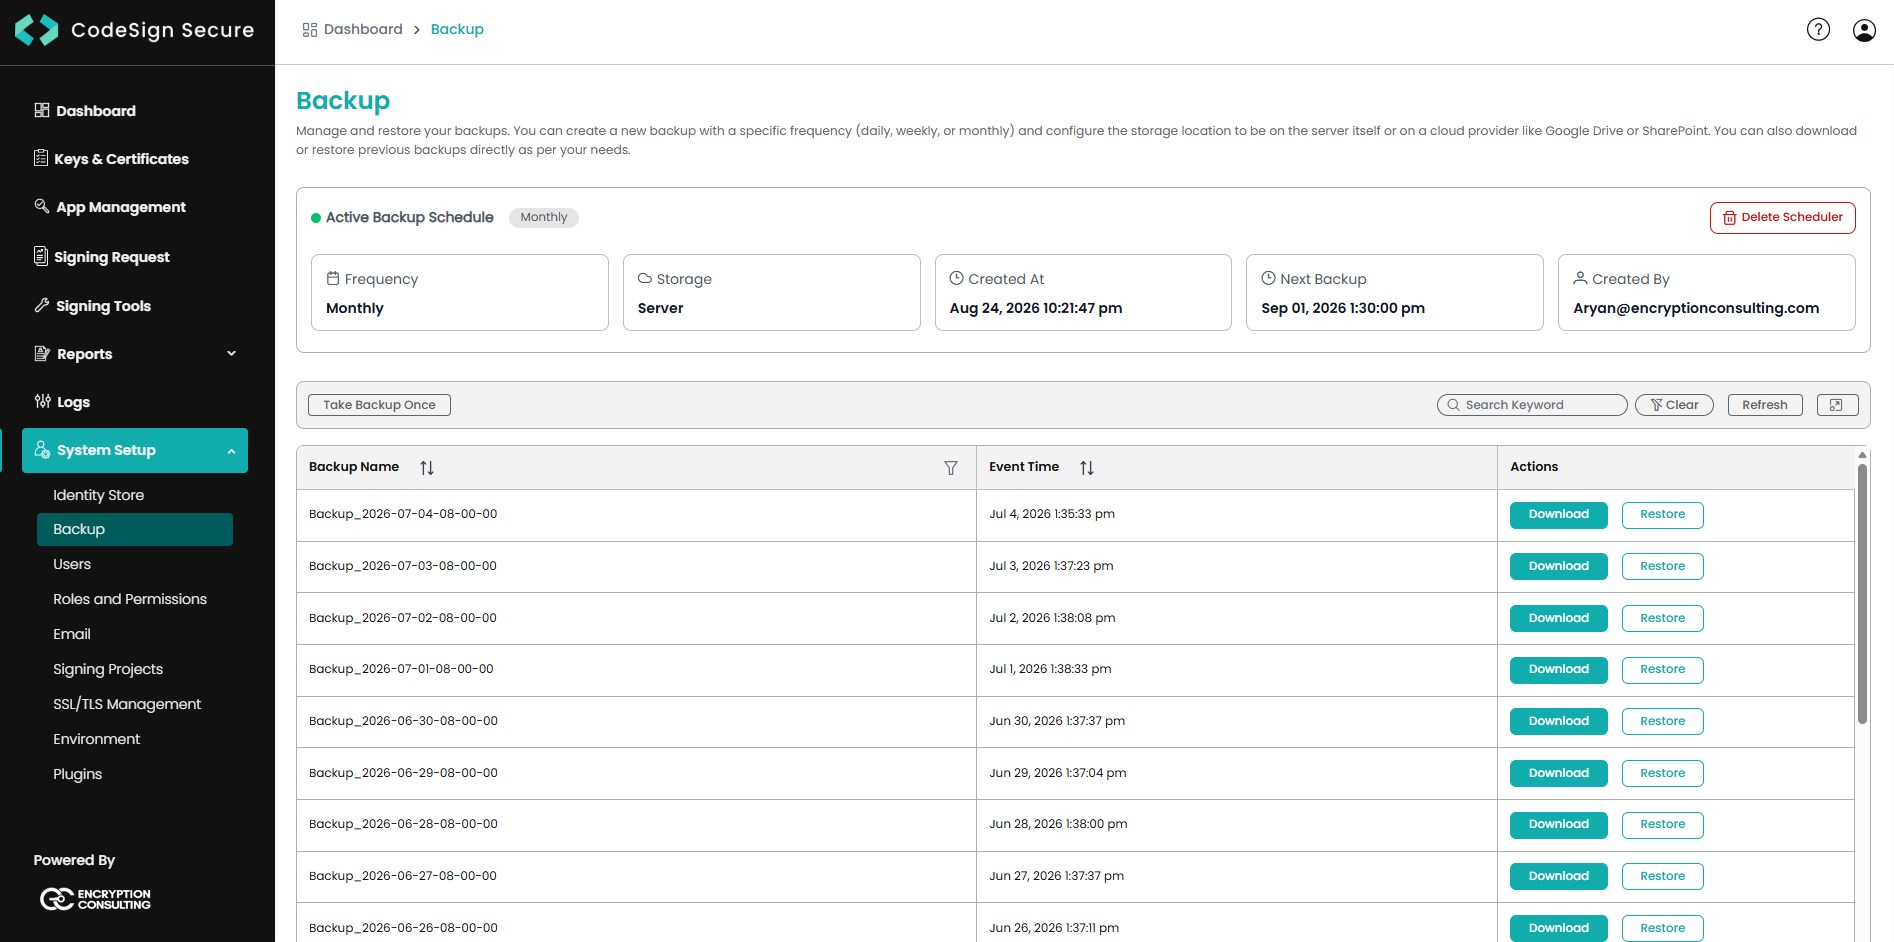
After you save a schedule, the page shows the backup location, who created it, the creation date and the next backup date. Each completed backup appears in the table.
Download saves the backup file to your computer for offline storage.
Restore returns the portal data to the state captured in that backup.
Important:
Restore overwrites the entire database with the backed-up dump. Anything created after that backup is removed. Create and download a fresh backup before you restore. See Restore a backup.