- Overview
- Reference Guide
- Setup & Architecture
- Release Notes
- API Reference
-
Integration Guides
-
Signing Capabilities
- Supported Formats and Platforms
- Timestamping
- Windows Signing - SignTool
- Apple Signing
- AppX & MSIX Signing
- Visual Studio ClickOnce
- Jar Signing
- Sign HLK/HCK using CodeSign Secure
- NuGet Signing
- Mage Signing
- Sign OVA/OVF using Encryption Consulting’s Utility Tool
- Utility Tool for code signing
- Container Signing
- PKCS11 Wrapper
- Reproducible Build
- CI/CD Integration
-
Signing Capabilities
Utility Tool for code signing
The following tool will help you perform code signing through the command line. The tool supports single signing and bulk signing. For single signing, it will take the path of your file as an input, and when performing bulk signing, it will take the path of the folder which contains all the files that need to be signed. It will then automatically scan it for virus, and if malware is detected, the process exits and does not allow signing to continue when single signing.
In bulk signing, it will skip that file. Once the file has been scanned for malware, as per the file type, an appropriate code signing method will be selected for you. For example, files with the .so and .txt extension will be signed with OpenSSL, files with the .jar extension will be signed with Jar signing, and files with the .exe, .dll, .sys, .cat, .cab will be signed with windows signing.

Installation of Utility Tool
For installation, you would need to download and run a MSI file from the portal which will install this tool into your machine. Along with the tool, it will also prompt you to install various signing softwares such as Windows SDK, Java SDK and Encryption Consulting KSP. These signing softwares will be used by the Utility Tool to perform signing operation on different file types.
After successful installation, you will find the Utility Tool.exe in the "C:\Program Files\Encryption Consulting\Utility Tool" directory.
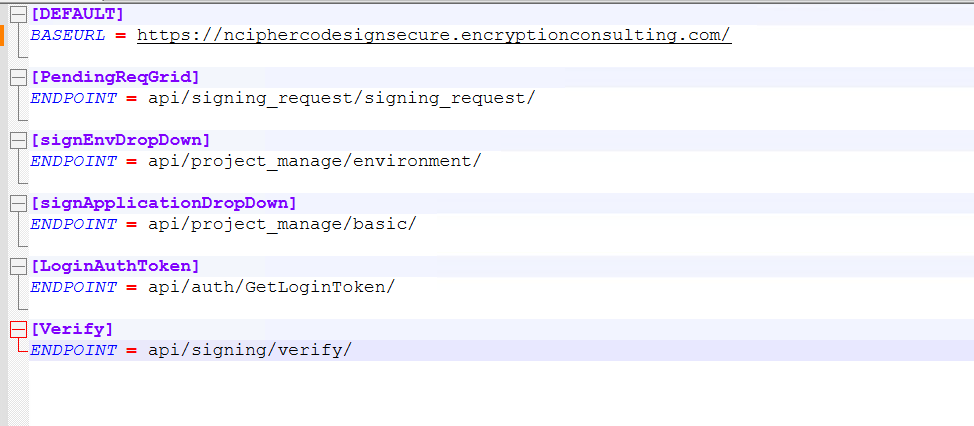
You will need to change the "BASEURL" field in the config file with the URL of your domain
You can cancel the installation of signing softwares if updated versions are already configured in your system environment.
Single Signing
Follow the steps below to use the tool for single file signing:
-
To Access the tool, click on the executable file- Utility Tool.exe
-
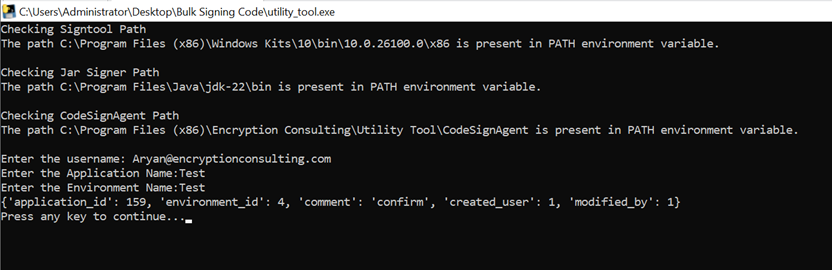
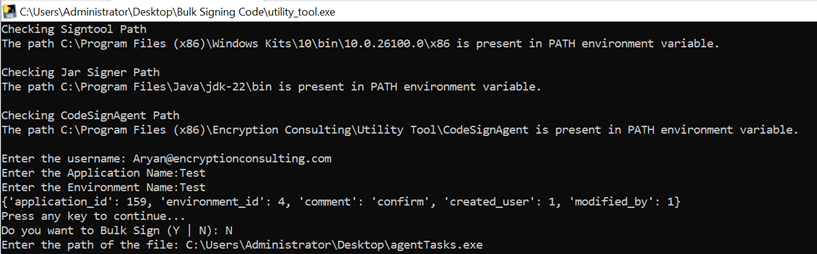
It will prompt you to provide your username, Application Name and Environment Name that will perform user authentication on the portal and verify the user's team details.
-
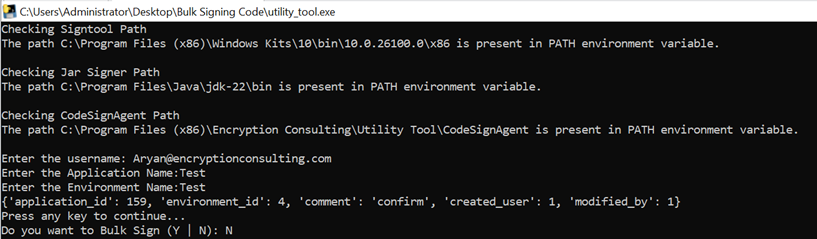
It will then ask you whether you want to bulk sign or not, Y for Yes and N for No. Enter N in this case.
-
Then enter the path of the file that needed to be signed.
-
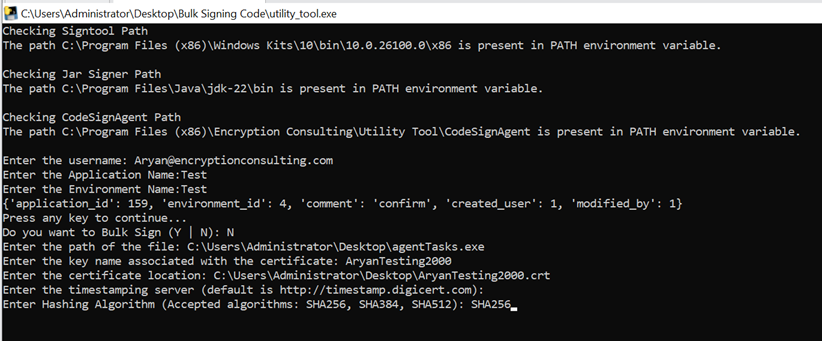
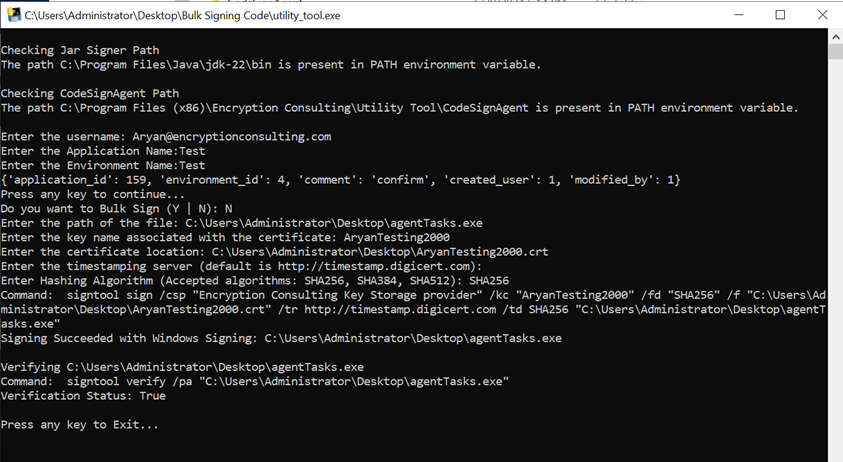
Once you provide the file path, malware check is done if ClamAV antivirus software is present in your system. Provide the inputs as asked. An example of doing .exe file with Windows signing is provided below.
-
A message will be displayed when Codesigning is done.
All possible inputs that users may have to provide for code signing are listed below with an example of each.
-
Enter the path of the file
This is where you provide the path of file that you want to sign. Example C:\<Folder_name>\<File_name>. Make sure you have provided a file name with the proper extension.
-
Enter the key name
This refers to the cryptographic key used to sign the code. Example: evcodesigning
-
Enter the certificate location
An example of what can be put in this field is C:\testing.pem. The certificate.pem file MUST be included in this input.
-
Enter Hashing Algorithm
You need provide the name of hashing algorithm such as SHA256, SHA384, or SHA512. It must be one of these three values.
Bulk Signing
Follow the steps below to use the tool for bulk file signing:
-
To Access the tool, click on the executable file- UtilityTool.exe. This file will be located at
C:\Program Files (x86)\Encryption Consulting\Utility Tool\UtilityTool.exe
-
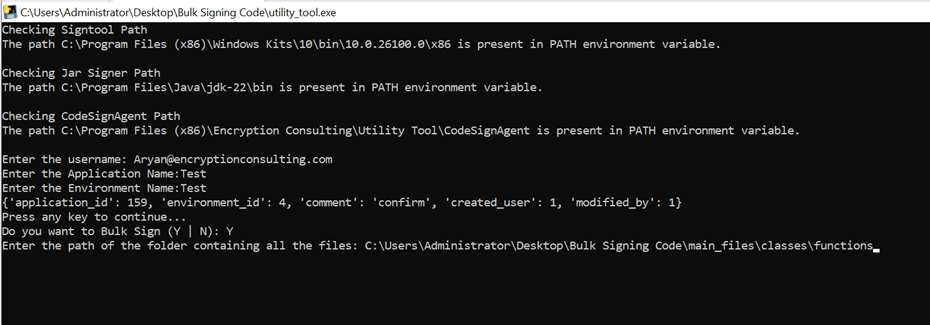
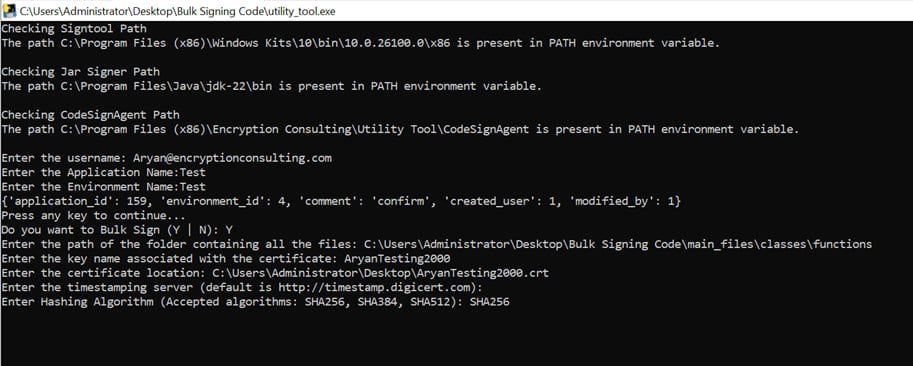
It will prompt you to provide your username, Application Name and Environment Name that will perform user authentication on the portal and verify the user's team details.
-
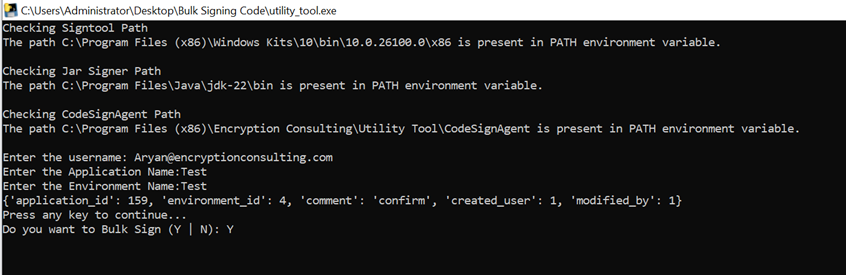
It will then ask you whether you want to bulk sign or not, Y for Yes and N for No. Enter Y in this case.
-
Then enter the path of the folder which contains all the files that needed to be signed.
-
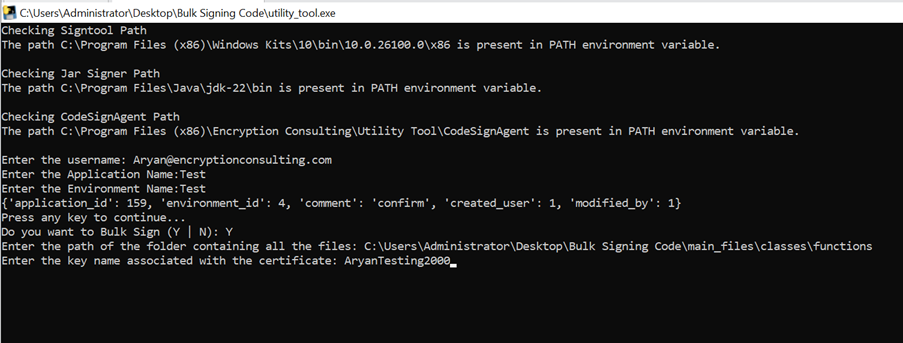
Now, provide the key name of the certificate which you want to use for signing. Key name or key alias can be seen from the portal.
-
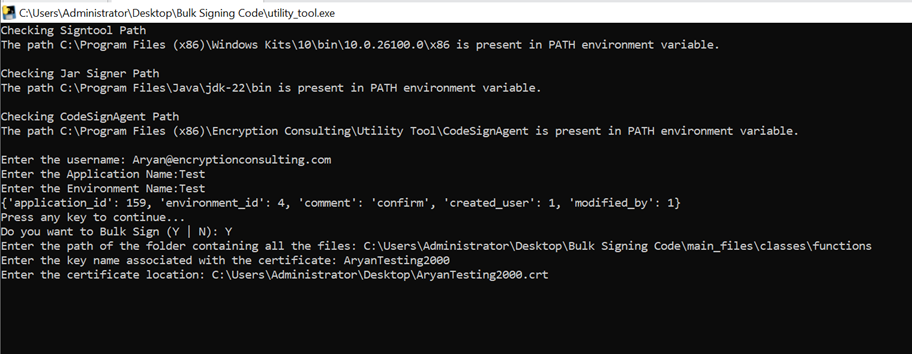
Now, provide the path of this certificate that will be used for signing the file.
-
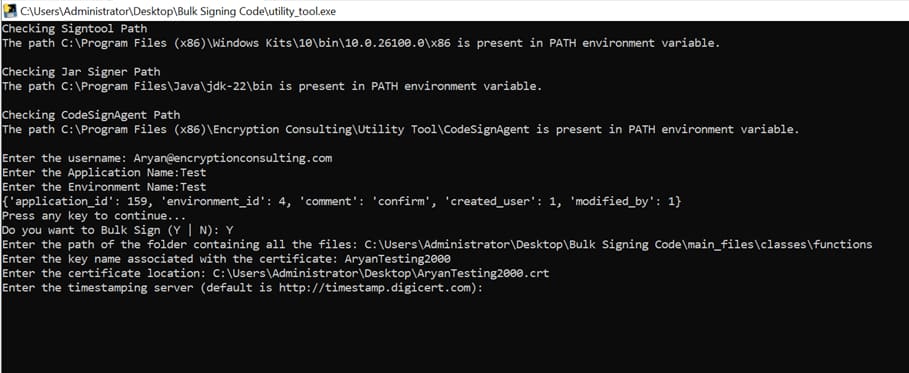
Then enter the url of the timestamping server. Press enter to select the default server i.e. http://timestamp.digicert.com
-
Then enter the hashing algorithm (Accepted algorithm: SHA256, SHA384, SHA512)
-
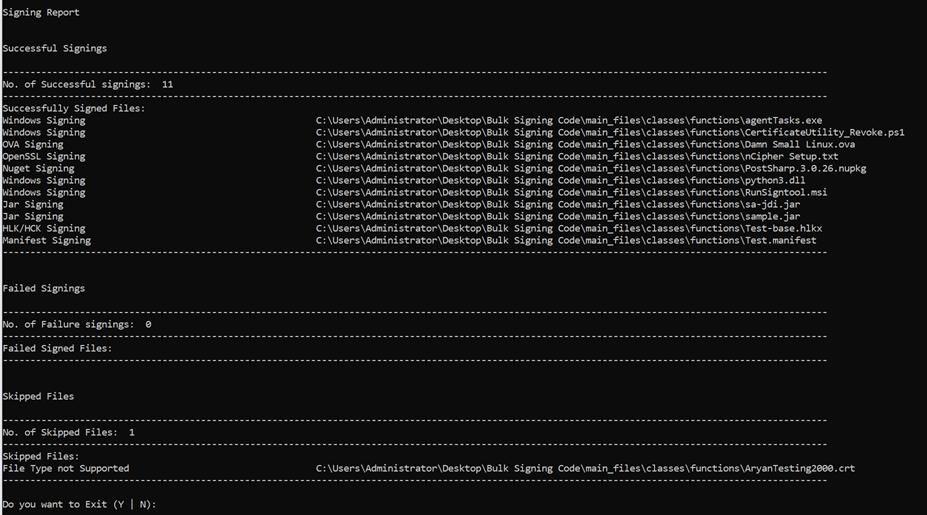
It will then generate a Signing Report for all files. It will provide details about successful signings, failed signing and skipped files.