-
Signing Appx and Msix files can be done using the Windows
Signtool which comes along the Windows SDK setup.
Microsoft Windows SDK includes an executable named
“makeappx.exe” located in the "C:\Program Files
(x86)\Windows Kits\10\bin<build
number><architecture>\makeappx.exe" directory.
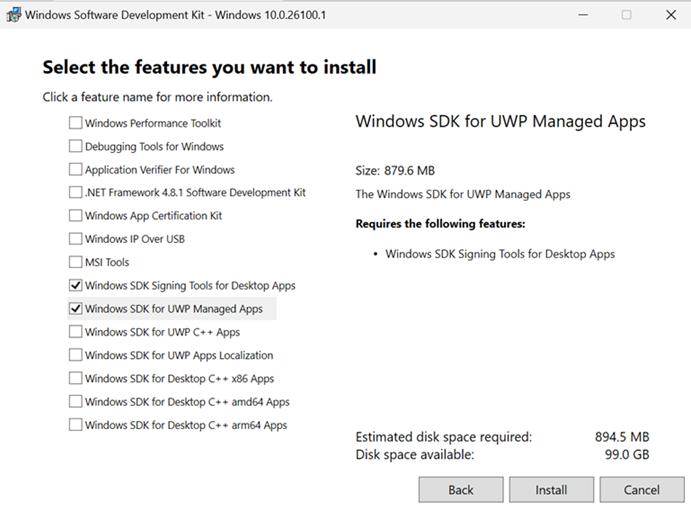
If you are not able to see the "makeappx.exe" file, you
would need to re-configure your Windows SDK with the
following settings.
-
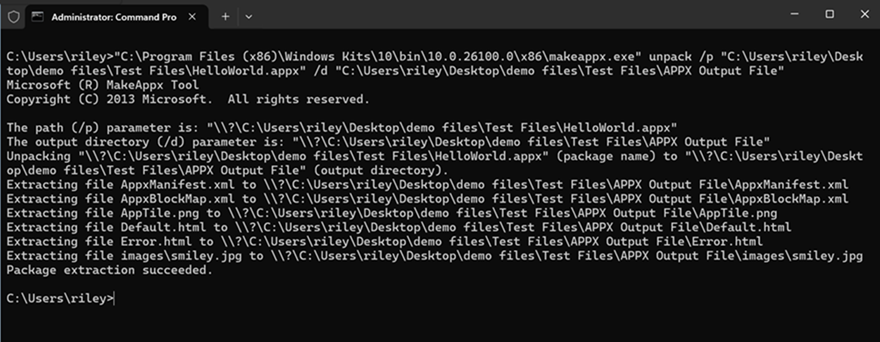
Here we are using the example of an Appx File. Similar steps
can be followed for Msix files as well. Use the command
prompt to run the following command:
"C:\Program Files (x86)\Windows Kits\10\bin\<build
number>\<architecture>\makeappx.exe" unpack /p
“<the path to your .appx file>” /d “<Your desired
new target directory>"
-
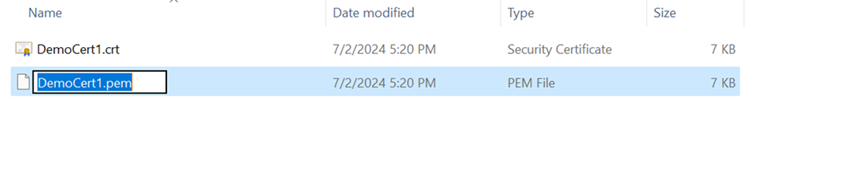
Now locate the certificate you wish to use for signing. The
certificate must have the .pem extension. You can change the
extension by renaming the certificate.
-
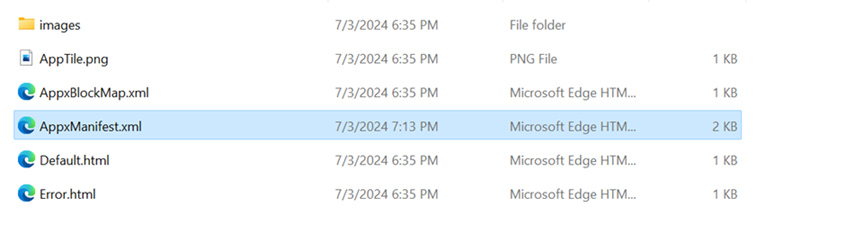
Navigate to the target directory specified in the previous
command and find the file AppxManifest.xml. Inside, two
lines must be modified.
-
Replace the Publisher line in the AppxManifest.xml with the
subject line from the .pem certificate as shown below:
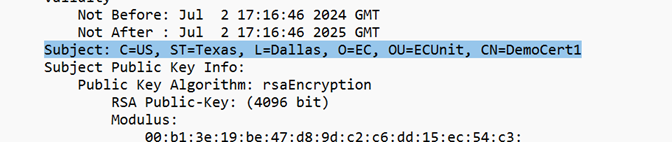
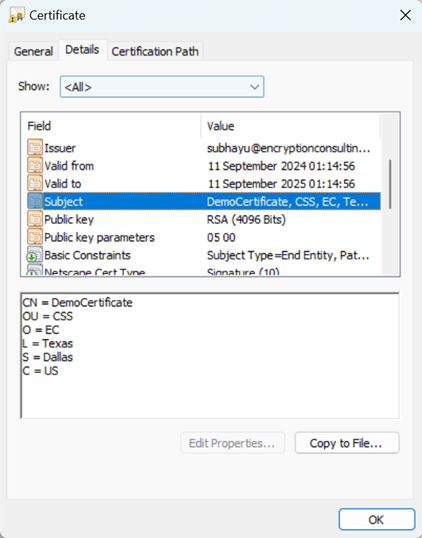
If you can see the content in .pem format, you can open the
certificate in .crt format, open details section and look at
the subject field.
The final AppxManifest.xml file line should look similar to
the signing certificate.
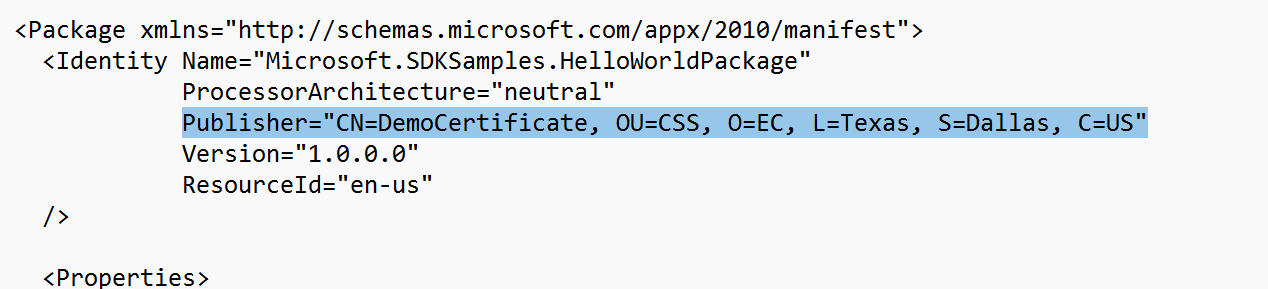
The subject line may be in reverse order depending on your
settings and certificate. To check, see if the Publisher
line in AppxManifest.xml file begins with CN as the first
entry. If it does not, make sure the order is switched such
that it does.
Check that the Publisher line in the AppxManifest.xml file
contains S instead of ST, if you see ST as a field, replace
it with S.
-
Replace the PublisherDisplayName line with your
organization's name if it is currently incorrect.

-
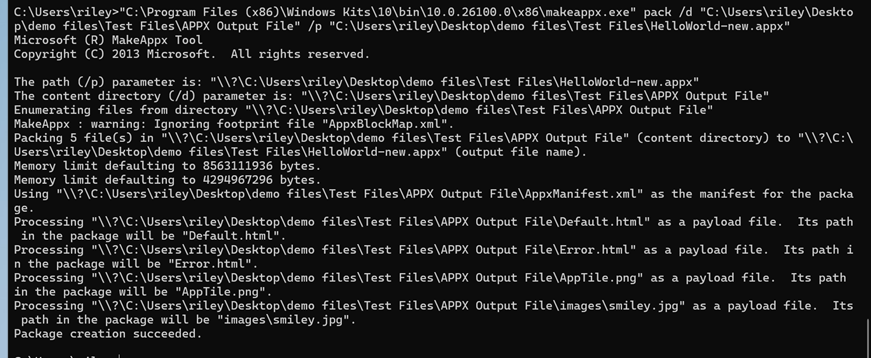
Repack the file using the following command:
"C:\Program Files (x86)\Windows Kits\10\bin\<build
number>\<architecture>\makeappx.exe" pack /d
“<target directory>” /p “<target location with
package name and extension(.appx)>”
-
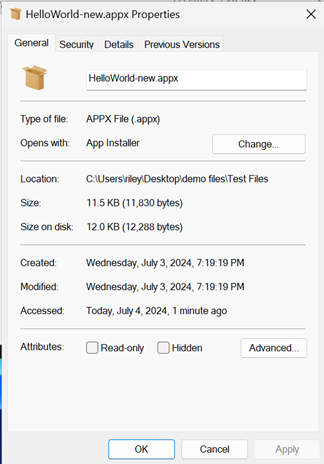
View the file properties, and confirm “read only” is NOT
checked or the signing will fail.
-
Proceed with Windows signing using the .crt certificate you
used to modify the manifest and the following signtool
command:
signtool sign /csp "Encryption Consulting Key Storage
Provider" /kc <key name of private key associated with
the certificate> /fd <the desired signing algorithm
to be used when signing> /f <The location of the
certificate to be used for signing>.crt /tr <The URL
of the time stamping server to be used> /td <The
signing algorithm to be used with the time stamping
server> <The path to the new .appx file>
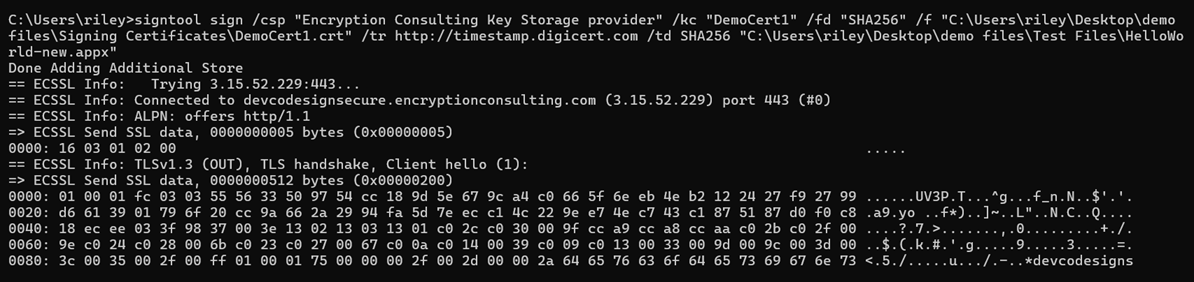
An example command is as below:
signtool sign /csp "Encryption Consulting Key Storage
provider" /kc "DemoCert1" /fd "SHA256" /f
"C:\Users\riley\Desktop\demo files\Signing
Certificates\DemoCert1.crt" /tr
http://timestamp.digicert.com /td SHA256
"C:\Users\riley\Desktop\demo files\Test
Files\HelloWorld-new.appx"
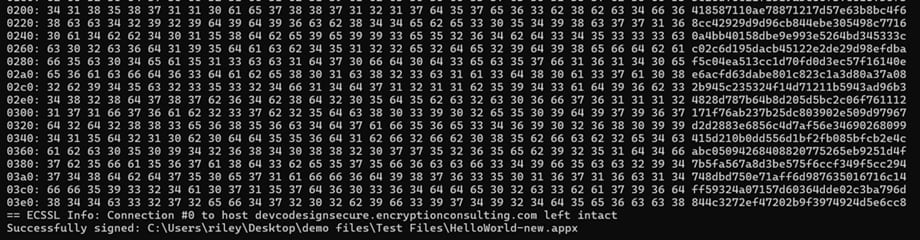
A successful signing will show an output as below:
-
To verify the signed package, run:
signtool verify /pa "<The path to the signed .appx file>"
NOTE: If installing the signed package fails, the most
common cause is a mismatch between the signing certificate's Subject and the Publisher line in
the package manifest — they must match exactly.
