CodeSign Secure Documentation
  • Overview
    • About CodeSign Secure
    • Getting Started
    • Documentation Guide
    • Portal Overview
    • Troubleshooting
      • FAQ
    • Glossary
  • Reference Guide
    • Header Bar
      • CodeSign Secure Documentation
      • Swagger API
      • Profile Section
    • Dashboard
      • Key Performance Indicators
      • Issued Certificates
      • Signatures Generated
      • HSM Health Check
    • Keys and Certificates
      • Key and Certificate Lifecycle
    • App Management
    • Signing Requests
      • Approval Workflows
    • Signing Tools
    • Reports
      • Signing Request Report
      • Audit Trail
      • Certificate Report
      • Client Report
    • Logs
    • System Setup
      • Identity Store
      • Backup
      • User
      • Roles and Permissions
      • Email
      • Signing Projects
      • SSL/TLS Management
      • Environment
      • Plugins
  • Setup & Architecture
    • Identity and Access Control
    • Architecture and Concepts
    • Installation
      • Windows
        • Installing the Server
        • Ports and Protocols
        • High Availability and Backup
        • Upgrades and Compatibility
    • Security
      • Security Hardening Checklist
      • Client Authentication
      • Designing Signing Policies
  • Release Notes
    • Releases for 2026
      • v3.2.1
    • Releases for 2025
      • v3.2.0
    • Releases for 2024
      • v3.1.0
  • API Reference
    • Getting Started
    • Authorizing Requests
    • Securing API Access
    • Request and Response Conventions
    • Endpoint Reference
      • Signing
      • Signing Requests
      • Certificates
      • Applications and Environments
      • User Management
      • Permissions
      • Email
      • System Setup
      • Reports
      • Dashboard
      • License
  • Integration Guides
    • Signing Capabilities
      • Supported Formats and Platforms
      • Timestamping
      • Windows Signing - SignTool
        • Signing
        • Macro Signing
      • Apple Signing
      • AppX & MSIX Signing
      • Visual Studio ClickOnce
      • Jar Signing
      • Sign HLK/HCK using CodeSign Secure
      • NuGet Signing
      • Mage Signing
      • Sign OVA/OVF using Encryption Consulting’s Utility Tool
      • Utility Tool for code signing
      • Container Signing
      • PKCS11 Wrapper
        • APK Signing
        • OpenSSL Signing
        • XML Signing
        • JSign Tool Signing
        • Jarsigner Signing
        • GPG2, Debian & RPM Signing
      • Reproducible Build
        • Automated Hash Validation
        • Reproducible Build Process Flow
        • Pipeline Script Components
        • Hash Validation
    • CI/CD Integration
      • GitHub Actions
      • Jenkins
      • GitLab
      • Azure DevOps
      • TeamCity
      • Bamboo
      • Securing CI/CD Credentials

Visual Studio ClickOnce Signing

Sign ClickOnce manifests with Visual Studio

  1. Install and Configure the tool (SigningKSP)
  2. From the command prompt reach to the directory where ECGetCert.exe is located.
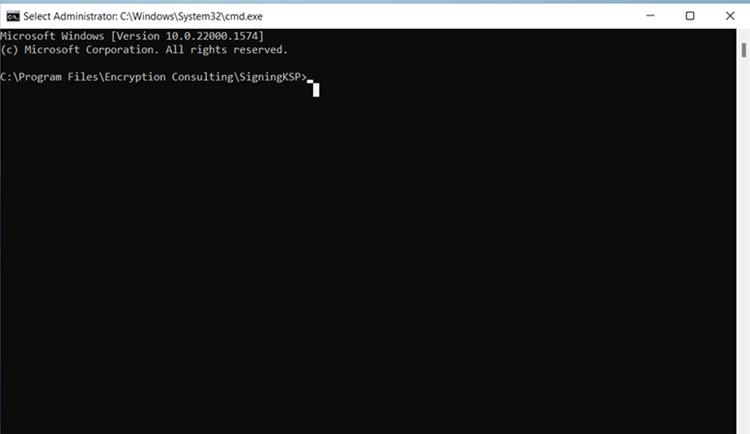
    SigningKSP

  3. Run the command: ECGetCert.exe evcodesigning

    Here, evcodesigning is the certificate name which we are using for codesigning purpose

    This command will save evcodesigning.pem (certificatename.pem) file in the same directory.
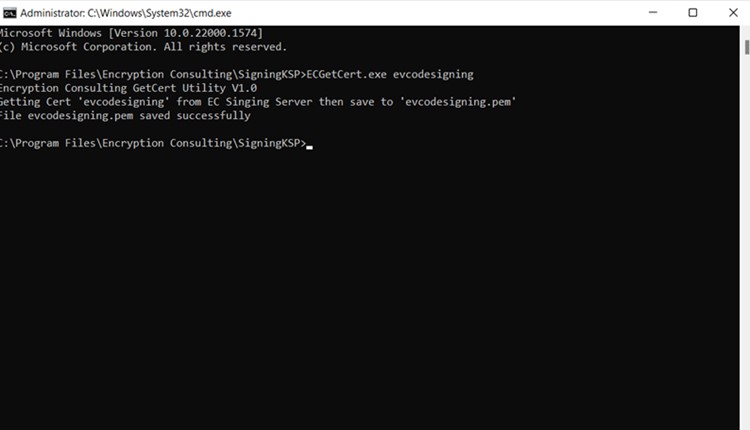
    certificatename.pem

  4. Open certmgr.msc and navigate to Personal -> certificates. If there is no certificate folder, just right click on personal -> All Tasks -> Import
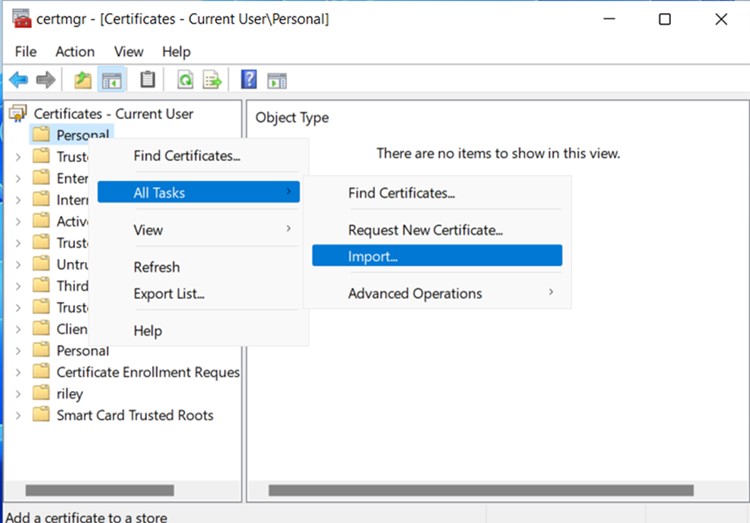
    signing certificates

  5. A Certificate import wizard Opens. Click on next, the store location here is by default current user.
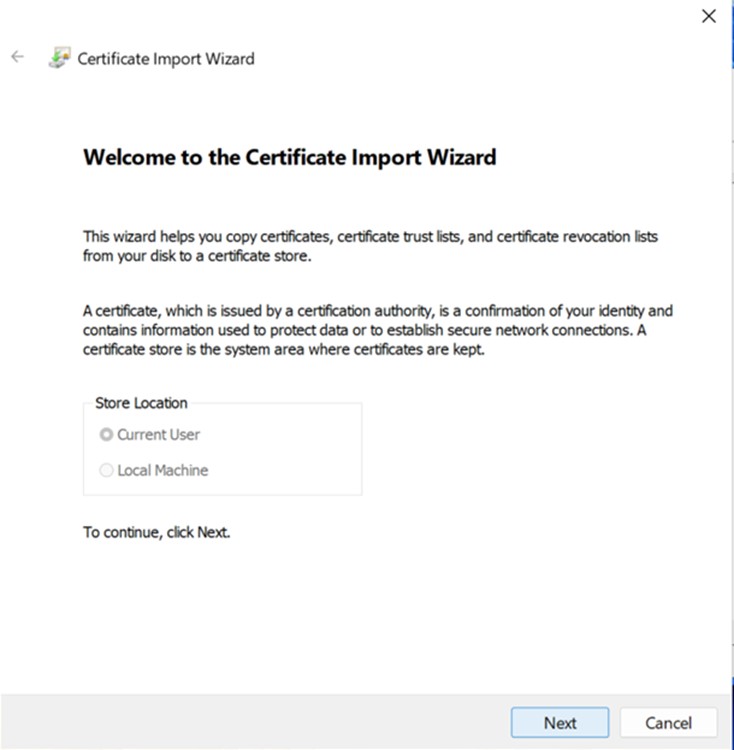
    import certificate

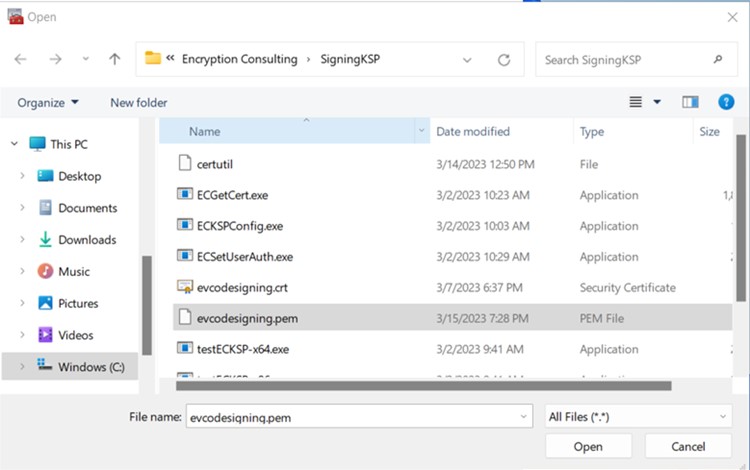
  6. In the next page browse for the certificate. It should be saved in the same directory where ECGetCert.exe is located. From there select evcodesigning.pem (certificatename.pem). If you’re unable to see the file select all files at the bottom, instead of X.509 certificate. Once the certificate is selected click next.
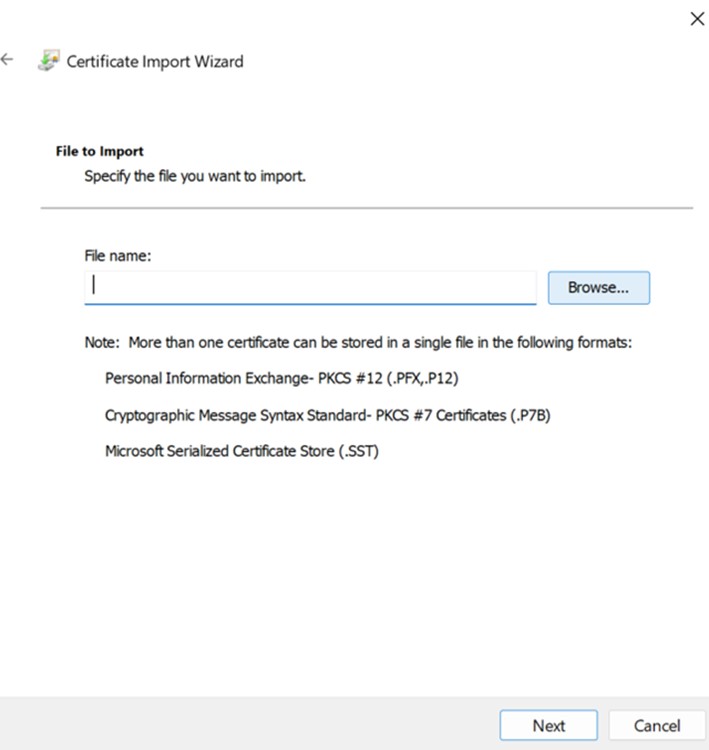
    ECGetCert

    Signing PEM file

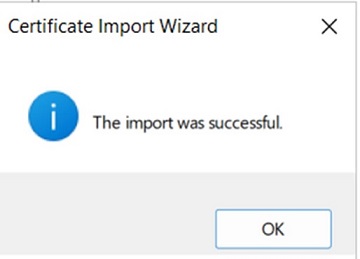
  7. In the other page, ensure "Place all certificates in the following store" is selected and under that, Certificate store is set to Personal. Click on next and then Click on Finish. You'll see a dialogue box saying the import was successful.
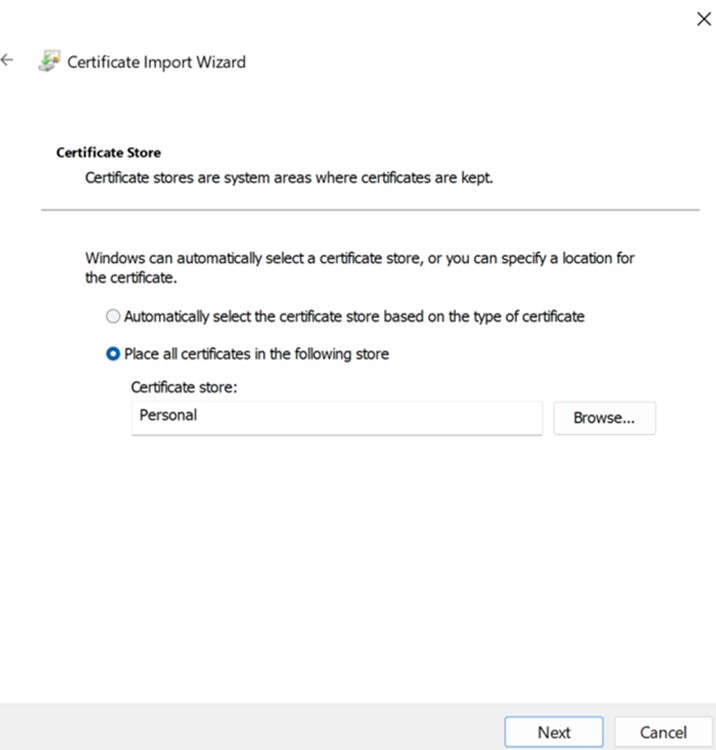
    certificates stores

    certificate import wizard

  8. Once the certificate import is done, you need thumbprint value of your certificate. Click on Personal -> Certificates -> and then the imported certificate. Navigate to “Details” and scroll down to thumbprint. You can copy the value.
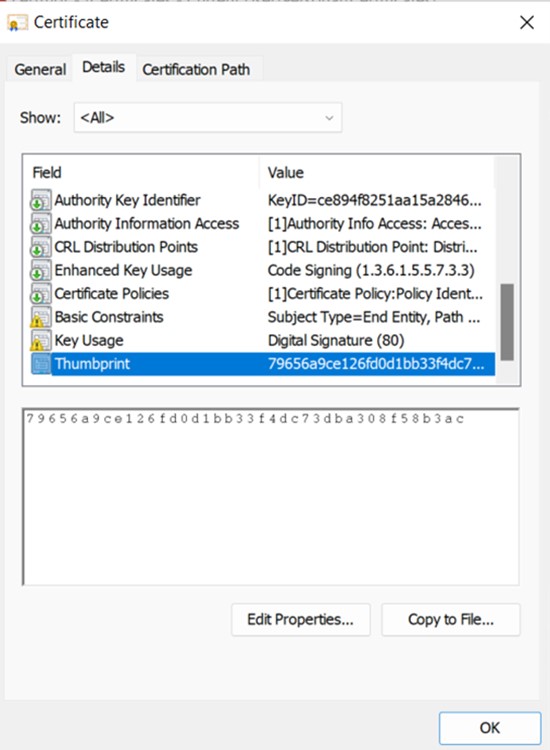
    certificate import

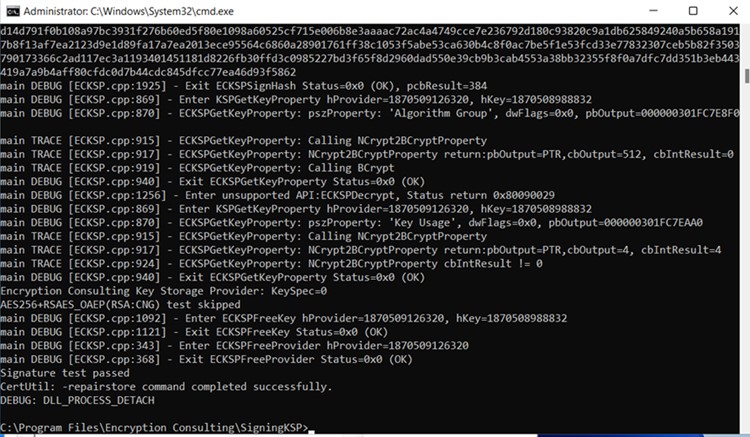
    Return to command prompt. Run the following command. Ensure that you place the Thumbprint of your certificate in your command.

    certutil -f -repairstore -csp "Encryption Consulting Key Storage Provider" -user "My" 79656a9ce126fd0d1bb33f4dc73dba308f58b3ac
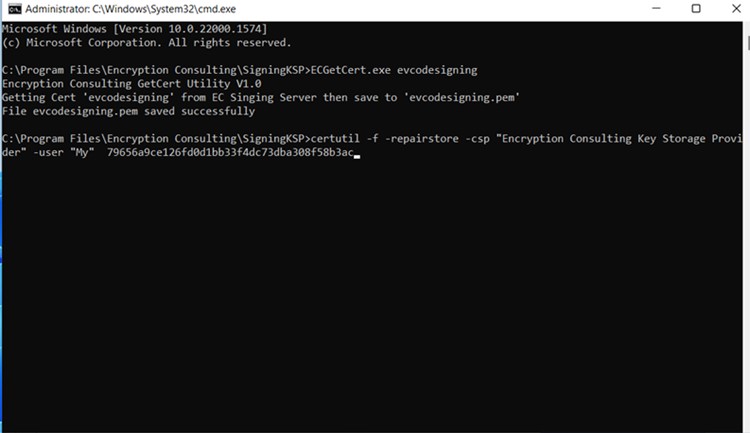
    get Cert

    Signing Hash

  9. Once the command runs, navigate to the project in Visual Studio, that you want to publish with ClickOnce.
  10. In the Solution Explorer, Right Click on your project and navigate to Publish. Click on it.
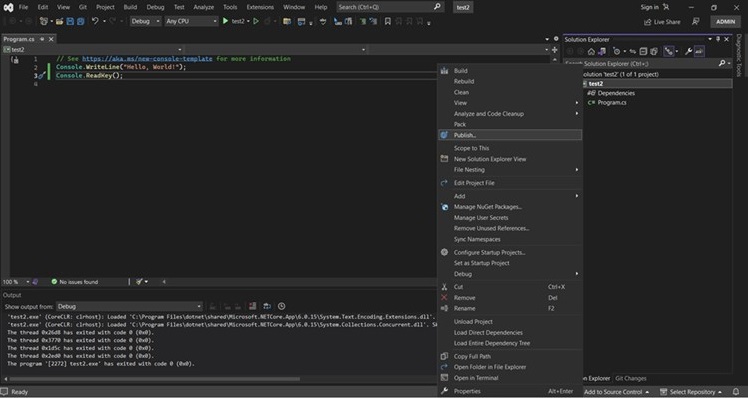
    Solution Explorer

  11. A new window opens. Select ClickOnce and click on Next.
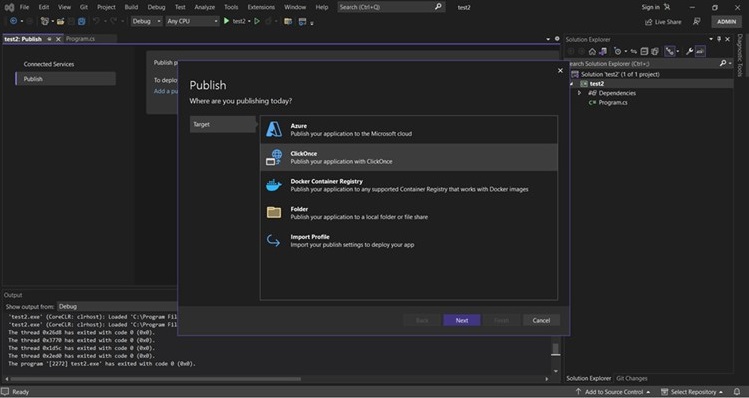
    Publish Modal

  12. In the next page, you can choose a publish location or leave the default bin\publish and click on Next.
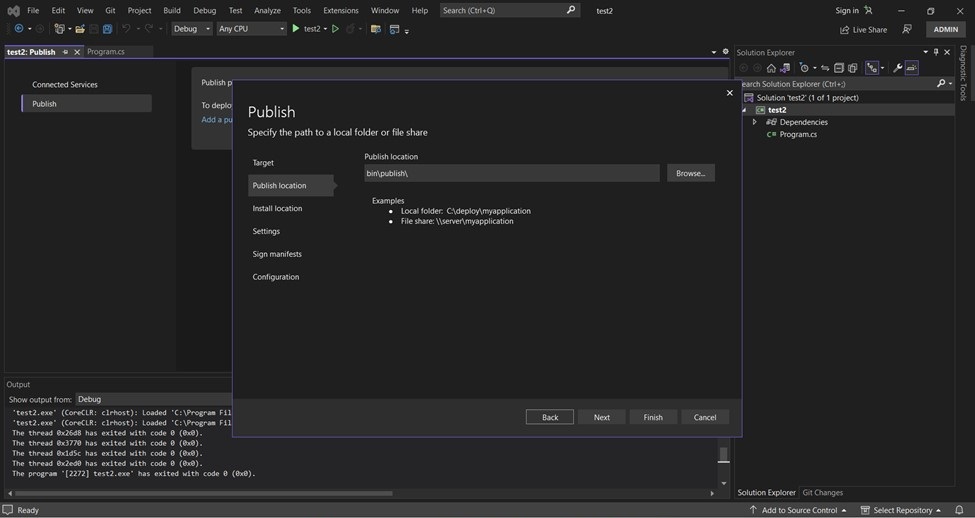
    Publish Location

  13. You can choose the Install Location as per your choice or leave the default. Click on Next.
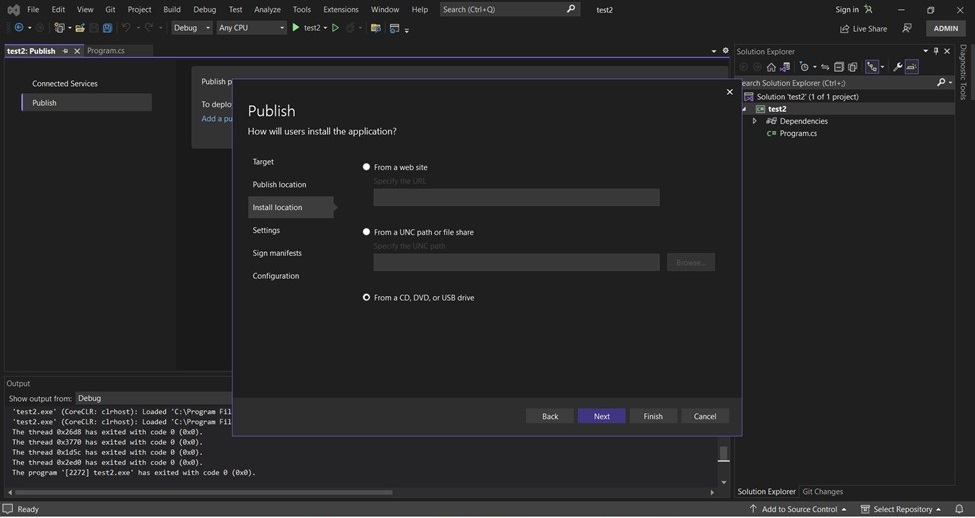
    Install Location

  14. You can select your settings in the next tab as you like and Click Next.
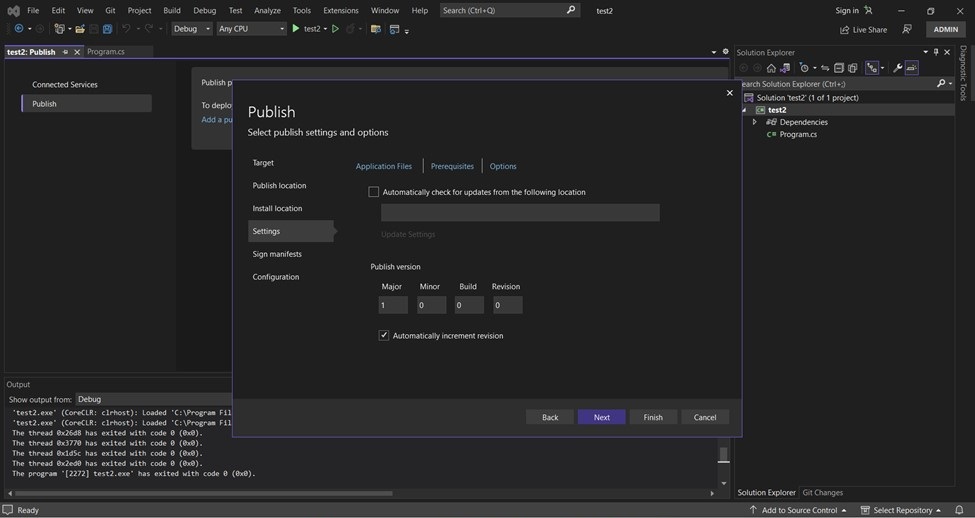
    IPublish Settings

  15. In Sign manifests, check the box “Sign the ClickOnce manifests” and click on select certificate from store.
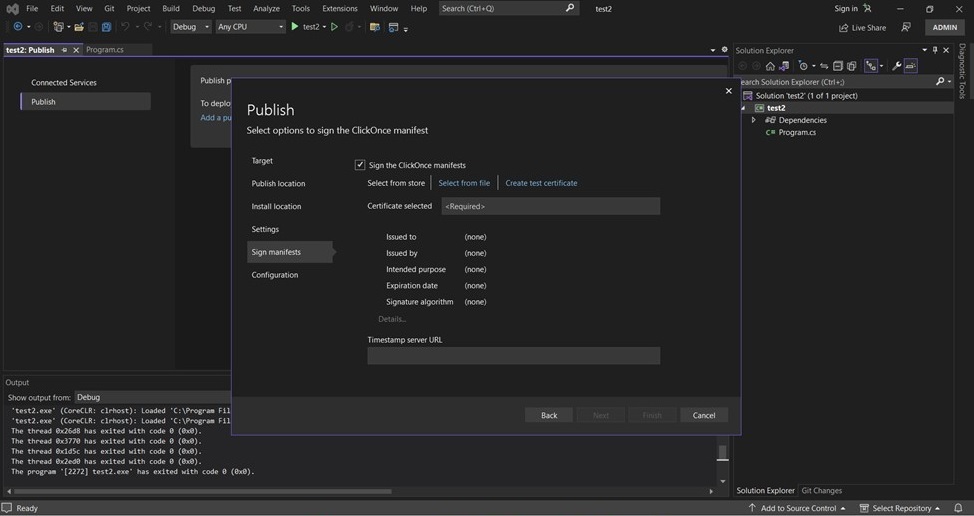
    Sign Manifest

    A dialogue box opens with certificate, which was initially imported. Click OK to proceed.
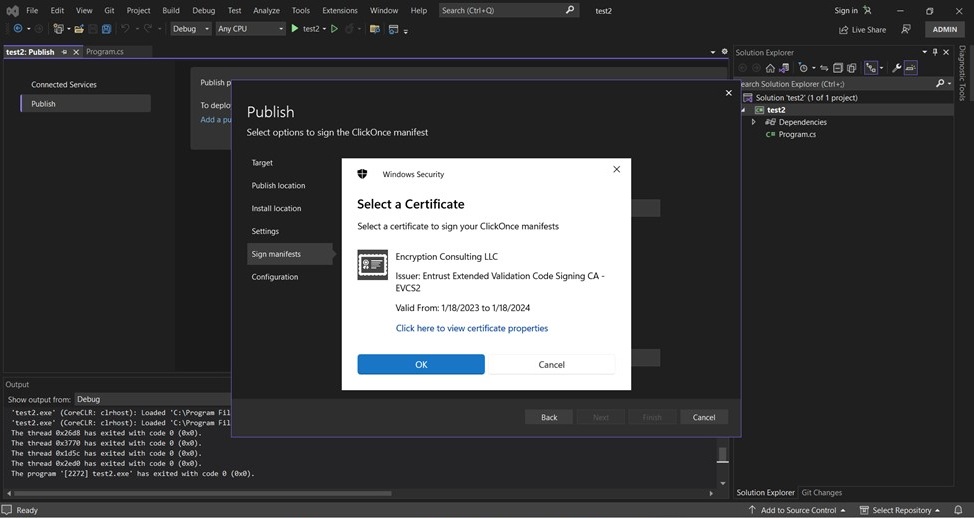
    Select Certificate

    You can now see the certificate details in Sign manifests.
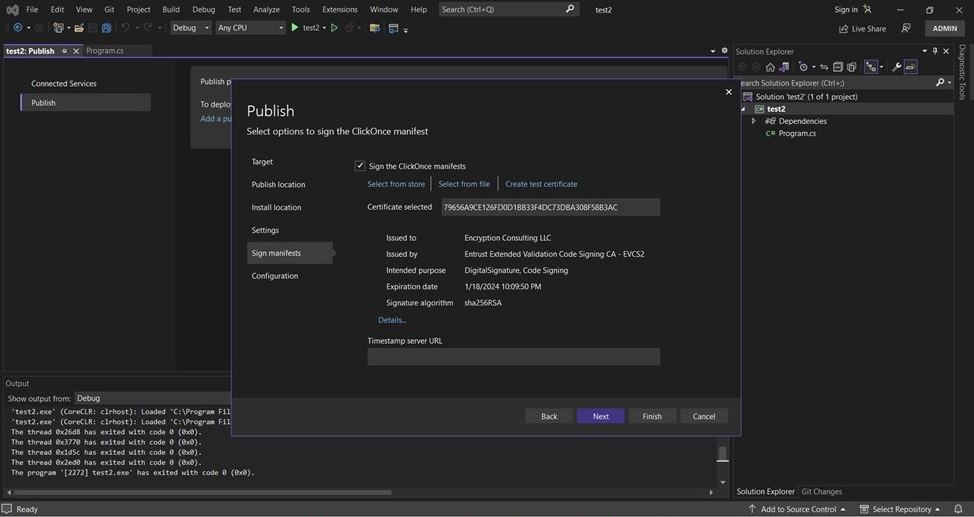
    Certificate Selected

  16. Click on next to choose your configuration and click on Finish.
  17. You’ll see Publish profile creation progress and a green tick when successful
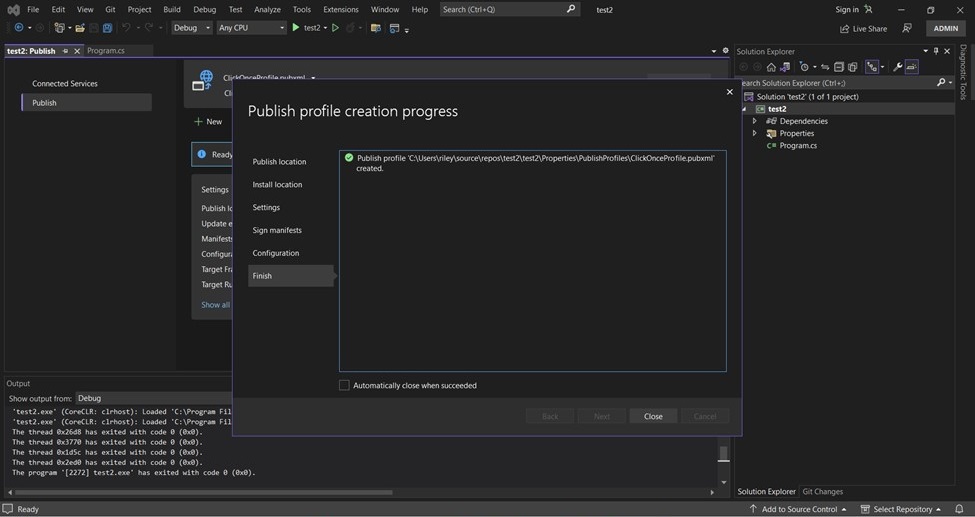
    Publish Profile Progress

  18. You can see the Publish Profile created.
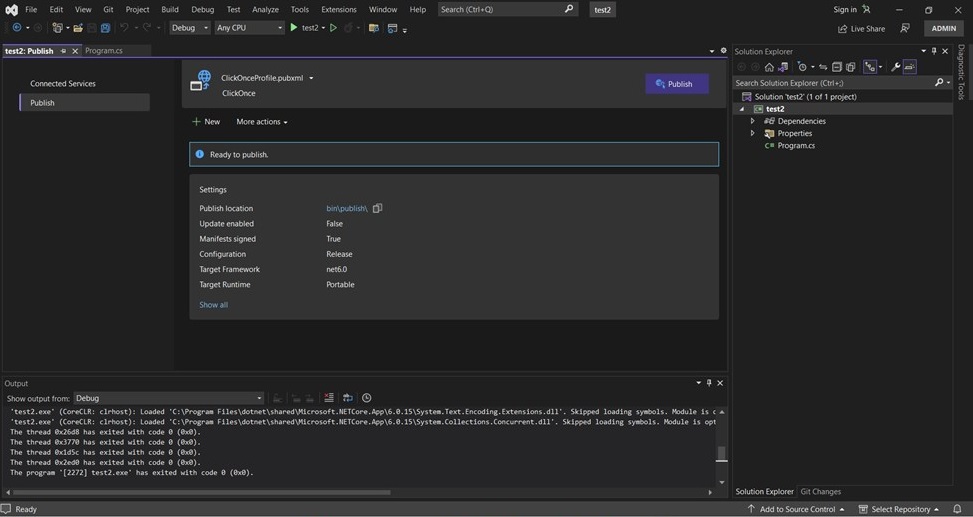
    Publish Created

    We have successfully signed ClickOnce manifests with Visual Studio.

On this Page:
Support Privacy Policy Terms of Service

Copyright Encryption Consulting LLC. All rights reserved.