CodeSign Secure Documentation
  • Overview
    • About CodeSign Secure
    • Getting Started
    • Documentation Guide
    • Portal Overview
    • Troubleshooting
      • FAQ
    • Glossary
  • Reference Guide
    • Header Bar
      • CodeSign Secure Documentation
      • Swagger API
      • Profile Section
    • Dashboard
      • Key Performance Indicators
      • Issued Certificates
      • Signatures Generated
      • HSM Health Check
    • Keys and Certificates
      • Key and Certificate Lifecycle
    • App Management
    • Signing Requests
      • Approval Workflows
    • Signing Tools
    • Reports
      • Signing Request Report
      • Audit Trail
      • Certificate Report
      • Client Report
    • Logs
    • System Setup
      • Identity Store
      • Backup
      • User
      • Roles and Permissions
      • Email
      • Signing Projects
      • SSL/TLS Management
      • Environment
      • Plugins
  • Setup & Architecture
    • Identity and Access Control
    • Architecture and Concepts
    • Installation
      • Windows
        • Installing the Server
        • Ports and Protocols
        • High Availability and Backup
        • Upgrades and Compatibility
    • Security
      • Security Hardening Checklist
      • Client Authentication
      • Designing Signing Policies
  • Release Notes
    • Releases for 2026
      • v3.2.1
    • Releases for 2025
      • v3.2.0
    • Releases for 2024
      • v3.1.0
  • API Reference
    • Getting Started
    • Authorizing Requests
    • Securing API Access
    • Request and Response Conventions
    • Endpoint Reference
      • Signing
      • Signing Requests
      • Certificates
      • Applications and Environments
      • User Management
      • Permissions
      • Email
      • System Setup
      • Reports
      • Dashboard
      • License
  • Integration Guides
    • Signing Capabilities
      • Supported Formats and Platforms
      • Timestamping
      • Windows Signing - SignTool
        • Signing
        • Macro Signing
      • Apple Signing
      • AppX & MSIX Signing
      • Visual Studio ClickOnce
      • Jar Signing
      • Sign HLK/HCK using CodeSign Secure
      • NuGet Signing
      • Mage Signing
      • Sign OVA/OVF using Encryption Consulting’s Utility Tool
      • Utility Tool for code signing
      • Container Signing
      • PKCS11 Wrapper
        • APK Signing
        • OpenSSL Signing
        • XML Signing
        • JSign Tool Signing
        • Jarsigner Signing
        • GPG2, Debian & RPM Signing
      • Reproducible Build
        • Automated Hash Validation
        • Reproducible Build Process Flow
        • Pipeline Script Components
        • Hash Validation
    • CI/CD Integration
      • GitHub Actions
      • Jenkins
      • GitLab
      • Azure DevOps
      • TeamCity
      • Bamboo
      • Securing CI/CD Credentials

Jenkins

To perform codesigning using Jenkins the following steps are necessary:

Prerequisites:
  1. Jenkins must be setup and configured on your device.
  2. Signtool must be installed and configured.
  3. The ECSigning KSP must be installed and configured.

To install and configure Signtool and the ECSigning KSP, please follow the steps mentioned here.

To Setup and Configure Jenkins go through the link

Once Jenkins is setup, we will require administrative privilege to run the command for signtool. To set up administrative privilege for Jenkins using these steps:

  • Go to services on your system (You can just search for it)
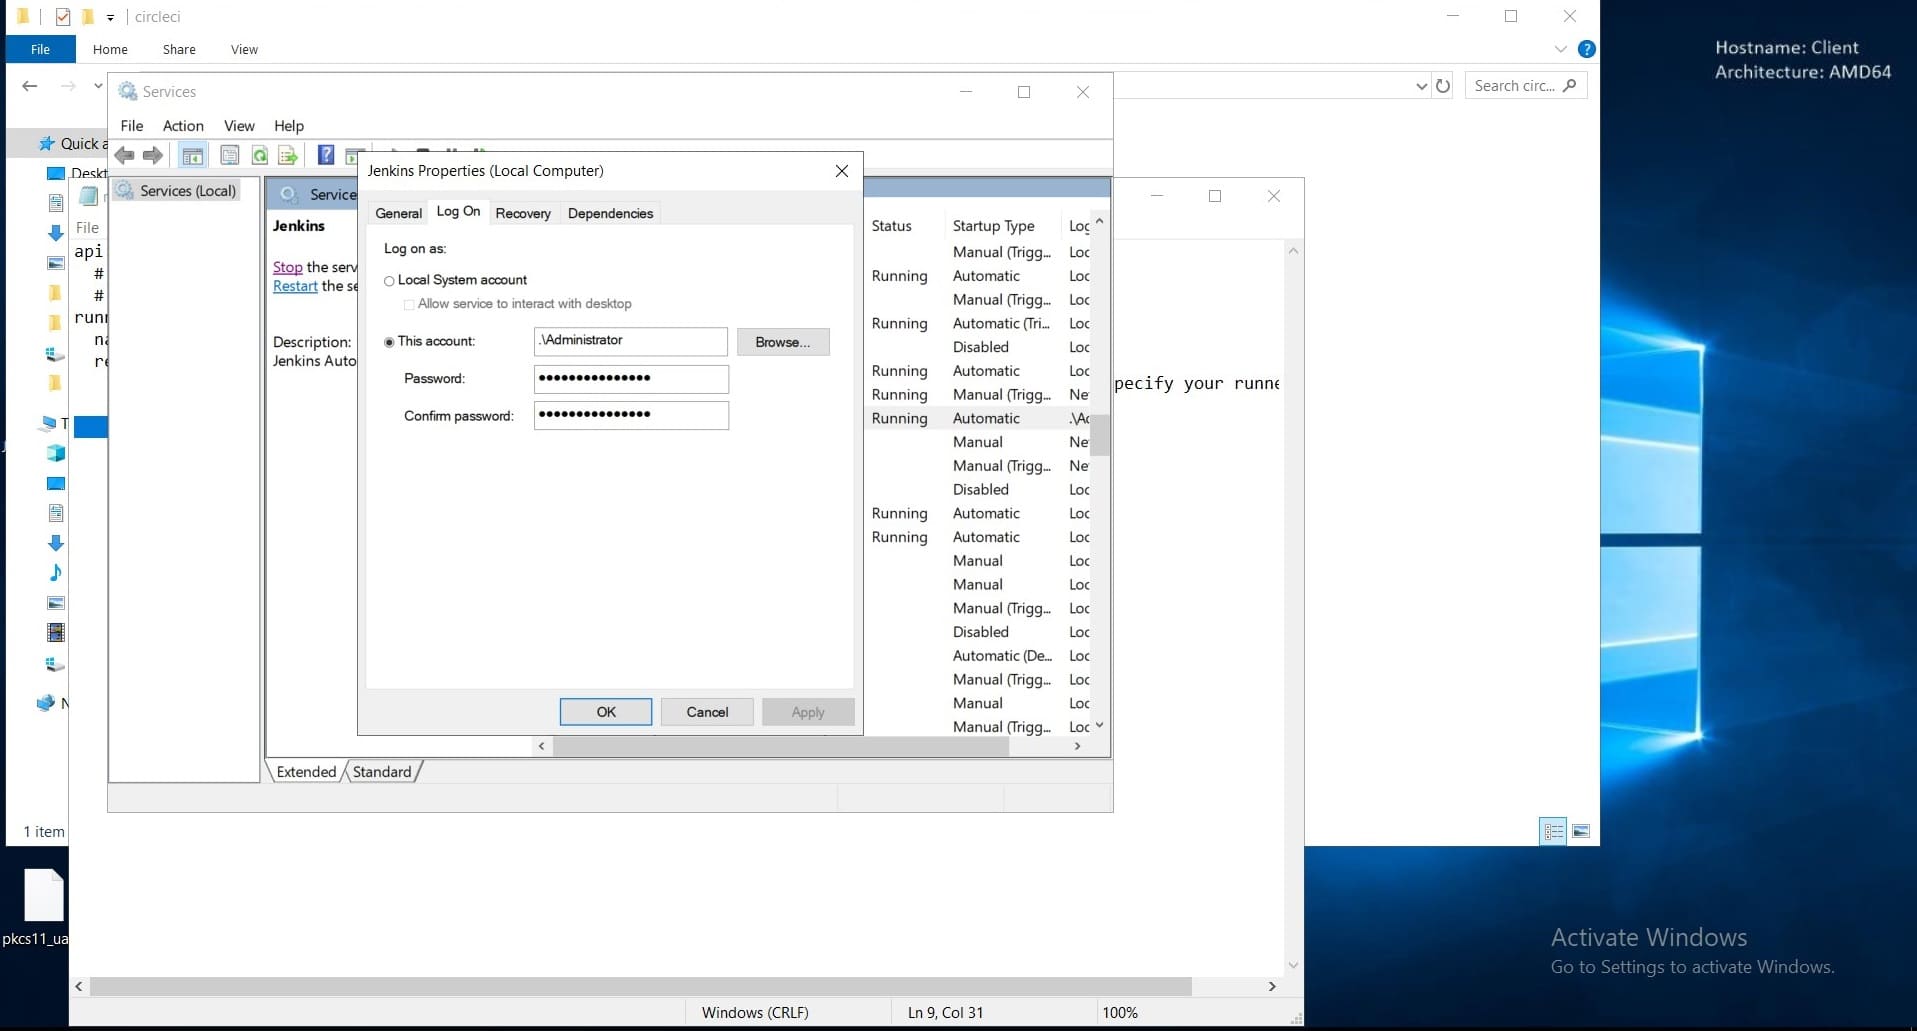
  • Scroll down to Jenkins. There in the “Log on As” column you can see the user account set up for Jenkins. If it’s set to anything (Local Service/System, Network Service/System) other than “.\Administrator”, then we have to set it for Administrator.
  • Double Click on Jenkins or Right Click > Properties to open Properties. Go to Log On. Select “This Account”

    Set it as “.\Administrator”. Give a password, preferably admininstrator password. Click on Apply once done.

    Jenkins Properties Modal

Once we have set this we’ll now head to Jenkins. Whichever URL/hostname you specified earlier while setting up, navigating to that from your browser will lead you to Jenkins. In my system I have set it up as http://localhost:8080/ (It is also default).

In you Dashboard follow the steps below:

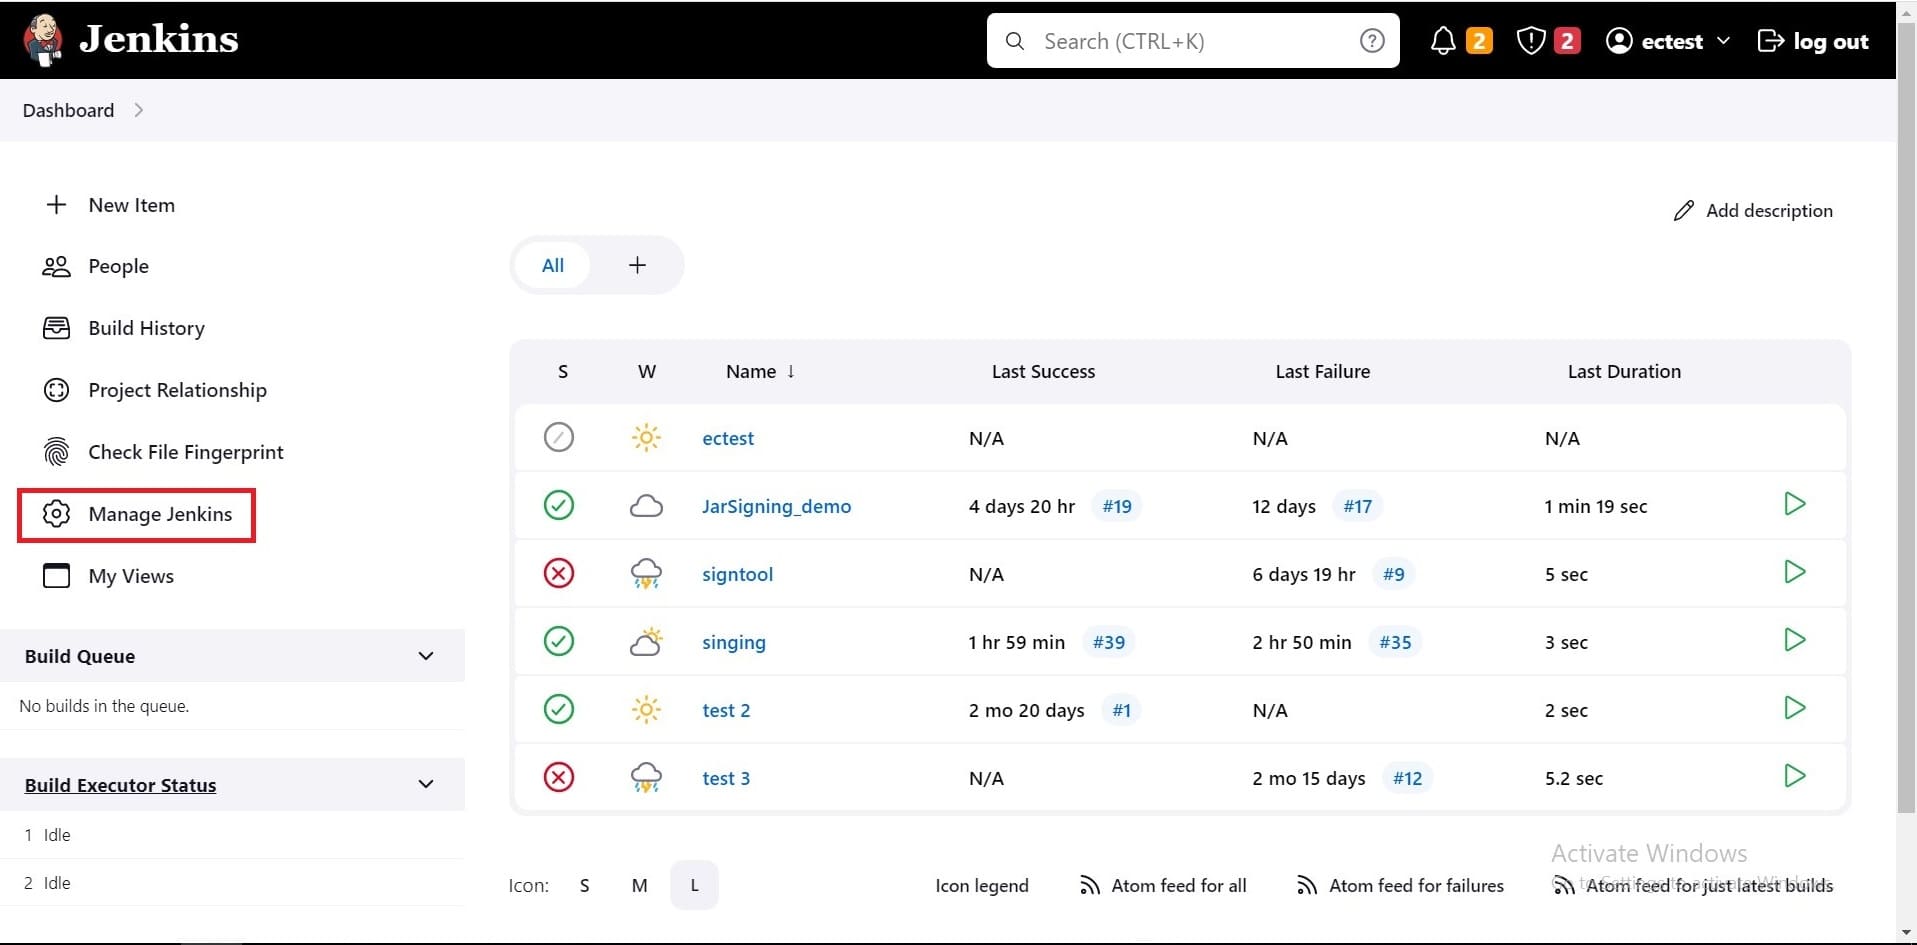
  • Click on Manage Jenkins (NOTE: Manage Jenkins doesn’t come up unless you have a job created)

    Jenkins Manage

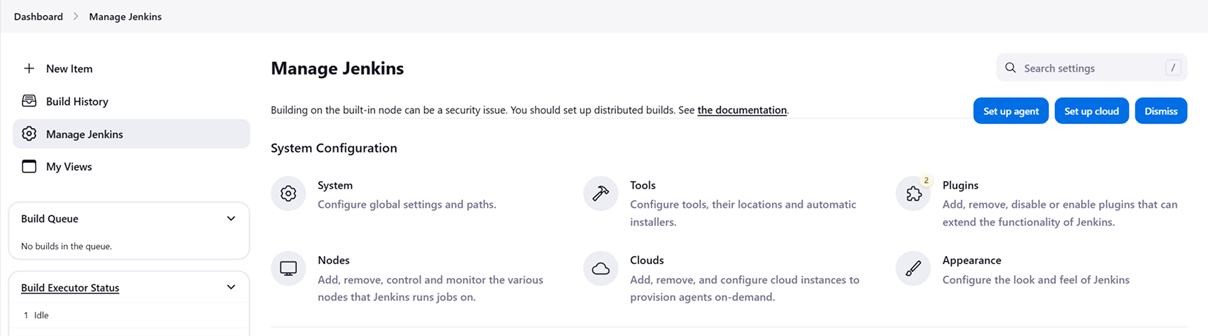
  • Scroll down to Plugins, Under System Configuration

    Jenkins Manage Plugin

  • In Manage Plugins, in “Available Plugins” section, search for powershell plugin. It won’t show in search result in this section if it has already been installed. You can see under “Installed Plugins” to see the plugins you have installed.

    Click the Checkbox of the plugin (if not already installed), and click on Install without restart. You can refresh the page once installed.

  • After doing so go to Global Tool Configuration. Dasboard > Manage Jenkins > Under System Configuration (as shown in the picture above) – Global Tool Configuration
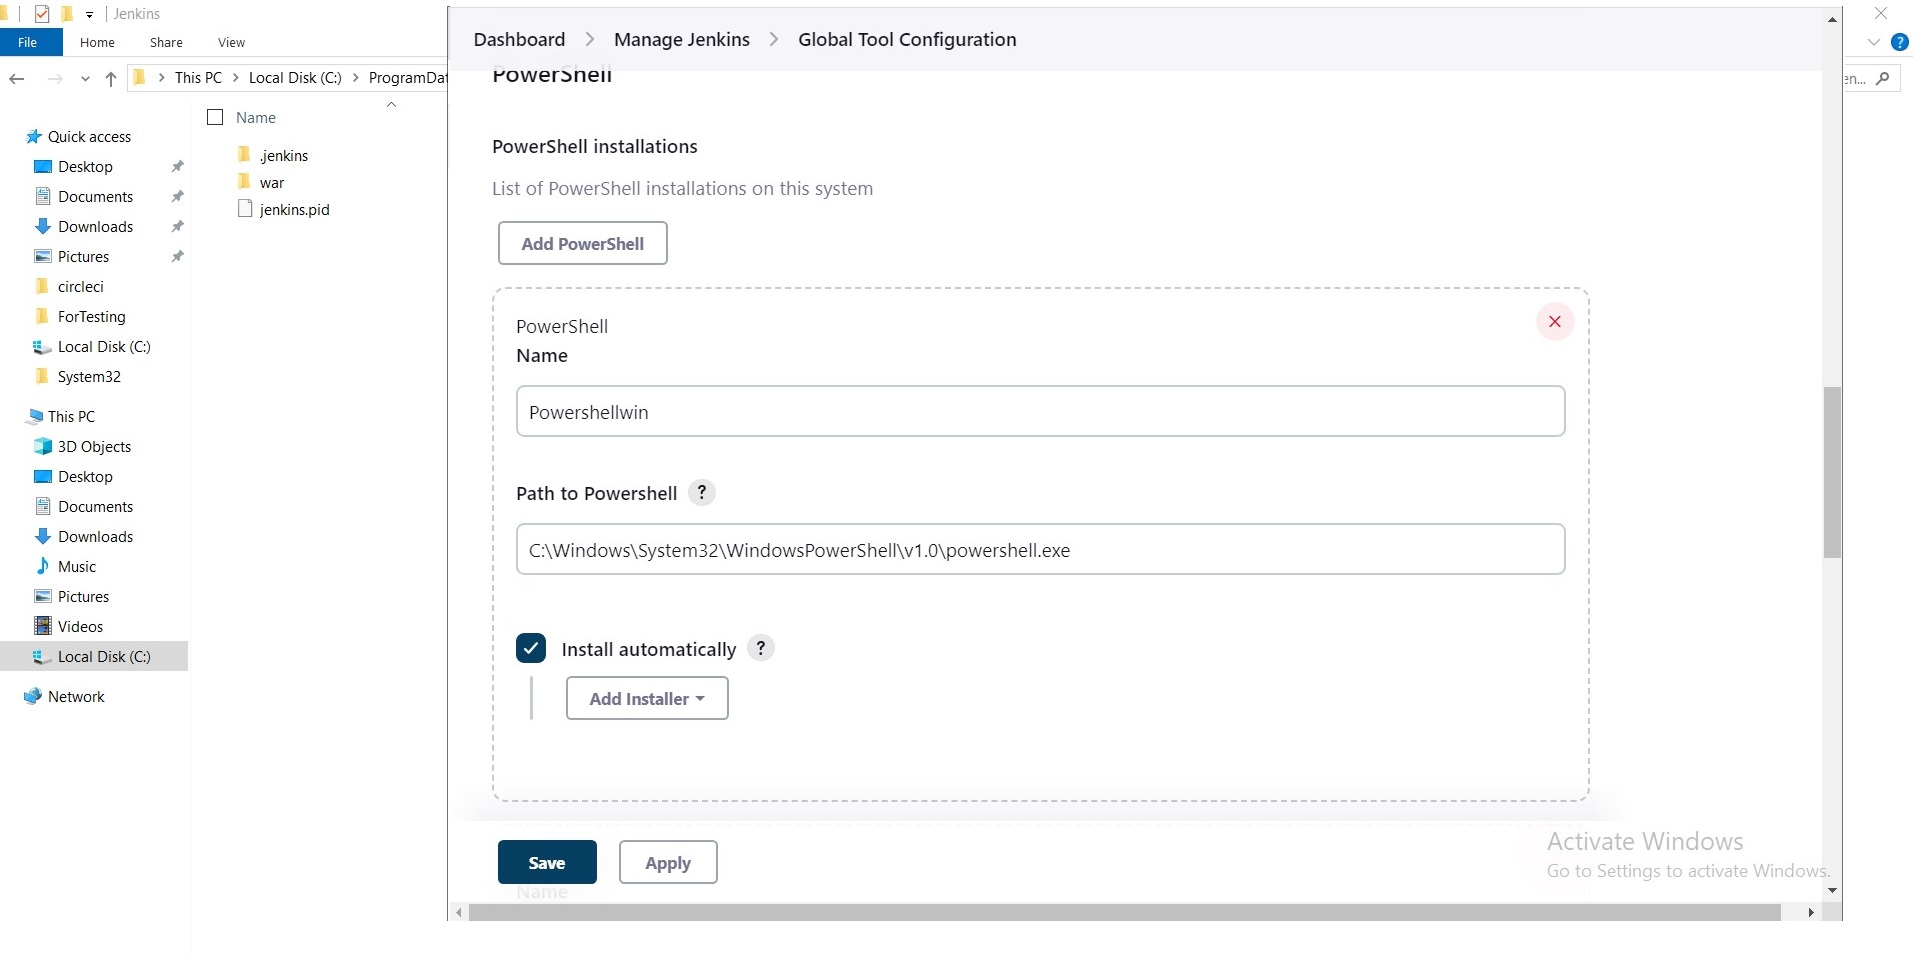
  • Scroll down to Powershell. Click on Add Powershell. You’ll see configuration window like the picture below. Name you powershell. Provide the path (where it is located in your machine) to your powershell. The default path is

    C:\Windows\System32\WindowsPowerShell\v1.0\powershell.exe

    Click on Apply and Save.

    Jenkins Global Tool Config

After we’ve configured PowerShell, we’ll move on to creating the pipeline job.

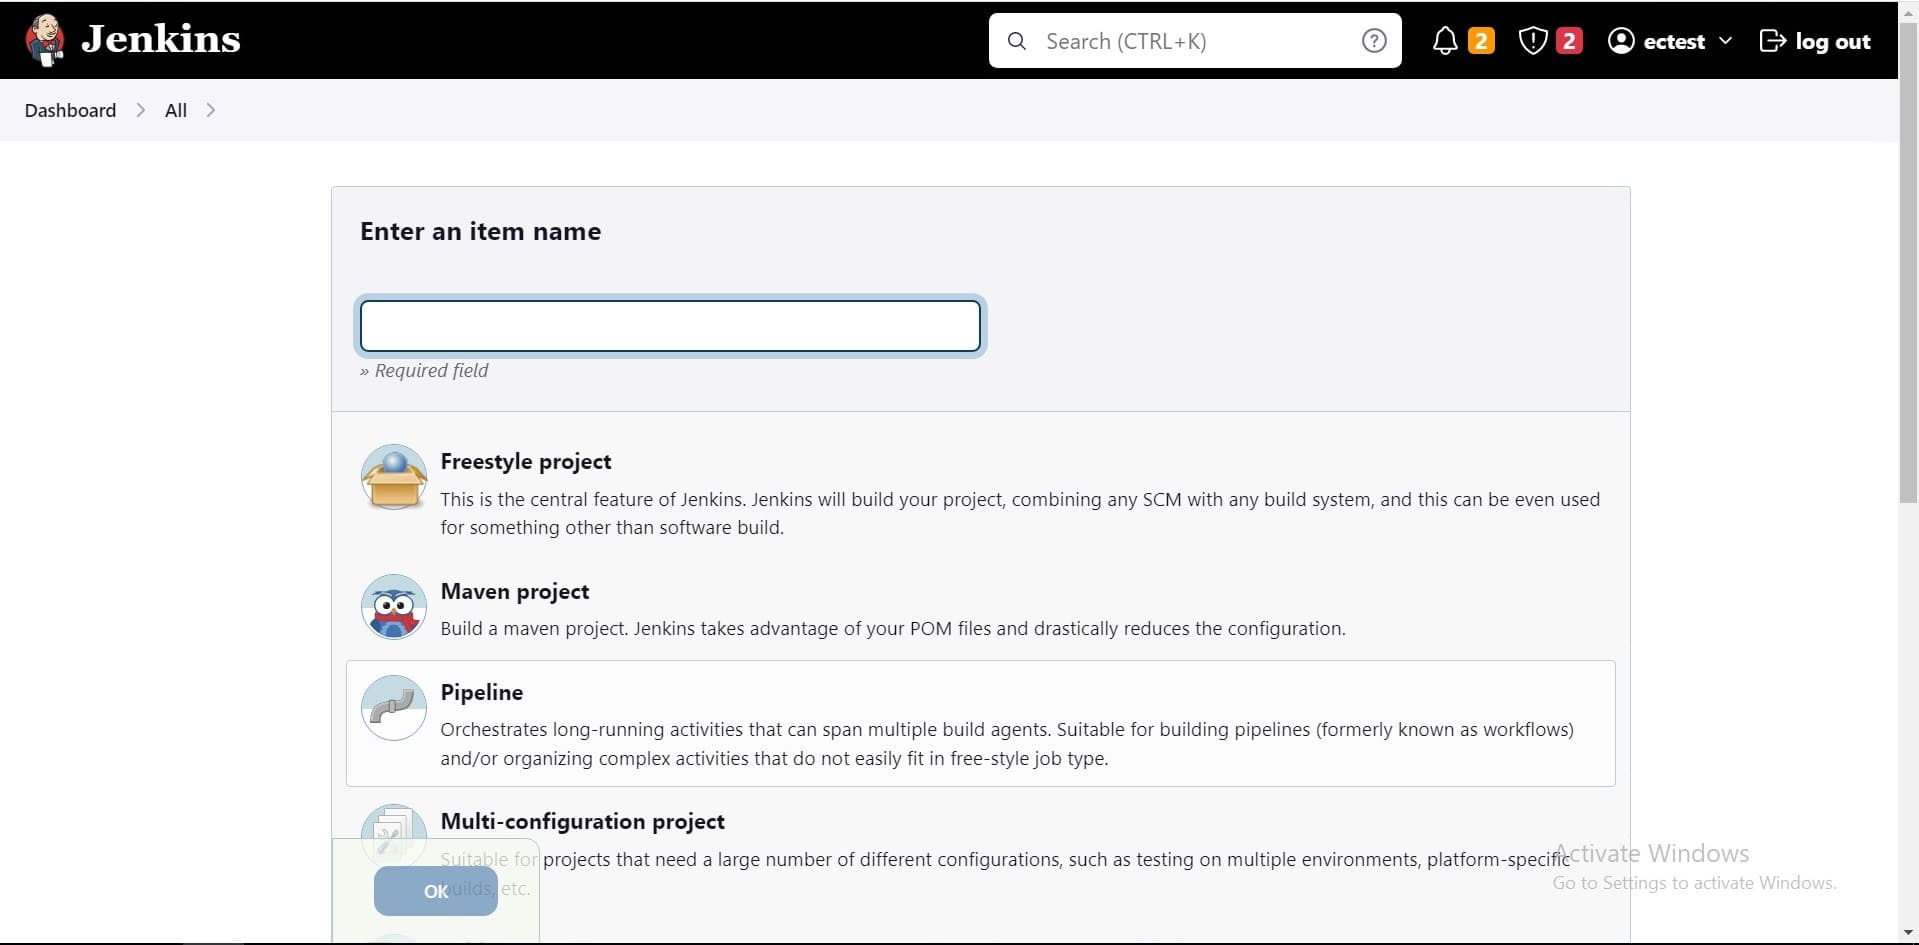
  • From Dashboard click on New Item
  • Enter any item name and click on pipeline and click ok.

    Jenkins New Item

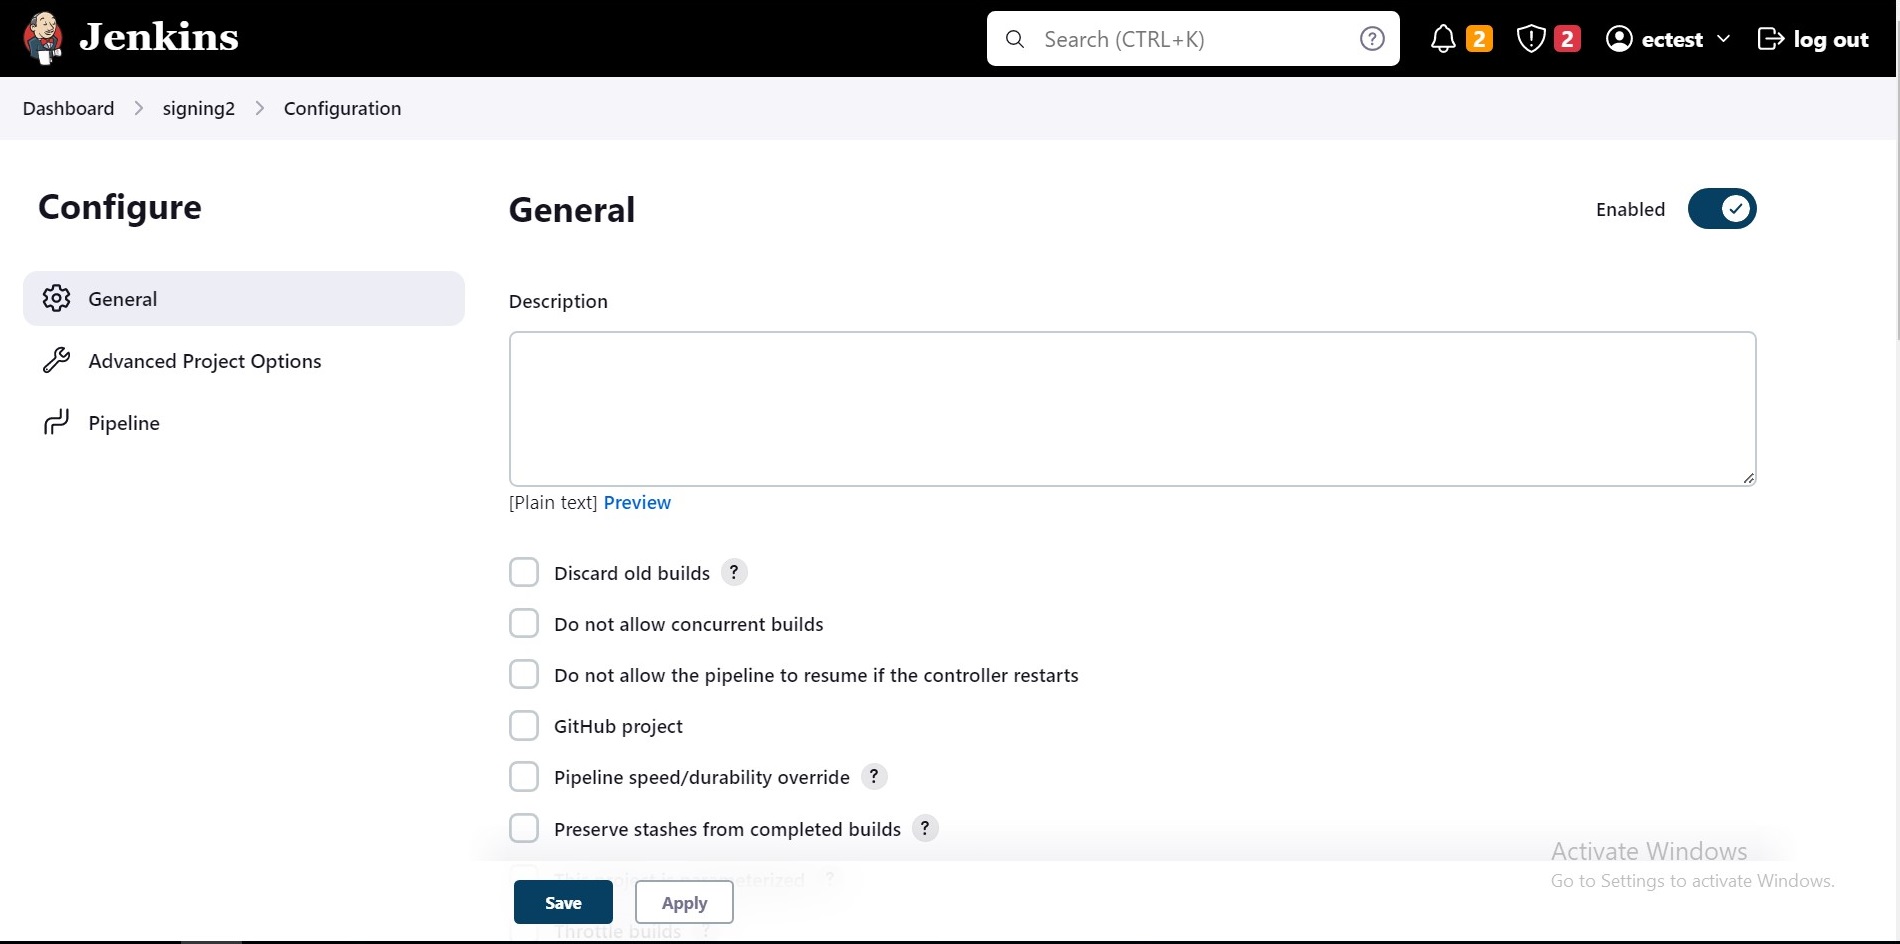
  • In configuration page, under General put up a description as your wish

    Jenkins General Configure

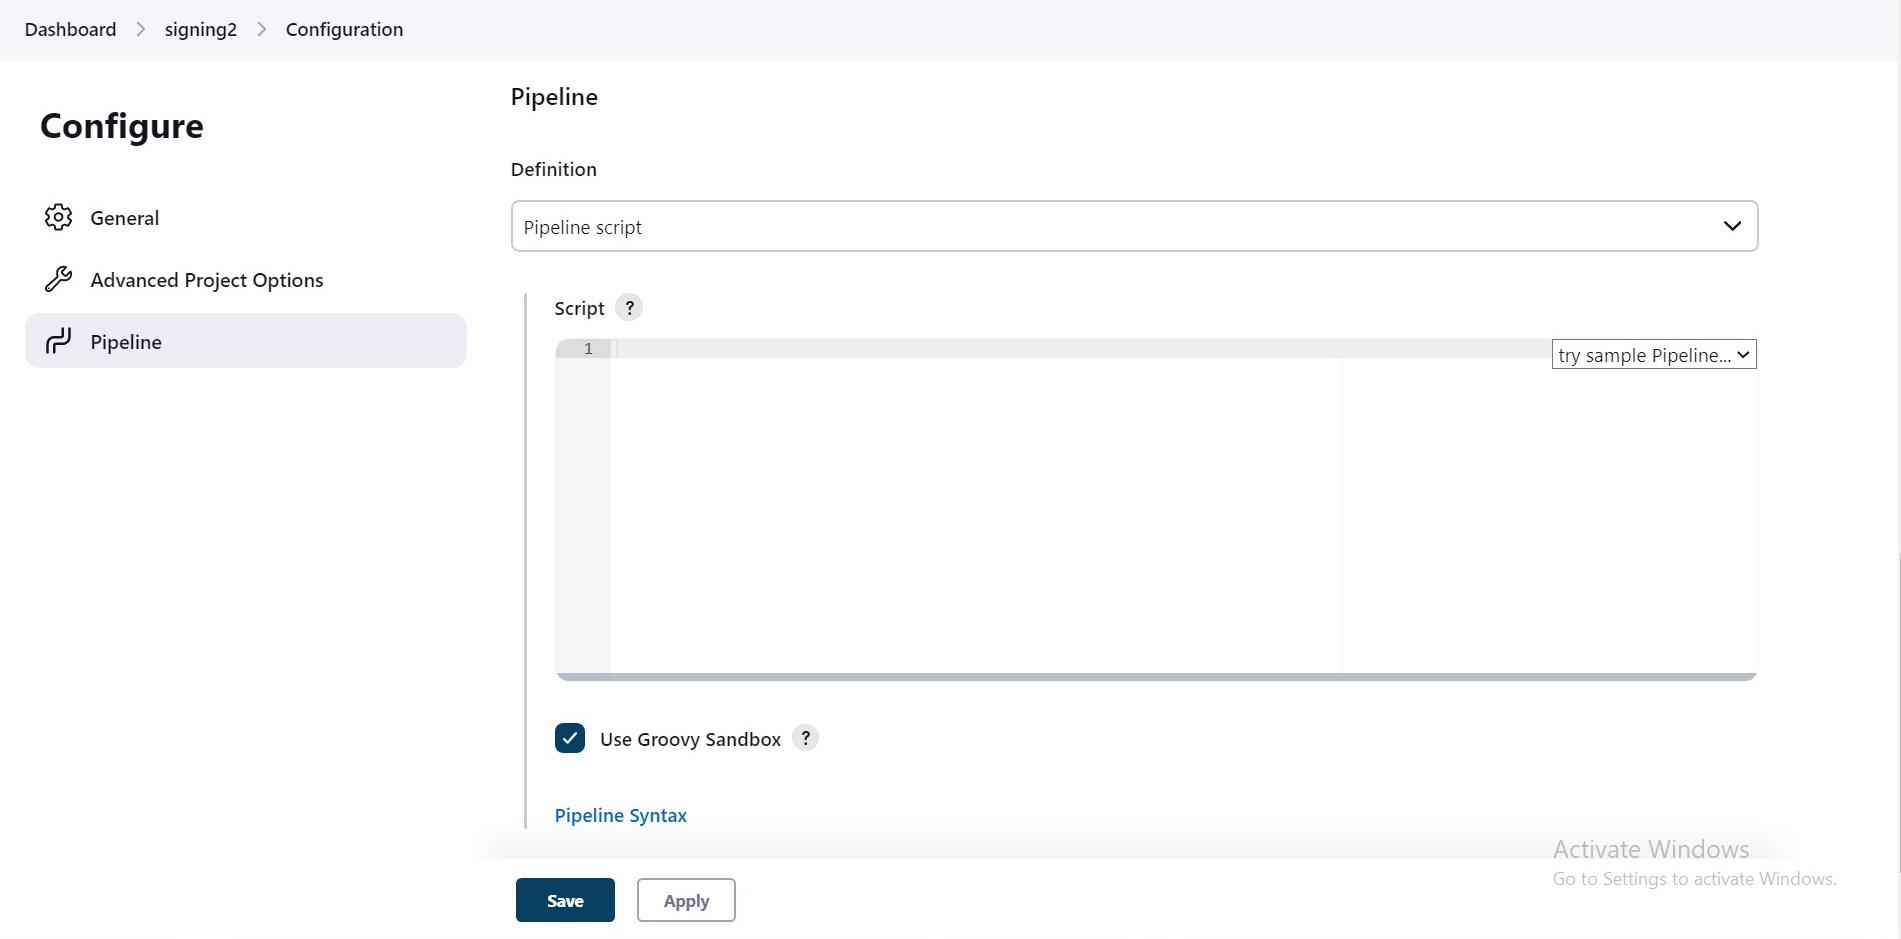
  • Scroll down to the bottom to find Pipeline.

    Jenkins Configure Pipeline

  • Write the script in the script box and click on save. You’ll need to edit your environment variable as per your setup

    Note: The EC_ variables below are defined in the pipeline itself and passed to SignTool. They are separate from the KSP settings EC_Client_Auth and EC_Client_Pass, which are set on the agent. Keep certificate files and passwords in Jenkins Credentials; see Securing CI/CD Credentials.

                        
    
                            pipeline {
                                agent any
                                environment {
                                    EC_KEY_NAME='evcodesigning'
                                    EC_CLIENT_CERT_FILE='C:\\Users\\Administrator\\Desktop\\ForTesting\\evcodesigning.pem'
                                    EC_HASHING_ALGORITHM='SHA256'
                                    EC_TIME_STAMP_SERVER="http://timestamp.digicert.com"
                                    EC_FILEPATH="C:\\Users\\Administrator\\Desktop\\ForTesting\\AgentService.exe"
                                }
                                stages {
                                    stage('Code Signing') {
                                        steps {
                                            dir('C:\\Users\\Administrator\\Desktop\\ForTesting'){
                                                bat 'signtool sign /csp "Encryption Consulting Key Storage Provider" /kc %EC_KEY_NAME% /fd %EC_HASHING_ALGORITHM% /f %EC_CLIENT_CERT_FILE% /tr %EC_TIME_STAMP_SERVER% /td SHA256 %EC_FILEPATH%'
                                            }
                                        }
                                    }
                                }
                            }
                        
                                            
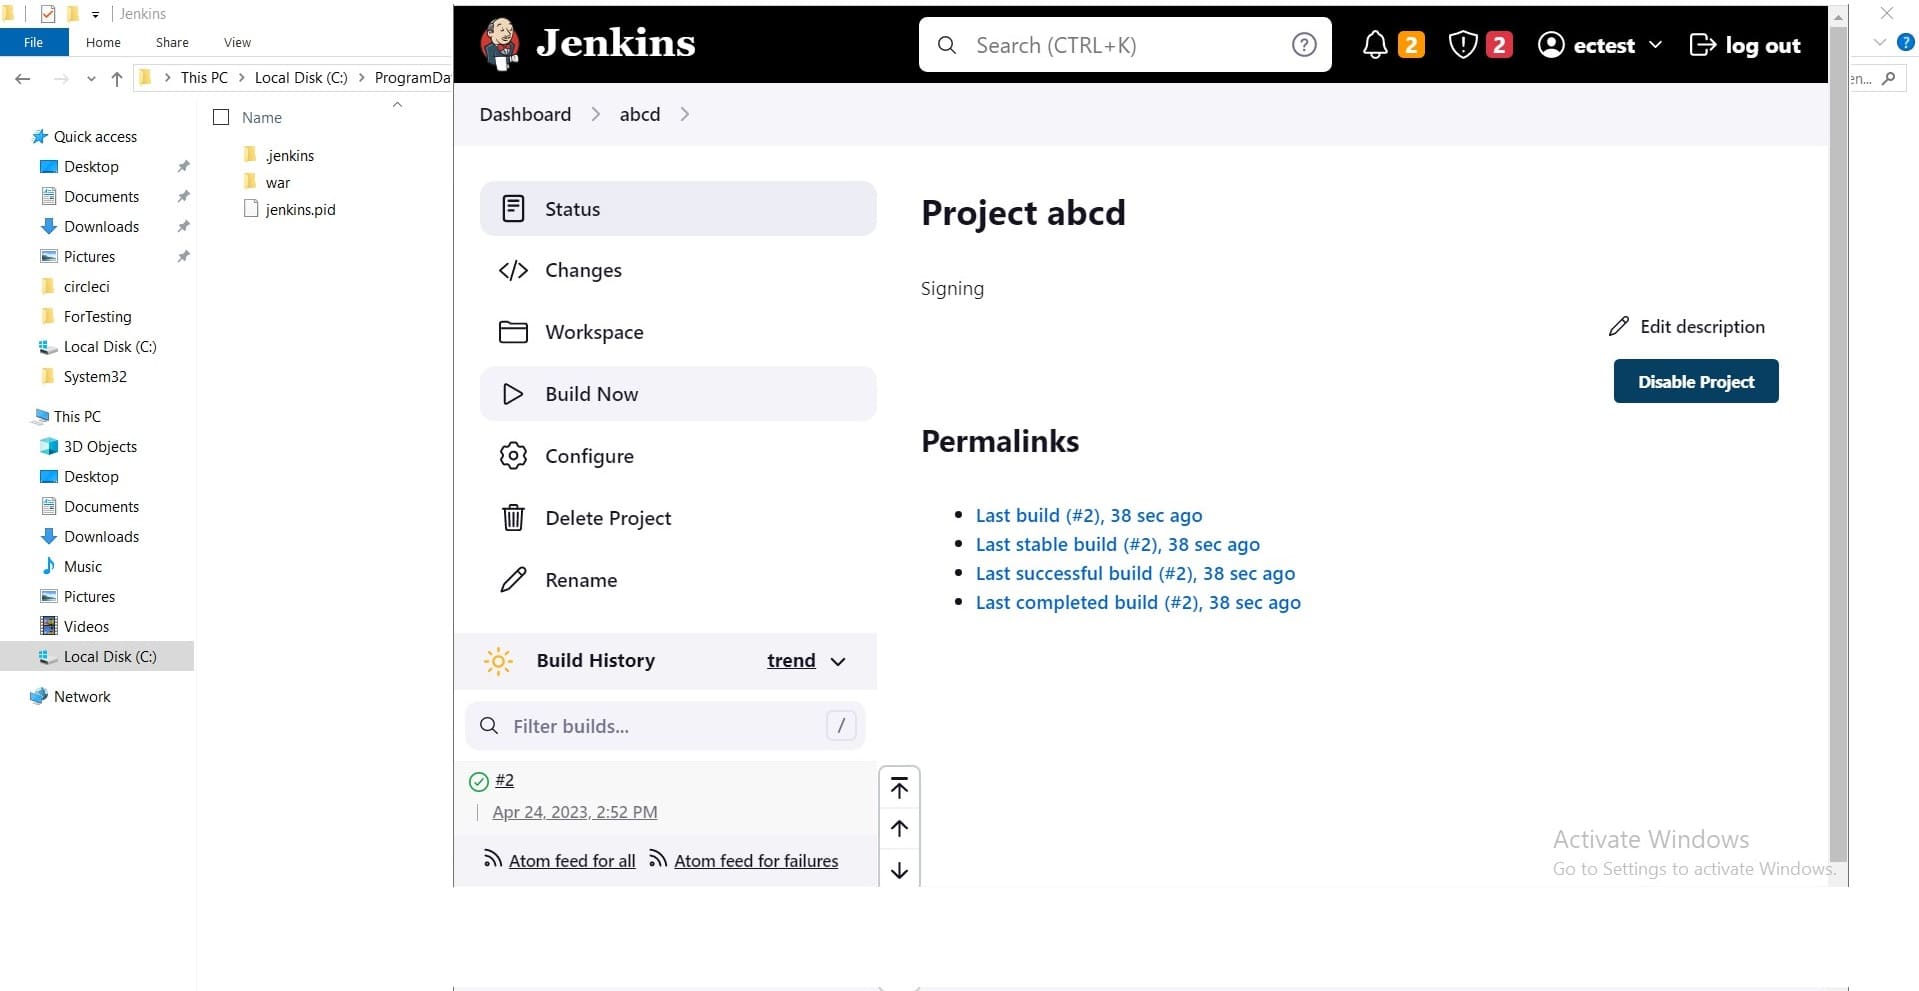
  • Click on build now and you’ll see a build number running on the screen

    Jenkins Build Number

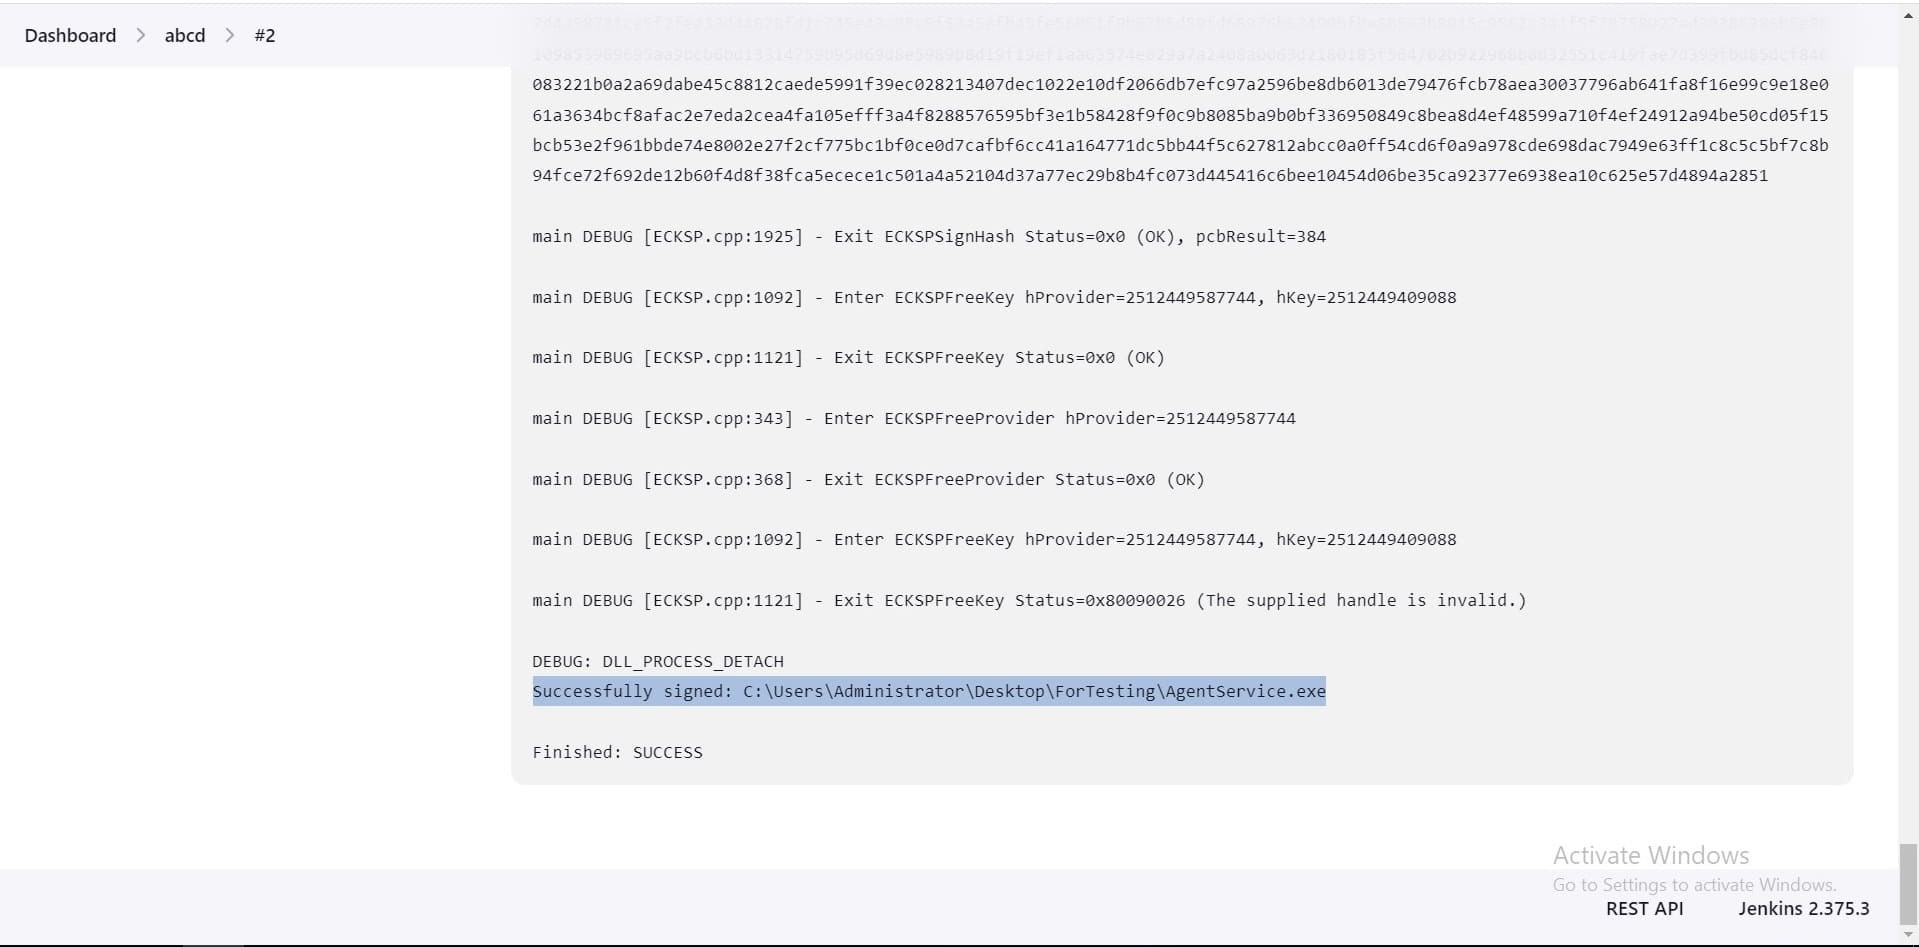
  • If you click on the build number and go for console output you’ll see that your file has been signed.

    Jenkins File Signed

On this Page:
Support Privacy Policy Terms of Service

Copyright Encryption Consulting LLC. All rights reserved.