CodeSign Secure Documentation
  • Overview
    • About CodeSign Secure
    • Getting Started
    • Documentation Guide
    • Portal Overview
    • Troubleshooting
      • FAQ
    • Glossary
  • Reference Guide
    • Header Bar
      • CodeSign Secure Documentation
      • Swagger API
      • Profile Section
    • Dashboard
      • Key Performance Indicators
      • Issued Certificates
      • Signatures Generated
      • HSM Health Check
    • Keys and Certificates
      • Key and Certificate Lifecycle
    • App Management
    • Signing Requests
      • Approval Workflows
    • Signing Tools
    • Reports
      • Signing Request Report
      • Audit Trail
      • Certificate Report
      • Client Report
    • Logs
    • System Setup
      • Identity Store
      • Backup
      • User
      • Roles and Permissions
      • Email
      • Signing Projects
      • SSL/TLS Management
      • Environment
      • Plugins
  • Setup & Architecture
    • Identity and Access Control
    • Architecture and Concepts
    • Installation
      • Windows
        • Installing the Server
        • Ports and Protocols
        • High Availability and Backup
        • Upgrades and Compatibility
    • Security
      • Security Hardening Checklist
      • Client Authentication
      • Designing Signing Policies
  • Release Notes
    • Releases for 2026
      • v3.2.1
    • Releases for 2025
      • v3.2.0
    • Releases for 2024
      • v3.1.0
  • API Reference
    • Getting Started
    • Authorizing Requests
    • Securing API Access
    • Request and Response Conventions
    • Endpoint Reference
      • Signing
      • Signing Requests
      • Certificates
      • Applications and Environments
      • User Management
      • Permissions
      • Email
      • System Setup
      • Reports
      • Dashboard
      • License
  • Integration Guides
    • Signing Capabilities
      • Supported Formats and Platforms
      • Timestamping
      • Windows Signing - SignTool
        • Signing
        • Macro Signing
      • Apple Signing
      • AppX & MSIX Signing
      • Visual Studio ClickOnce
      • Jar Signing
      • Sign HLK/HCK using CodeSign Secure
      • NuGet Signing
      • Mage Signing
      • Sign OVA/OVF using Encryption Consulting’s Utility Tool
      • Utility Tool for code signing
      • Container Signing
      • PKCS11 Wrapper
        • APK Signing
        • OpenSSL Signing
        • XML Signing
        • JSign Tool Signing
        • Jarsigner Signing
        • GPG2, Debian & RPM Signing
      • Reproducible Build
        • Automated Hash Validation
        • Reproducible Build Process Flow
        • Pipeline Script Components
        • Hash Validation
    • CI/CD Integration
      • GitHub Actions
      • Jenkins
      • GitLab
      • Azure DevOps
      • TeamCity
      • Bamboo
      • Securing CI/CD Credentials

Apple Signing

Using CodeSign Secure and our Apple Signing CSP, you have the ability to quickly and efficiently set up your environment to sign any type of Apple file including .app, .dmg, .pkg, .ipa, and .mpkg files with ease. Configuration of your Mac to run our Apple CSP is a very quick and easy process.

Prerequisites: Ensure you have a username and access to the CodeSign Secure webpage.

  • From the CodeSign Secure webpage, go to the Signing Tools section and download the EC Provider for Mac.
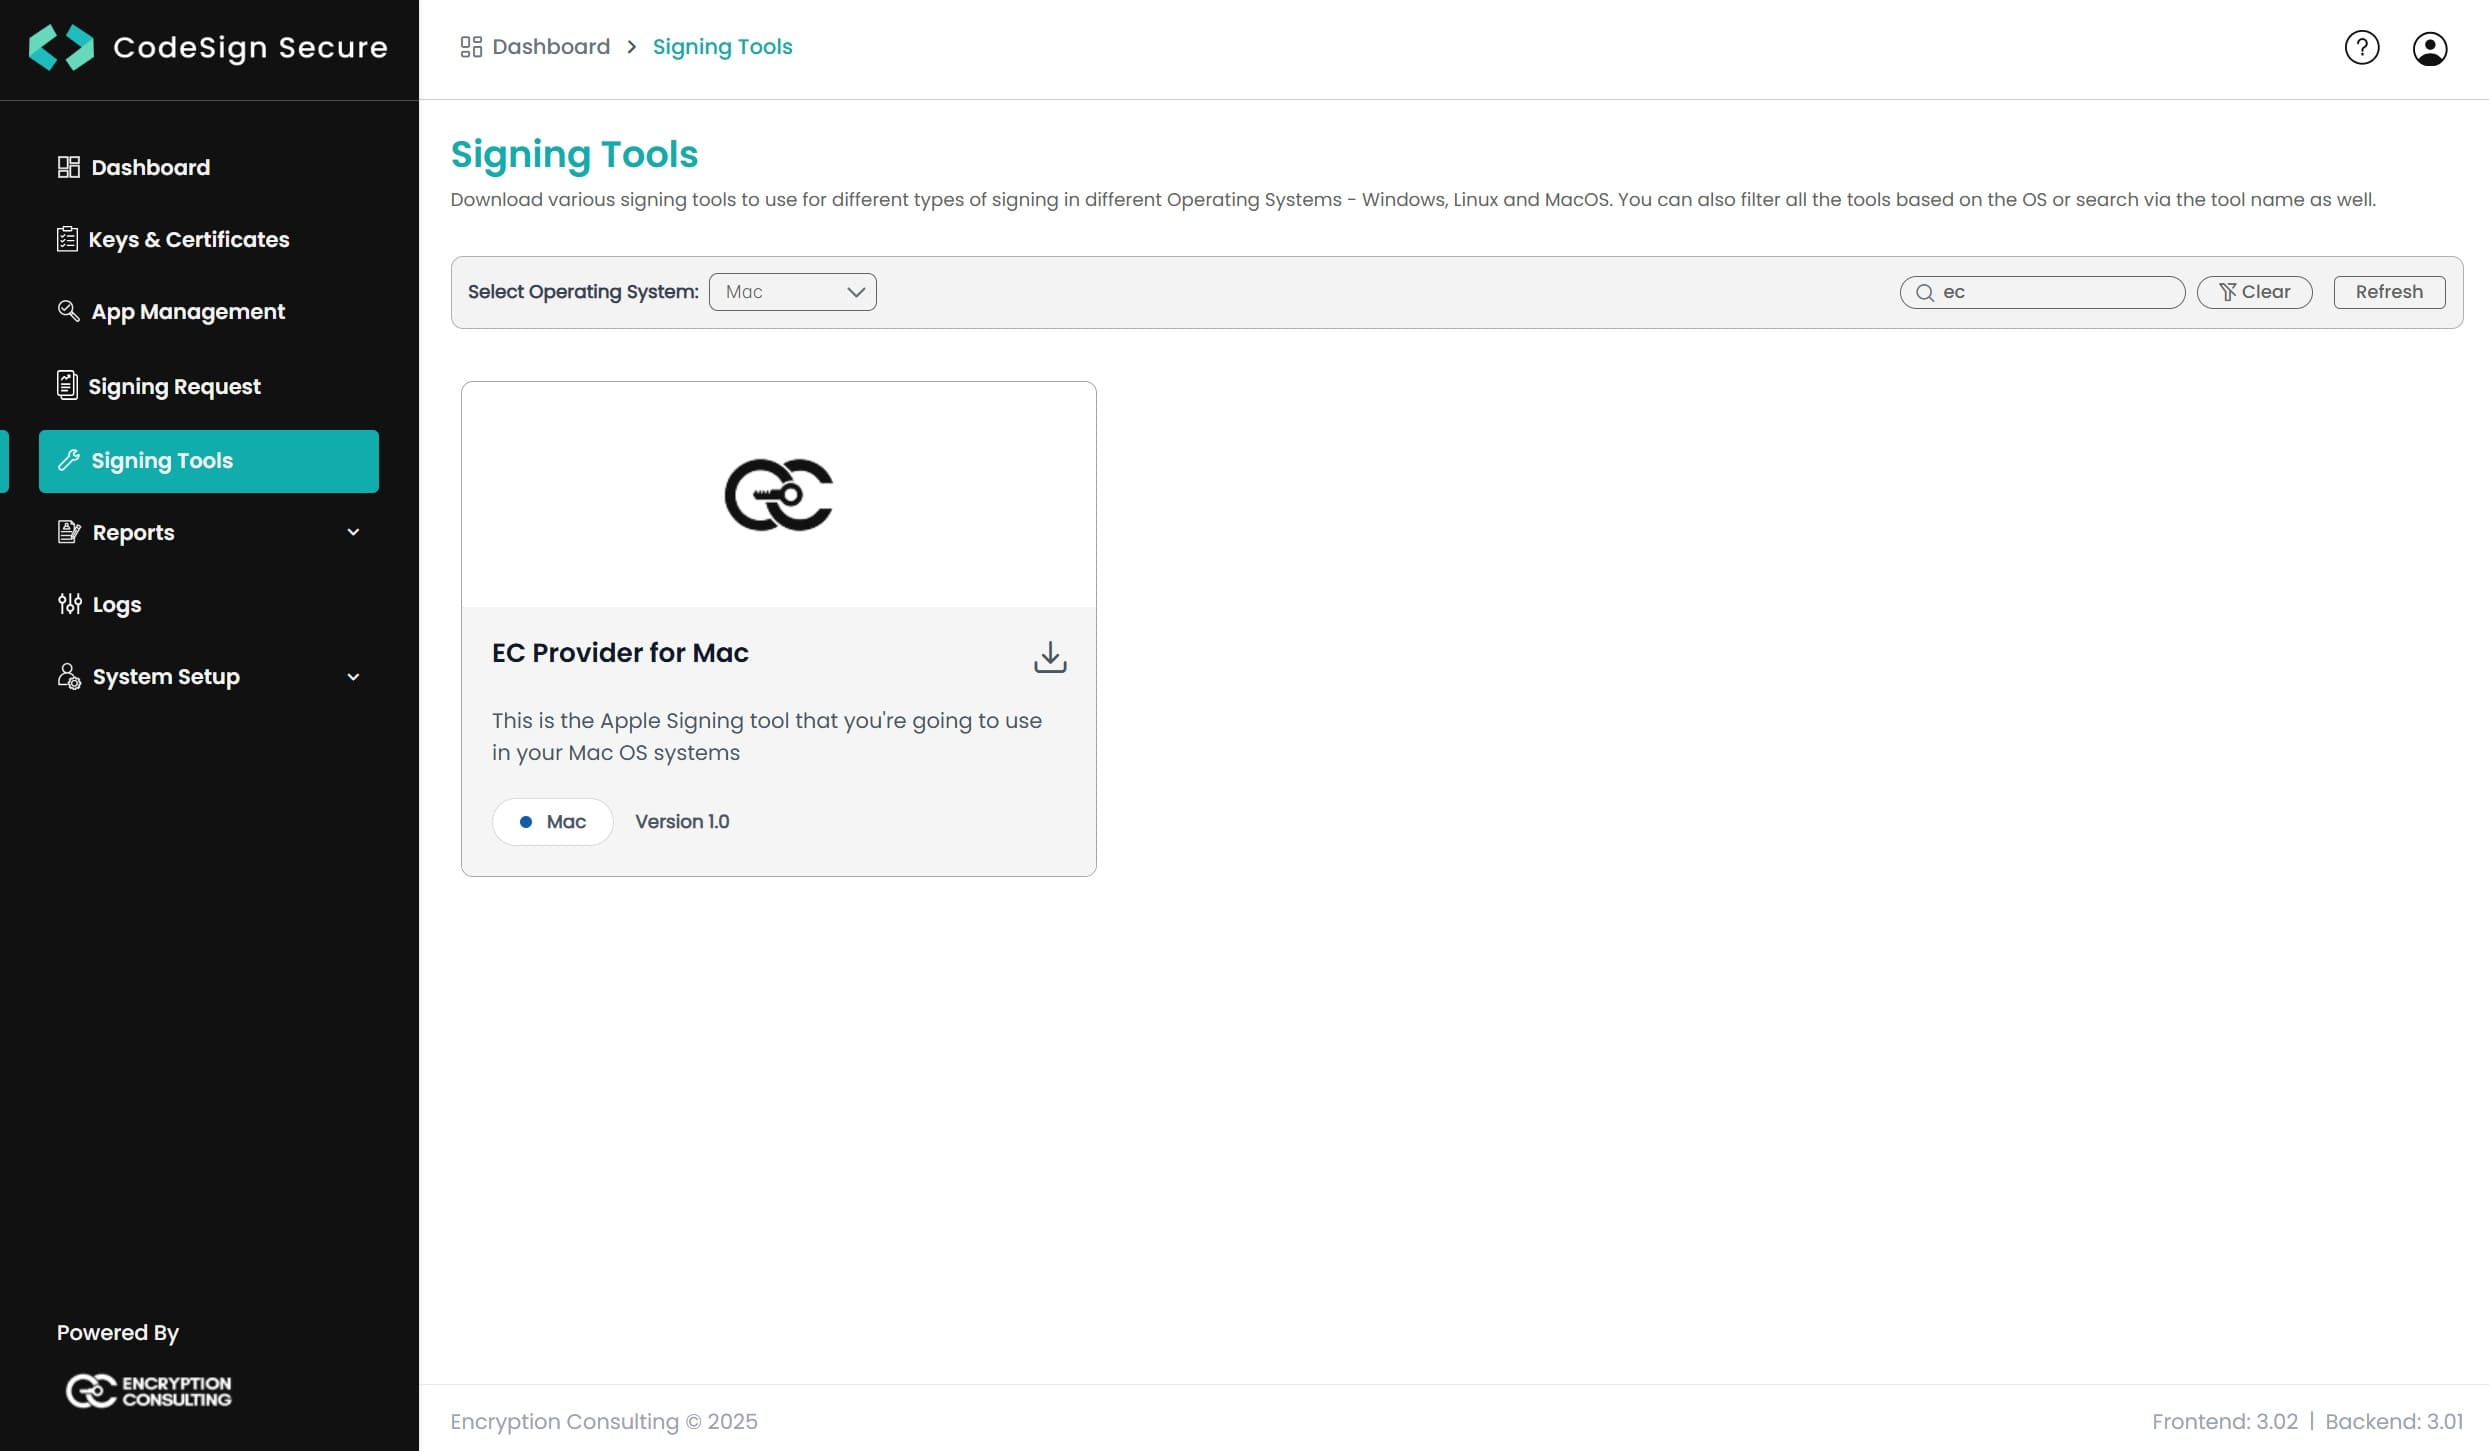
    Apple Signing CSP Download
  • Unzip the file and transfer the unzipped file to the Applications folder. From here, run the ECCssProvider application.
    Apple Signing CSP Extraction
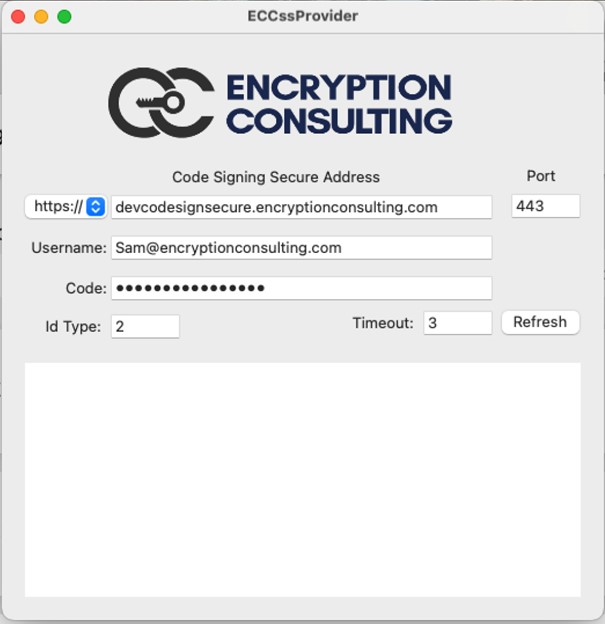
  • Ensure you have your CodeSign Secure URL, Username, and code entered into the application and then select refresh. The Page should now show different certificates you have access to for signing.
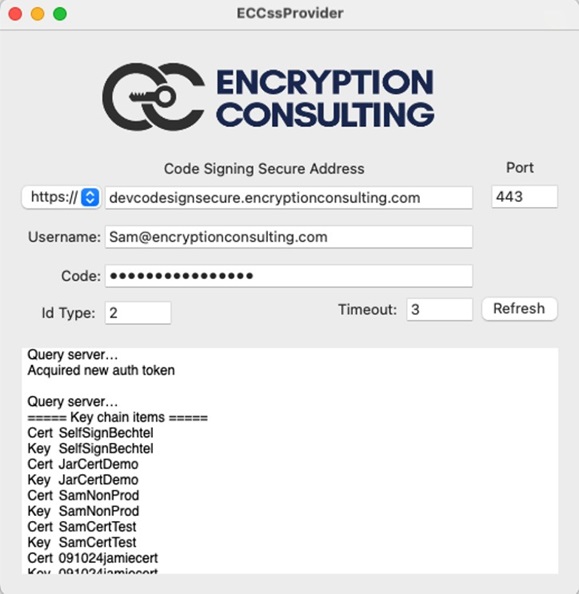
    Apple Signing CSP Details
  • Now, we must set up the P12 certificate for access to signing on the server. First, go to the CodeSign Secure Webpage and select the settings section. From here, select “User”. Finally, on the drop-down menu on the right, select “Generate Authentication Certificate”.
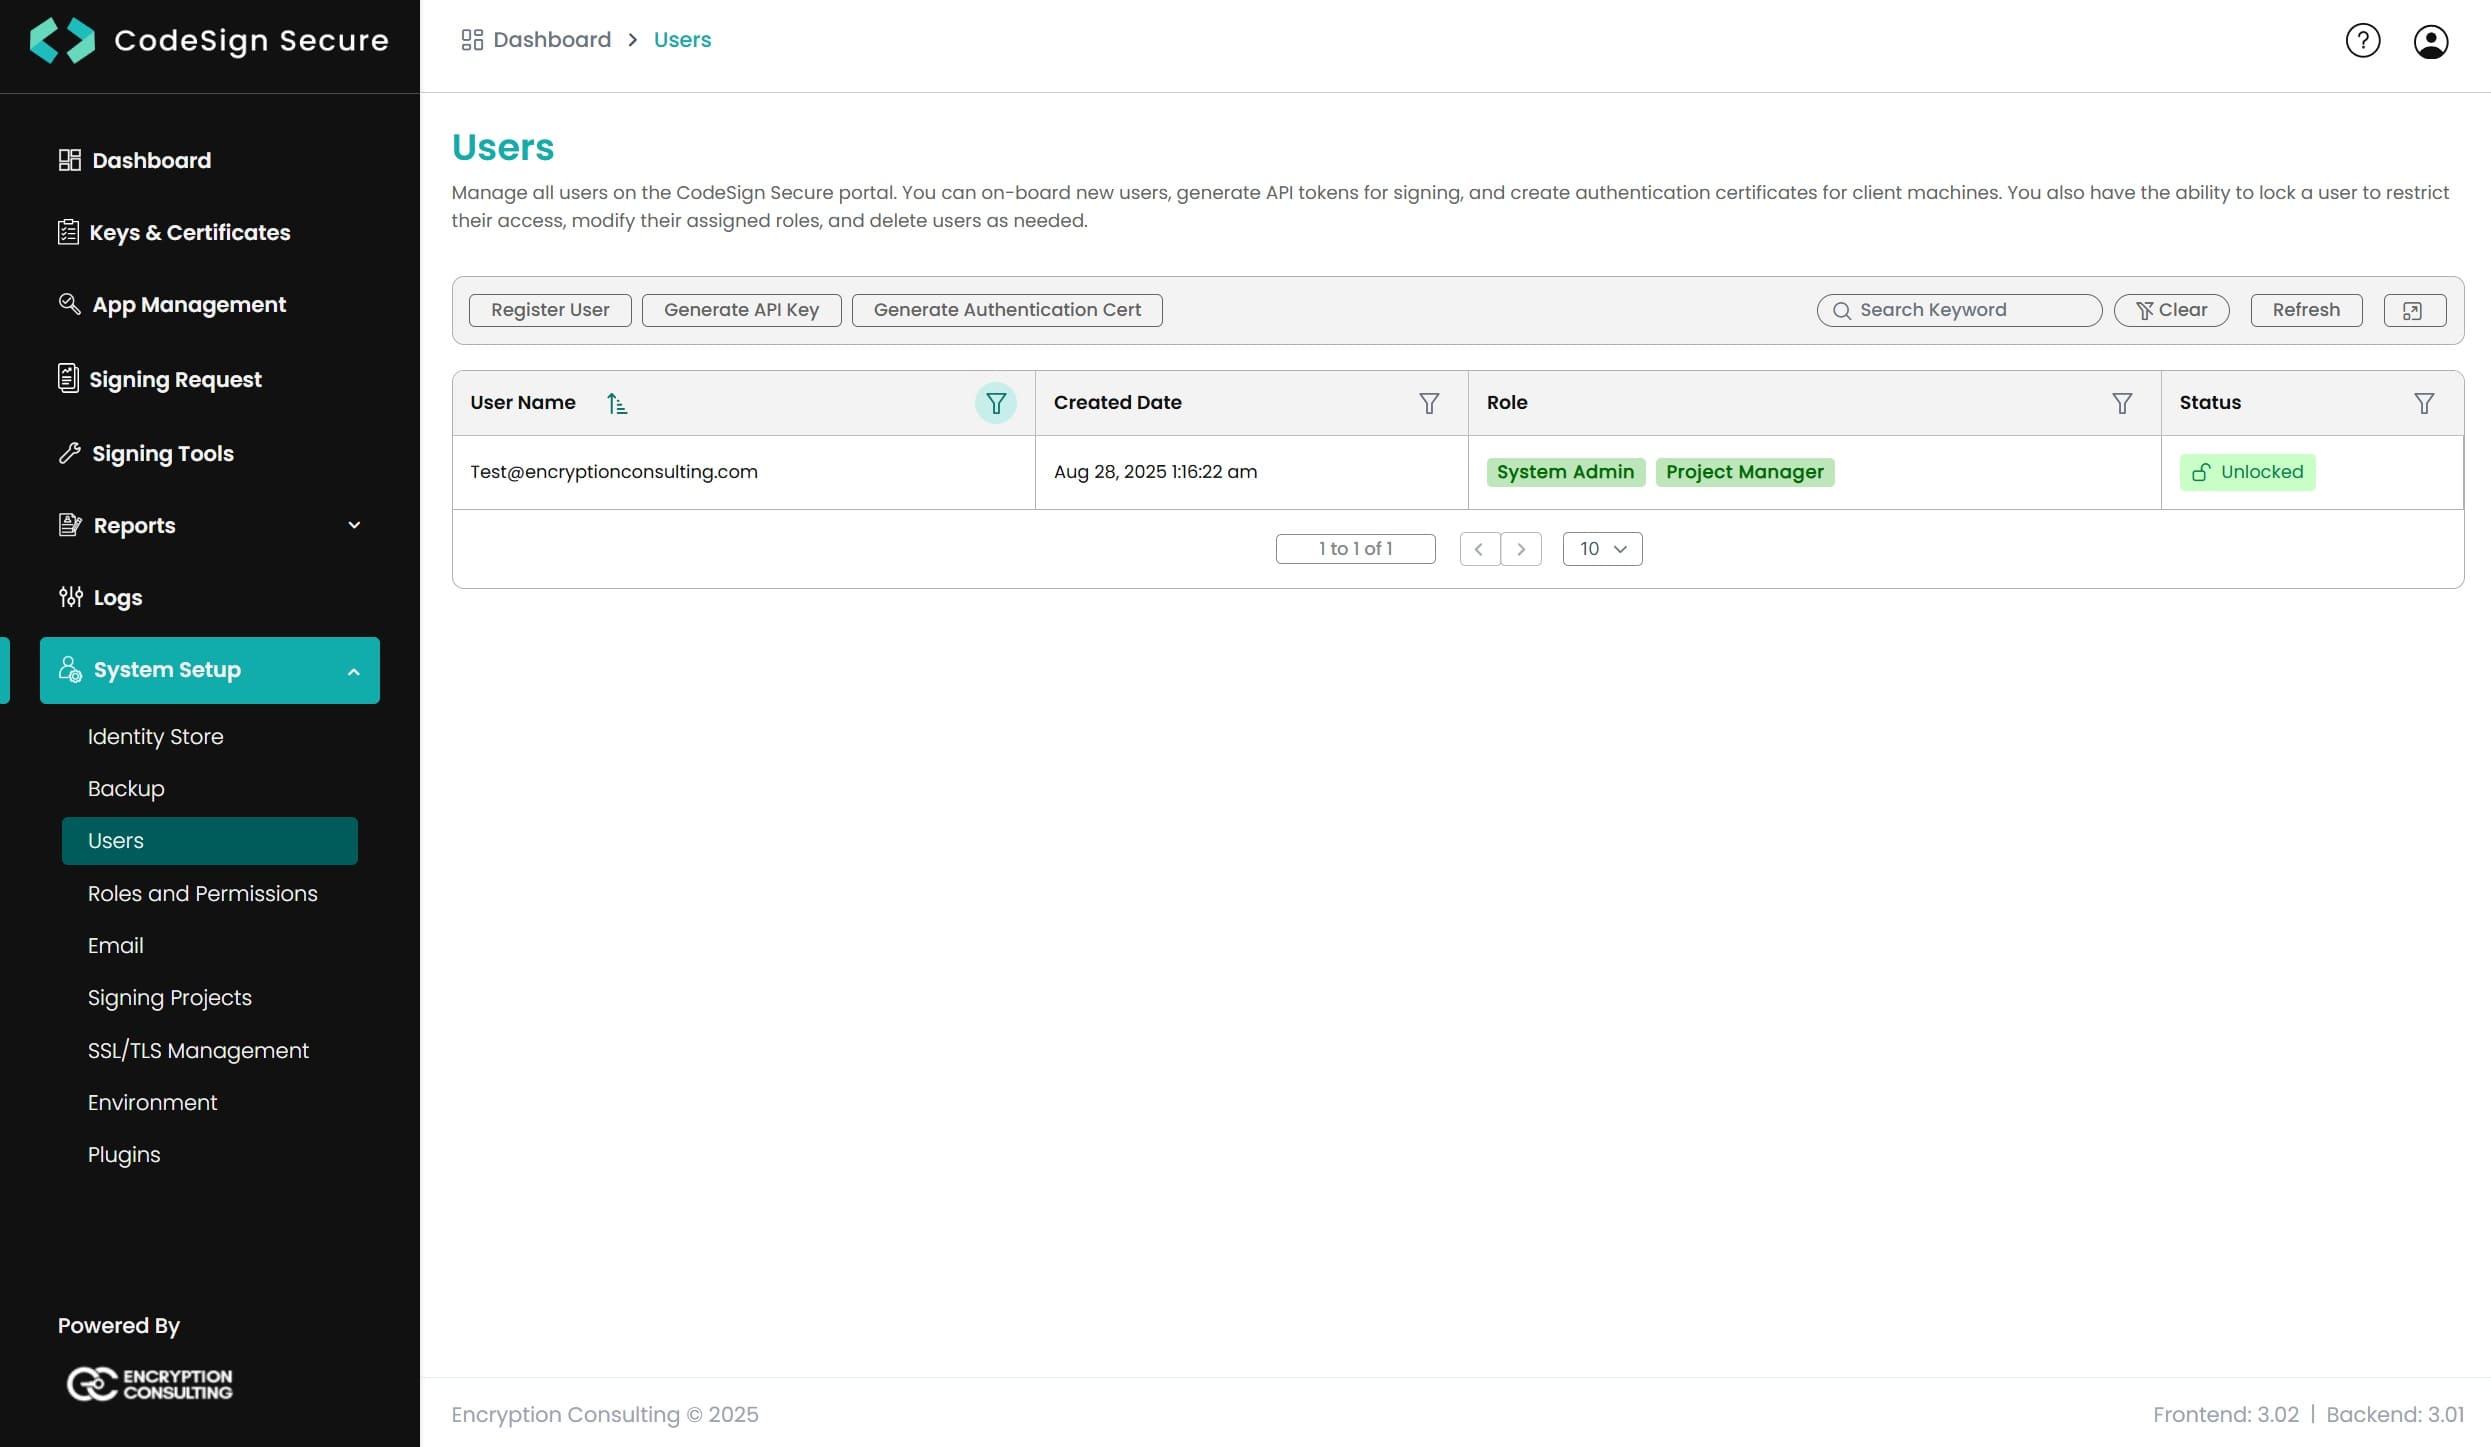
    Apple Signing Authentication Certificate
  • Enter the Certificate Name, UserName, and Expiration Date of the P12 certificate, then select the “Generate” option. A p12 certificate should be generated and downloaded to your machine. Save the password of the certificate as well as the certificate itself.
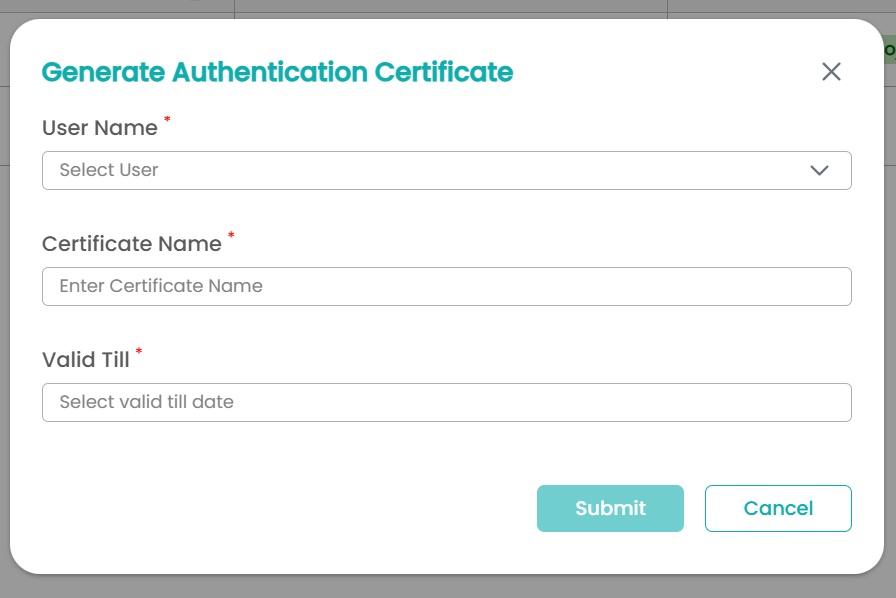
    Apple Signing Authentication Certificate Download
  • Double-click your newly downloaded P12 certificate and open it with the application “Key Chain Access.” It should prompt you for the administrator password and the certificate password, which will put the certificate in your System key chain.
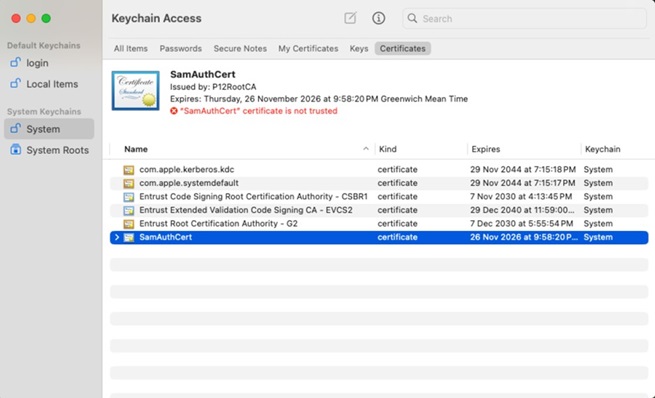
    Apple Signing Authentication Certificate Install
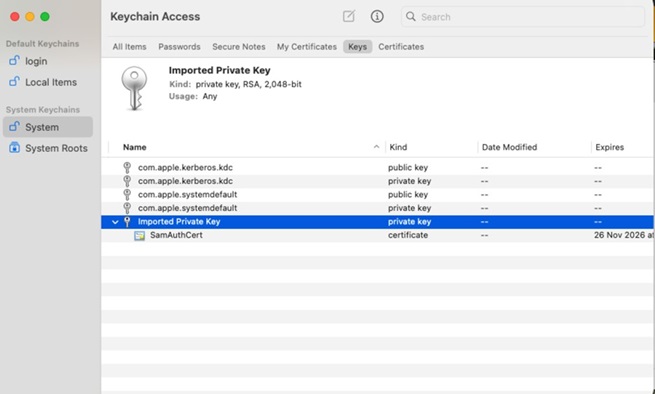
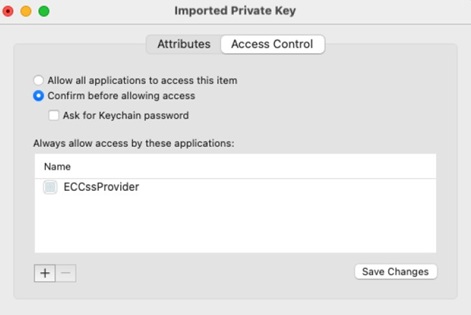
  • After putting the authentication certificate into your key access chain, open the key itself. It should be in the drop-down of the authentication certificate. Right-click it and select get info. From there, select access control and allow access to the certificate using the ECCssProvider.app application. You will likely need to restart your machine to see that permission actually changes.

    Apple Signing Authentication Certificate Access Control
    Apple Signing Authentication Certificate Access Control
  • Next, ensure you have the full certification path of the certificate you will be signing within your Keychain Access. Mac devices tend not to start with the known Certification chains like Windows machines do, so if you are using an OV/EV certificate for signing, you must upload that entire certification chain.
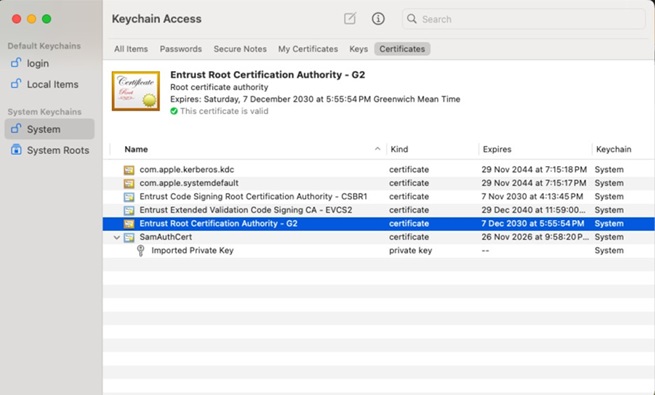
    Apple Signing Certificate Chain
  • Now, we need to run the following command:

    /Applications/ECCssProvider.app/Contents/MacOS/ECCssProvider --batch --tlsclient <Auth Cert Name>

    This command will set the authentication certificate we uploaded as the TLS authentication certificate when connecting to the CodeSign Secure server.

    Apple Signing Certificate Upload
  • Now, we need to run:

    security export-smartcard -i com.encryptionconsulting.ECCssProvider.CssToken:ECCSS

    This command pulls up all of the certificates listed in the ECCssProvider GUI and details about those certificates.

    The important detail we need is the SHA1 hash of that certificate. We will use that hash to determine which certificate we are signing with. The certificates are in the same number order as they appear in the GUI.
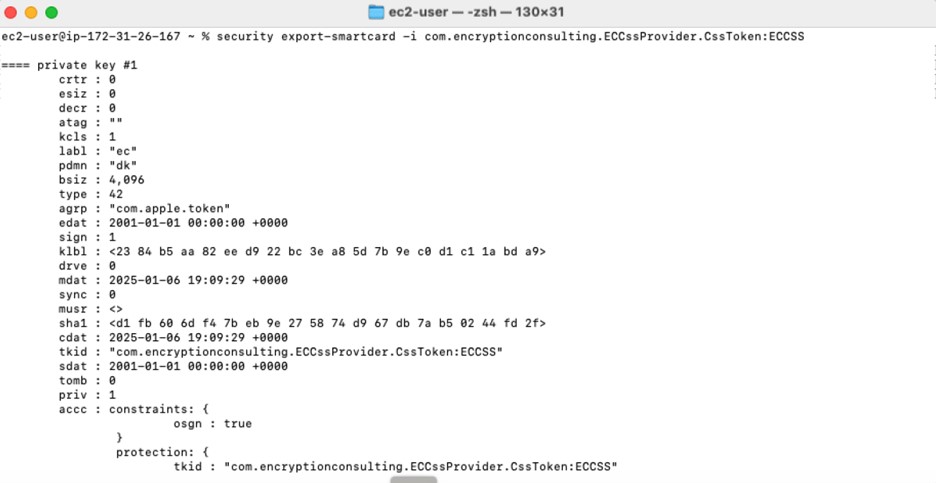
    Apple Signing Certificate Hash
  • Finally, we run our codesign command:

    codesign -f -s <Hash of the Certificate for signing> <Application or file to be signed>

    The -f flag is for overwriting old signatures on files, and the -s flag is to specify what we are signing. Then, we provide the hash of the certificate we are using and the path to the file to be signed. As you can see below, this is our expected output on the signing command.

    Apple Signing Signing Command
  • To verify the signature, run:

    codesign -dv --verbose=4 <Application or file to be signed>

    This prints the signature's details, including the signing certificate. To confirm the signature itself is valid:

    codesign --verify --verbose <Application or file to be signed>

On this Page:
Support Privacy Policy Terms of Service

Copyright Encryption Consulting LLC. All rights reserved.