"Mage.exe" is a command-line tool used in the Windows operating
system for signing and verifying software manifests
Prerequisites
- .NET Framework or the Windows SDK signing tools installed (mage.exe comes bundled with them).
- .NET Framework 4 or above.
- Signing Certificate.
Mage.exe is a .NET Framework tool, so it will either get
automatically installed while you install .NET Framework using
Visual Studio or it is downloaded with Windows SDK, under
Windows SDK signing tools for Desktop apps.
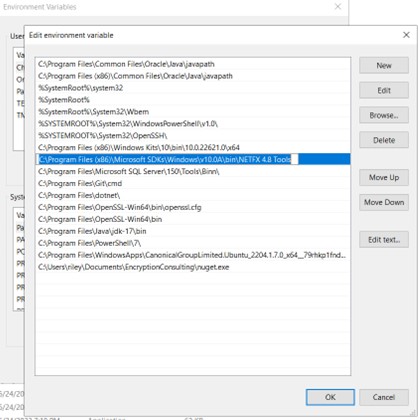
You can locate it in file path
C:\Program Files (x86)\Microsoft
SDKs\Windows\v10.0A\bin\NETFX 4.8 Tools
Once you’ve mage.exe in your system, you will need to set PATH
environment variable to mage.exe
Mage commands and parameters
You can also see these by mage -help or mage -help verbose in
your CMD
| Parameters |
Details |
| -s, -Sign [Sign options] |
Uses a key pair or X509 certificate to sign a file.
Signatures are inserted as XML elements inside of the
files.
You must be connected to the Internet when signing a
manifest that specifies a -TimestampUri value.
This command tells Mage to sign the selected/specified
package.
|
| -ver, -Verify [manifest-filename] |
Verifies that the manifest is signed correctly. Cannot be
combined with other commands.
|
| -a, -Algorithm |
Specifies "sha256RSA" or "sha1RSA" as the algorithm to
generate dependency digests with.
|
| -ch, -CertHash |
Provides Certificate Hash or Fingerprint |
| -ti, -TimestampUri |
Specify time stamp url ex: http://timestamp.digicert.com
|
Timestamping with -ti is optional. The examples below do not use
it and produce a validly signed manifest either way; add
-ti <timestamp server URL> to the sign command if you want
the signature to remain valid after the signing certificate expires.
Using the command line and EV certificate
We will use Mage.exe to sign file
Syntax
mage -sign <file_name> -CertHash <hash_or_cert_fingerprint>
mage -verify <file_name>
For example:
mage -sign Test.manifest -CertHash
79656a9ce126fd0d1bb33f4dc73dba308f58b3ac
Here,
<file_name>: specify
the name of the file you want to sign or the path of the file,
if it is not in the same directory
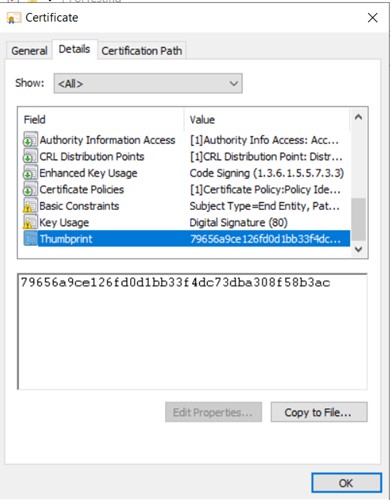
<hash_or_cert_fingerprint>: specify the fingerprint or Hash of your certificate. This can
be found in detail section of your certificate.
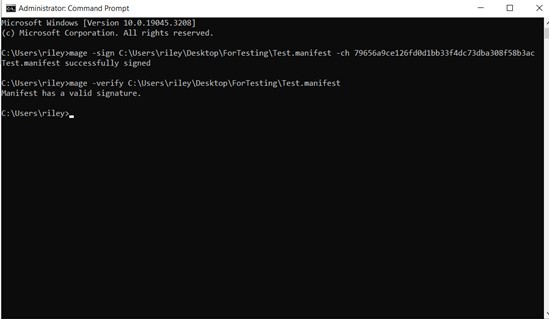
A sample of the executed command:
Using the command line and self sign certificate (from our web
portal)
This method also involves leveraging the Mage (Command Line
Interface) that provides functionality to create, publish, sign,
and manage packages without changing the project files. But
first, the user needs to generate a Self-Signed certificate from
our web portal. After that, convert the download certificate
from .pem to .crt format for better operations. When these steps
are performed successfully, perform the following steps:
-
Download the
Certificate Chain from
our “Signing Tools” screen. And unzip it in your client
machine.
-
After that, install the Root Certificate into your system
Steps
-
Click on the
INSTALL CERTIFICATE
button.
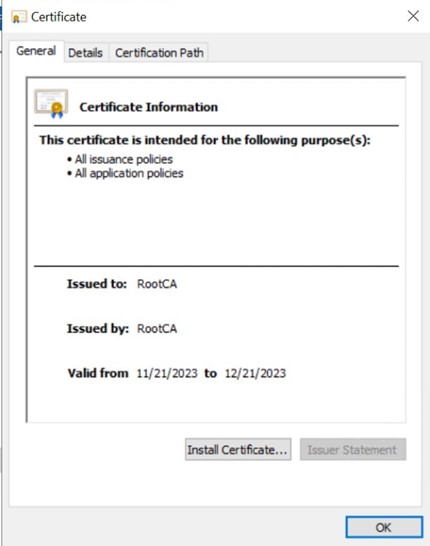
-
On the “Import Wizard” popup, select Current User and then
hit NEXT.
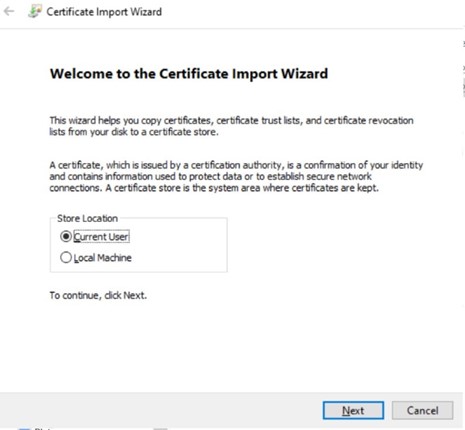
-
On the “Certificate Store” popup, choose Trusted Root
Certification Authorities for the Root CA certificate and
click on NEXT.
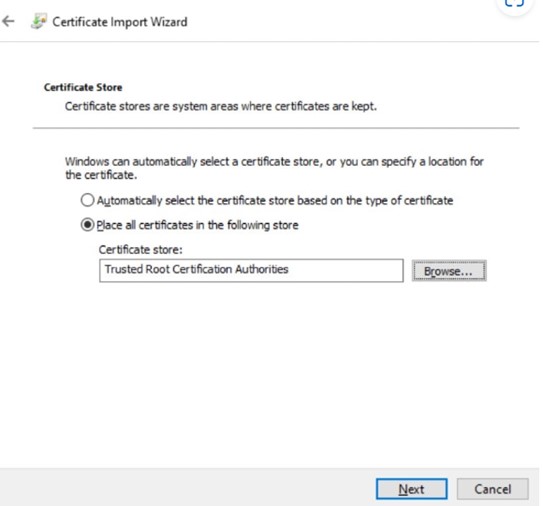
-
After verifying all the details, click on FINISH.
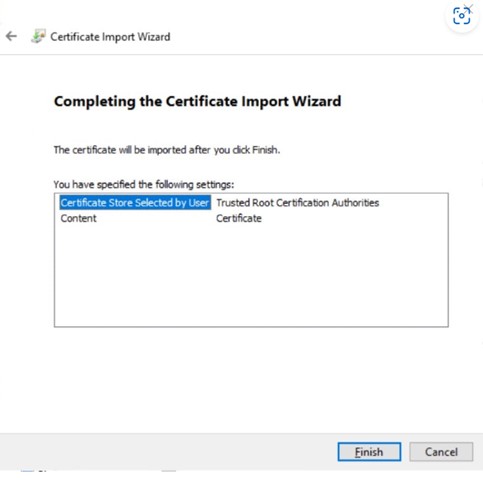
-
After installing Root CA, install the Issuing CA from the
Certificate Chain folder (intermediate.crt). Follow the same
procedure, except to install this certificate in
Intermediate Certification Authorities.
-
After successfully installing the Issuing CA, install the End
Entity certificate (or the Self-Signed certificate from our
portal) into your system. The process is the same, except this
certificate will be installed in the
Personal store.
-
Run the
repairstore command
using the Thumbprint of this End Entity certificate. Like
this:
certutil -f -repairstore -csp "Encryption Consulting Key
Storage Provider" -user "My" <thumbprint of the
certificate>
When all of these steps have been completed successfully, try
running the Mage command-line command using this certificate’s
thumbprint.
Syntax
mage -sign <file_name> -CertHash <hash_or_cert_fingerprint>
mage -verify <file_name>
For example:
mage -sign Test.manifest -CertHash
0089b116e14018a4229d8e775c9b00717f876fd1
Here,
<file_name>: specify
the name of the file you want to sign or the path of the file,
if it is not in the same directory
<hash_or_cert_fingerprint>: specify the fingerprint or Hash of your certificate. This can
be found in detail section of your certificate.
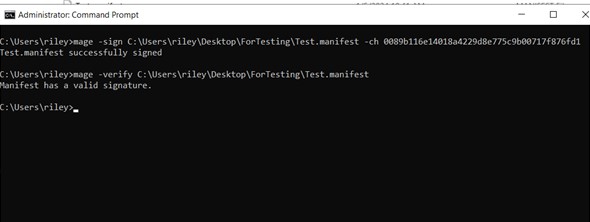
A sample of executed command