
Template
A Template defines a reusable discovery configuration — which sensors to run and how each is configured — independent of any specific host. Templates let you design a scanning strategy once and reuse it across many discovery jobs. A template is later combined with one or more hosts to create a runnable Discovery task. The page is reached from Discovery > Template in the left navigation menu.
Viewing Templates
Templates are listed in a paginated table. The toolbar above the table carries Create Template and an Actions menu on the left. Actions stays disabled until you tick at least one row, and then offers Bulk Delete Templates and Create Task (which starts a task from the selected templates). A checkbox in each row selects templates for those bulk actions.
On the right is an All Deliveries dropdown, which narrows the list to templates of a single delivery type (Networked or Cloud), and a full-screen toggle.
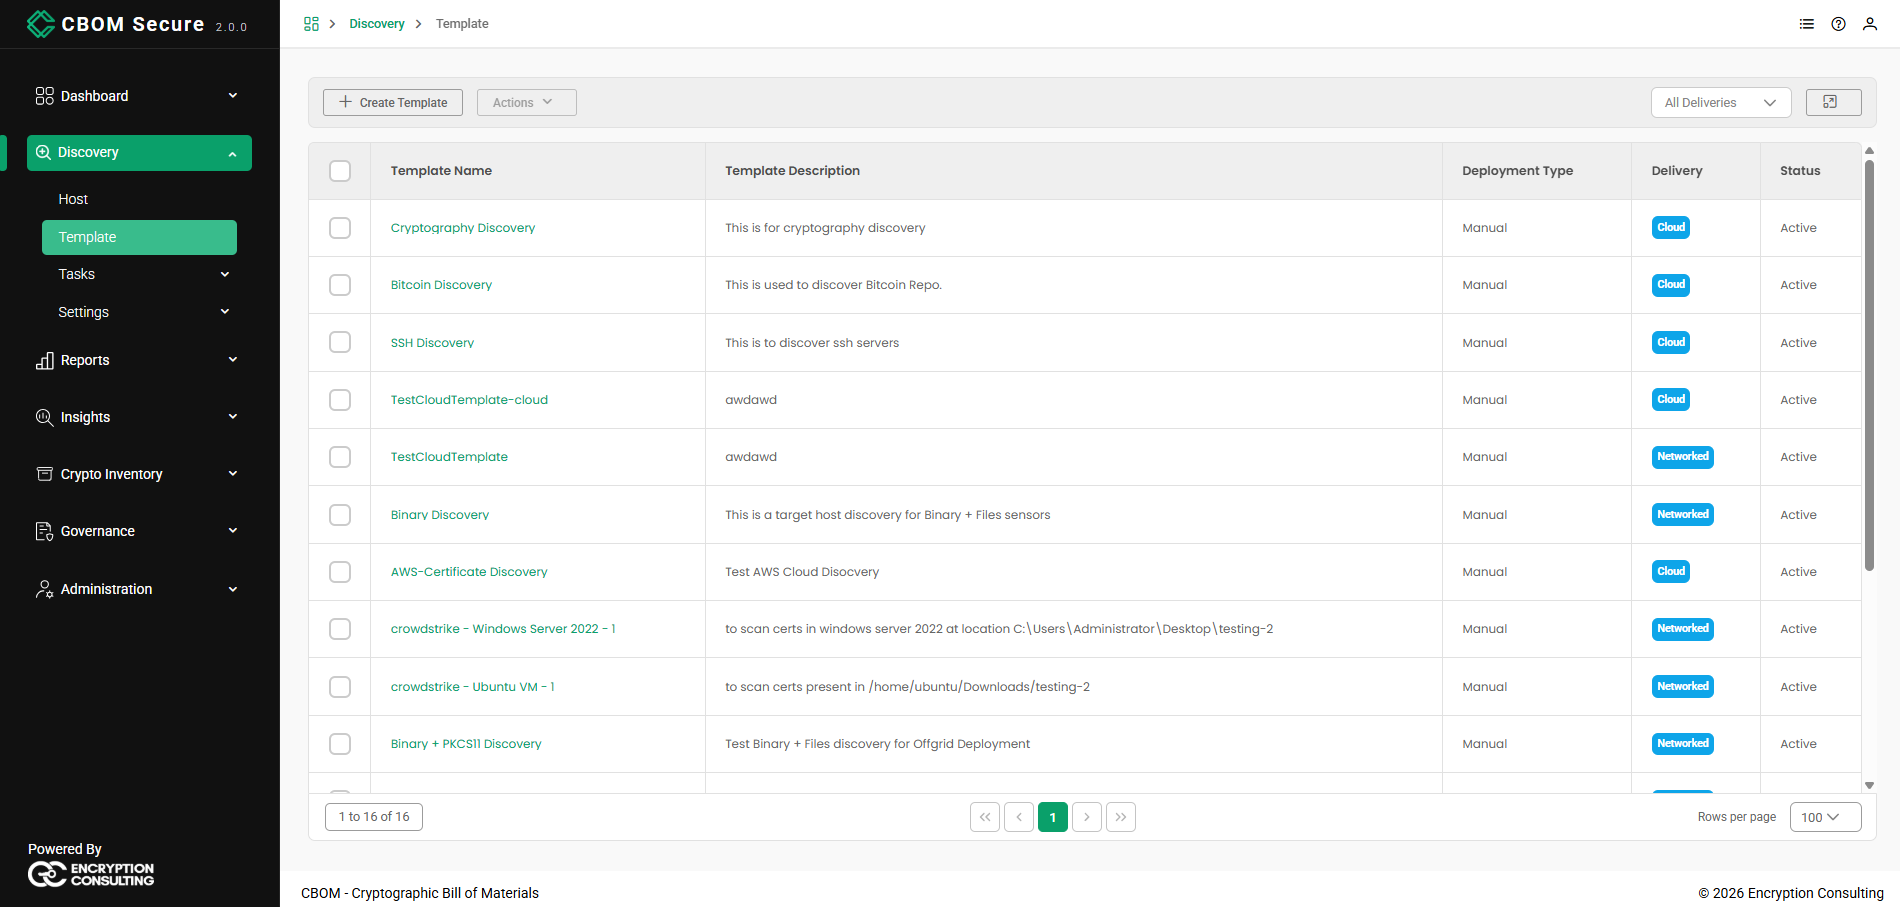
Each row describes a single template:
-
Template Name: The name of the template.
-
Template Description: A short description of what the template scans.
-
Deployment Type: How the template is run — Manual (on demand) or Schedule.
-
Delivery: How the sensors reach their targets — Networked for hosts CBOM Secure can connect to directly, or Cloud for cloud provider APIs. A template is only ever one of these two; Off-Grid is chosen on the task, not the template, and runs networked templates.
-
Status: The template's lifecycle state — Draft (created but not finished), Active (ready to be used by tasks) or Inactive (retired without being deleted). A template whose status is missing is treated as Draft.
Creating a Template
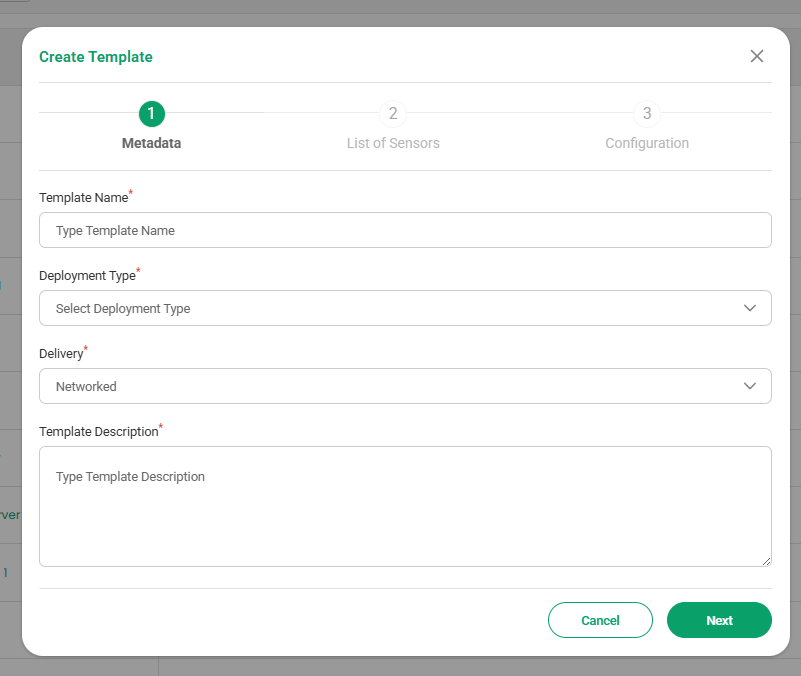
Click Create Template to open a three-step wizard — Metadata, List of Sensors, and Configuration.
Step 1 — Metadata
Provide the template's basic details: a Template Name, a Deployment Type (Manual to run the template on demand, or Schedule to run it on a schedule), a Delivery (Networked or Cloud), and a Template Description. All four fields are required. Click Next to continue.
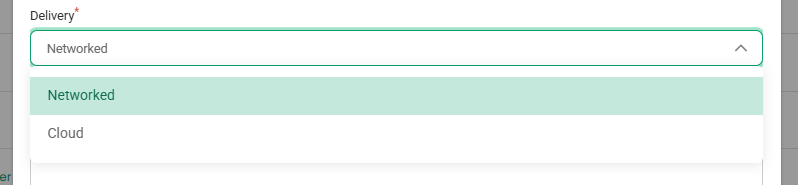
Delivery decides which sensors Step 2 offers and which tasks may later reference the template: a cloud task can only use a Cloud template, and networked and off-grid tasks can only use a Networked one.
Step 2 — List of Sensors
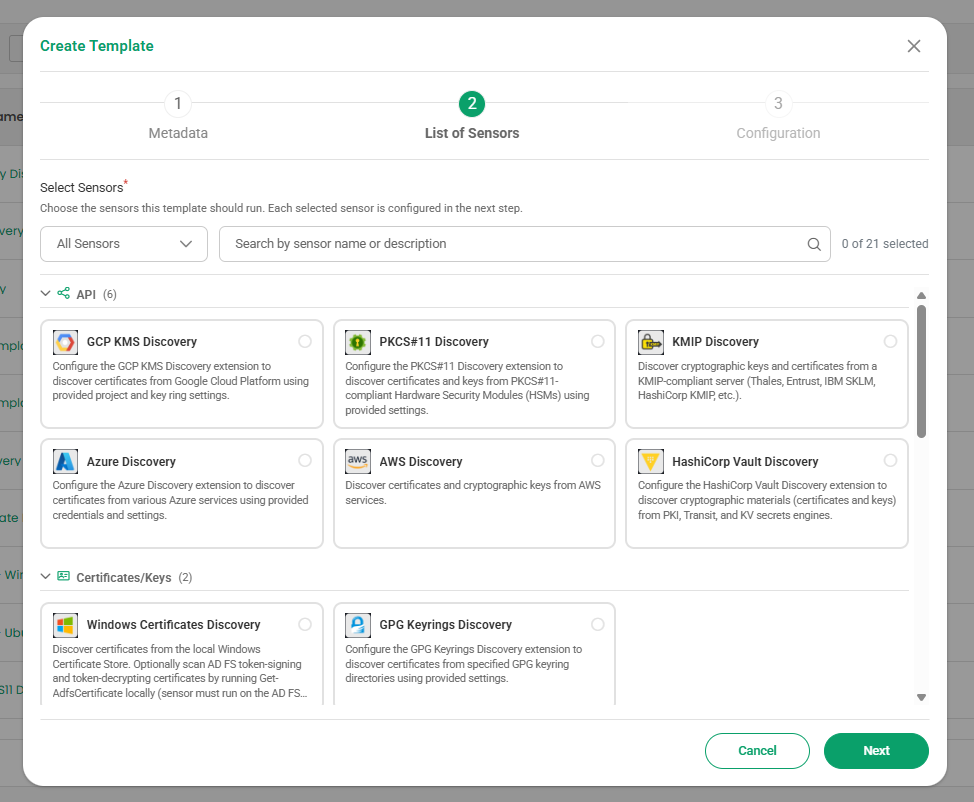
Select one or more sensors to include in the template. Each sensor targets a specific source of cryptographic material, and the sensors are grouped into categories — API, Certificates/Keys, Database, Extra-Net/Internal Network, Files/Keystores and PKI. Category groups can be collapsed and expanded.
Above the catalog are a category dropdown for showing one category at a time, a Search by sensor name or description box, and a running count of how many sensors you have picked (for example, 3 of 21 selected). Searching expands every category so matches are never hidden inside a collapsed group.
Selected sensors are highlighted, and each sensor carries a description explaining what it discovers. The catalog is built from the sensor schemas registered on the server, so it reflects the sensors your deployment actually has — see Sensors Reference for what each one collects and which settings it takes. Click Next to continue.
Step 3 — Configuration
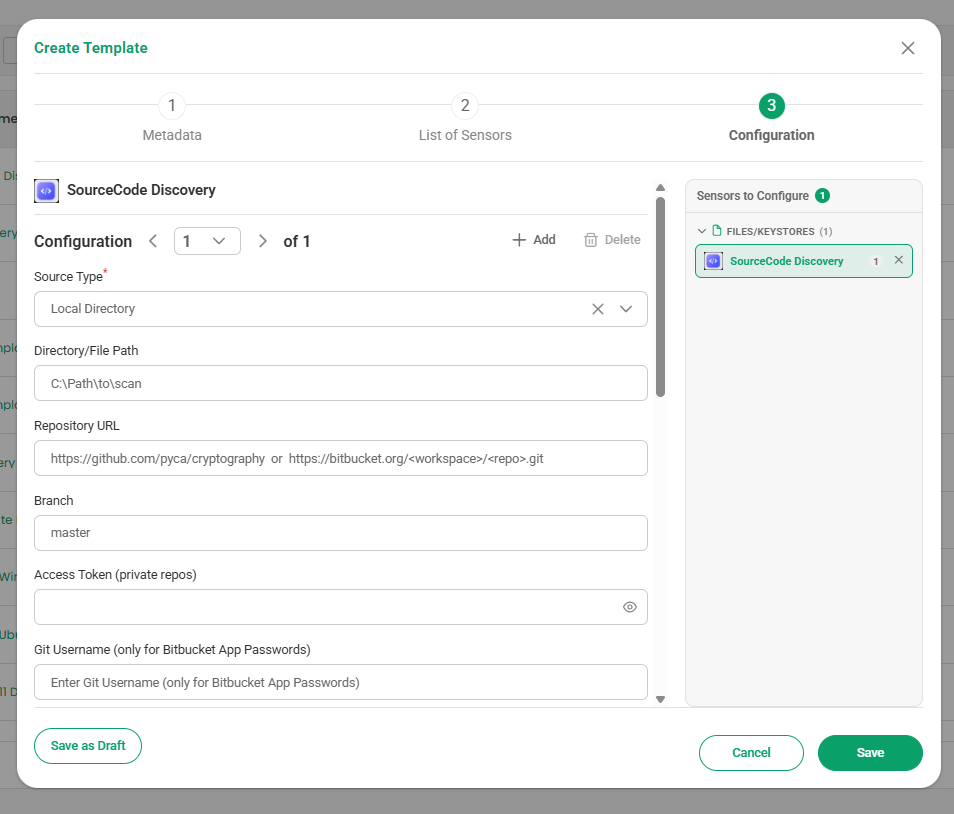
Configure each selected sensor. The selected sensors appear as tabs, and each one shows its own set of fields. For example, Azure Discovery requires the Azure Key Vault URL, Client ID, Tenant ID, Client Secret and Subscription ID, along with options such as Include Managed HSM, Azure Services and a Scan Name. The fields shown are generated from the sensor's own schema, so they always match what that sensor accepts.
A single sensor can carry more than one configuration. Each sensor tab has its own pager — arrows, a dropdown of the configuration currently open, and an of n count — with Add and Delete links beside it. Use Add to configure the same sensor against a second target (a second Key Vault, a second database instance), and Delete to remove the block on screen. Delete is disabled when only one configuration remains, so a selected sensor always keeps at least one.
A Sensors to Configure panel on the right lists the sensors you picked, grouped by category and badged with how many configurations each one carries. Use it to move between sensors, and the × beside a sensor to drop it from the template without going back to Step 2.
Finish with Save to store the template ready for use, or Save as Draft to keep it as a Draft you can return to through Continue Setup. Cancel closes the wizard without saving.
Template Actions
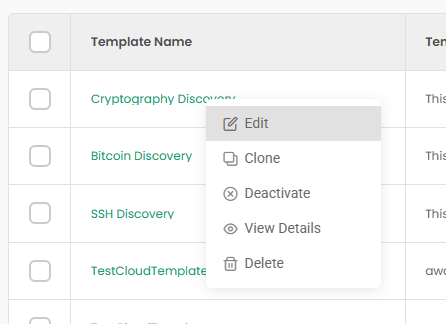
Right-click any template row to open a context menu. Which entries appear depends on the template's status and on your permissions:
-
Continue Setup: Shown for a Draft template. Reopens the wizard so you can finish the configuration you started.
-
Edit: Shown once a template is no longer a draft. Reopens the wizard on the saved values.
-
Clone: Copies the template under a new name.
-
Activate: Shown for an Inactive template, returning it to Active.
-
Deactivate: Shown for an Active template. Retires it from new tasks without deleting it.
-
View Details: Opens the read-only detail dialog.
-
Delete: Removes the template permanently.
Activate and Deactivate are never shown together, and Continue Setup and Edit are the same wizard under two names — only one of the pair applies to any given row.
View Details
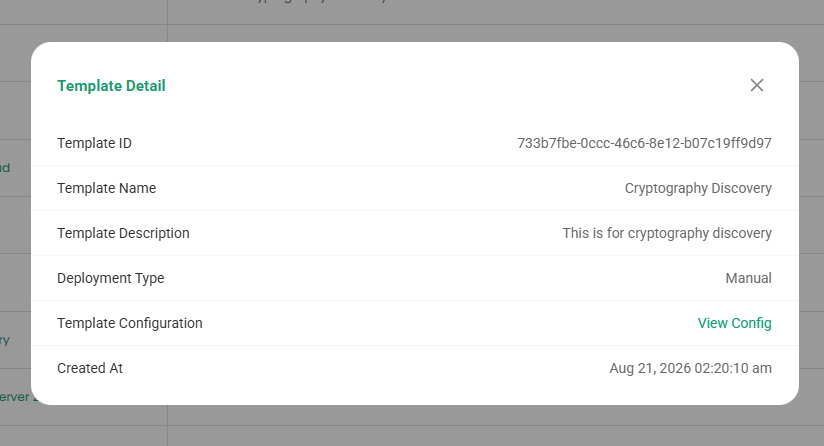
Opens the Template Detail dialog, showing the template's Template ID, Name, Description, Deployment Type, and Created At date. The Template Configuration row provides a View Config link.
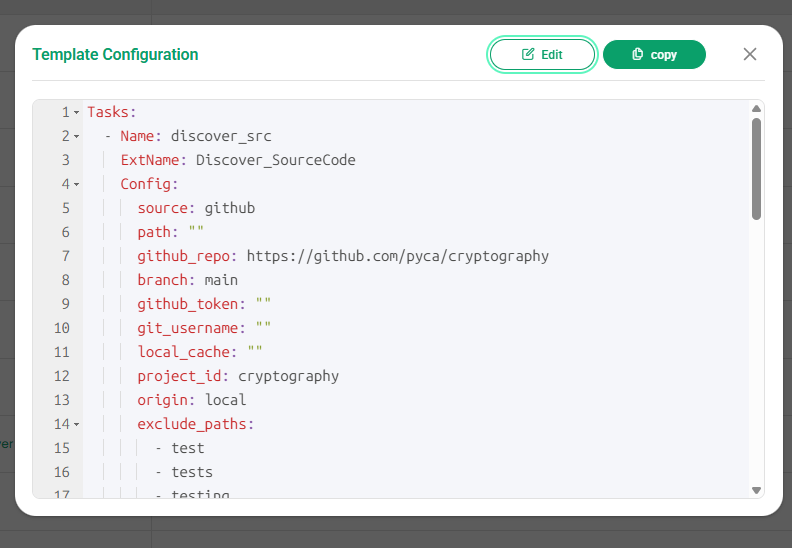
Selecting View Config opens the Template Configuration view — the underlying discovery configuration rendered as YAML. From here you can Edit the template or copy the configuration to the clipboard.
Edit and Clone
Edit opens the same three-step wizard as creation — Metadata, List of Sensors, and Configuration — pre-populated with the template's current values. Adjust any step as needed, then click Save to apply your changes or Save as Draft to keep it as a draft. Clone opens a Clone Template dialog asking for the new template's Template Name, Deployment Type, Delivery and Template Description; the sensor selection and configuration are carried over from the original. A clone always starts as a Draft, even when cloned from an active template, so a copy cannot be assigned to hosts before someone has reviewed it.
Because it is the same wizard, the three steps look exactly as they do above under Creating a Template; only the header changes, to Edit Template.
Delete
Removes the template from the platform. A Confirmation prompt is shown first; answer Yes to delete it permanently or No to keep it.