CertSecure Documentation
  • Overview
    • About CertSecure Manager
    • Documentation Guide
  • Reference Guide
    • Header Bar
      • CertSecure Documentation
      • Swagger API
      • Profile Section
      • Search
    • Dashboard
      • Key Performance Indicators
      • Expiring Certificates
      • CA metrics
      • Key Strength
      • Signing Algorithm
      • Certificate Risk Report Profile
      • PKI Posture Management
      • NDES Health Information
    • AI Assistant
      • Chat
      • Configuration
      • Usage Report
    • Inventory
      • Overview
        • Overall
        • CertSecure
      • Template Management
        • Switch Templates
        • Exclusion List
        • Alert Templates
        • Certificate Templates
      • Template Categories
    • Discovery
      • Inventory
      • Scan Config
      • Cloud Config
      • Vault Config
      • Discovery Analytics
      • Scan Details
      • Discovery Ingestion
    • Reports
    • Utilities
      • ACME
      • Tasks
      • Integrations
        • Renewal Manager
        • Load Balancers
        • Discovery Agents
        • CLI Tool
        • Key Management
        • SEIM Tools
        • DevOps Tools
        • Ansible Automation Platform
      • NDES
      • Azure Key Vault
      • API Tokens
    • Enrollment
      • Certificate Request
      • Generate CSR
      • Enroll CSR
      • Generate Certificate
      • Import Certificate
      • Bulk Certificate Generation
      • Manage Policies
      • Organization Details
    • Administration
      • Users
      • Roles and permission
      • Certificate Authorities
      • Departments
    • Miscellaneous
      • Logging
      • Service Setup
        • Zoom
        • Zendesk
      • Settings
        • Configure Realms
        • Schedule Alerts
        • Metrics
        • Web Branding
        • About License
  • Setup & Architecture
    • Identity and Access Control
    • Architecture
    • Installation
      • Pre-requisites
      • Windows
      • Linux
      • Docker
    • Upgrade
      • Windows
      • Docker
  • Release Notes
    • Releases for 2026
      • v3.4.0
      • v3.3.1
      • v3.3.0
    • Releases for 2025
      • v3.2.0
      • v3.1.0
    • Releases for 2024
      • v3.0.0
  • Workflow
    • Approval Workflow
  • API Reference
    • Getting Started
    • Authorizing Requests
    • Securing API Access
    • Request and Response Conventions
    • Endpoint Reference
      • Health
      • API Token Management
      • CA Management
      • Templates
      • Certificate Enrollment
      • Inventory
      • Certificate Discovery
      • Tasks
      • Watcher Groups
      • Alerts
      • Reports
      • Logs
      • Monitoring
      • Scheduling
      • SMTP
      • ACME
      • Azure Key Vault
      • Google Cloud (GCP)
      • HashiCorp Vault
      • EJBCA
      • ServiceNow
  • Integration Guide
    • Renewal Manager
      • Workflow
      • Setup
      • Troubleshooting
      • IIS
      • Apache
      • Tomcat
      • Nginx
      • MSSQL
      • MongoDB
      • Oracle
      • Cloudflare
      • AudioCodes
      • Cisco ISE
      • Palo Alto PAN-OS
      • Cisco ACI
    • Load Balancer
      • F5
        • Workflow
        • Setup
        • Onboarding
        • UI Guide
        • Troubleshooting
      • NetScaler
        • Workflow
        • Setup
        • UI Guide
        • Troubleshooting
    • Certificate Authorities
      • ACME CAs
      • AWS
      • DigiCert Connector
      • EJBCA
      • GlobalSign
      • GoDaddy
      • HashiCorp Vault PKI
      • Microsoft AD CS
      • Sectigo
      • Sectigo-PS
    • Ansible Automation Platform
    • Azure Key Vault
  • Discovery Agent Setup Guide

Certificate Authorities

Certificate Authorities

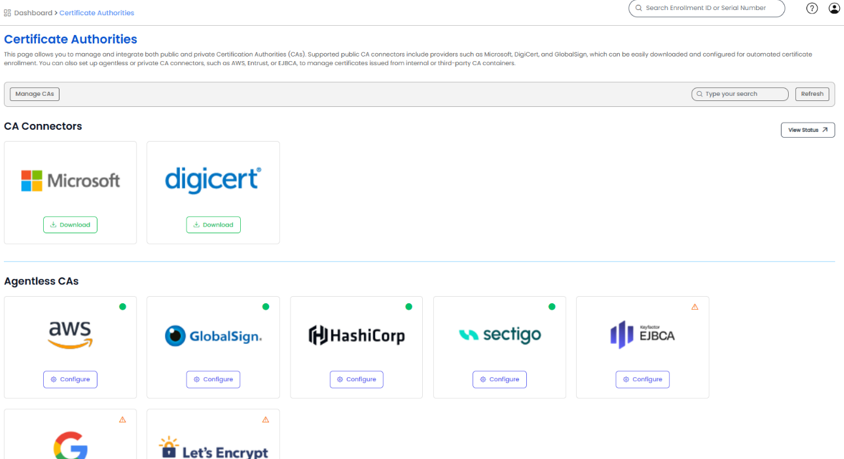
The Certificate Authorities section lists all Private and Public Certificate Authorities (CAs) integrated with CertSecure Manager. A connector for a CA can be downloaded by clicking on the Download button. These connectors enable automated certificate lifecycle operations in CertSecure Manager, ensuring seamless issuance, renewal, and management across different CA environments.

In the Agentless CAs section, you can configure integrations with Certificate Authorities that don’t require a connector, such as EJBCA, Sectigo, HashiCorp, GlobalSign, Google, LetsEncrypt, or AWS CA, enabling direct communication for certificate issuance and management.

Note: The Agentless CAs section shows one tile for each CA type that CertSecure Manager connects to directly: AWS-ACM, Sectigo, Sectigo-PS, LetsEncrypt, EJBCA, GooglePublicCA, HashicorpVault, GlobalSign, GoDaddy and ACME. The AWS-ACM tile configures both AWS Public CA (AWS-ACM) and AWS Private CA (AWS-PCA). MSCA and Digicert are agent-based CAs and need a connector to be downloaded.

Each tile shows the state of its CA type in the top corner and has a Configure button. Hover over the icon to see the state:

Tile state Meaning
Configured At least one CA of this type is configured.
Not Configured The CA type is covered by the license but no CA of this type has been configured yet.
Not included in license The active license does not cover this CA type. The tile is greyed out and its Configure button is disabled.
Note: A CA whose type is no longer covered by the license is parked, not deleted. It disappears from CA Management and is restored with its settings when the license covers the CA type again. GoDaddy, GlobalSign and Sectigo each use a single license entry that covers both of their connectors (GoDaddy SSL and GoDaddy Automated SSL, GlobalSign and GlobalSign Atlas ACME, Sectigo and Sectigo-PS).
Connectors Table

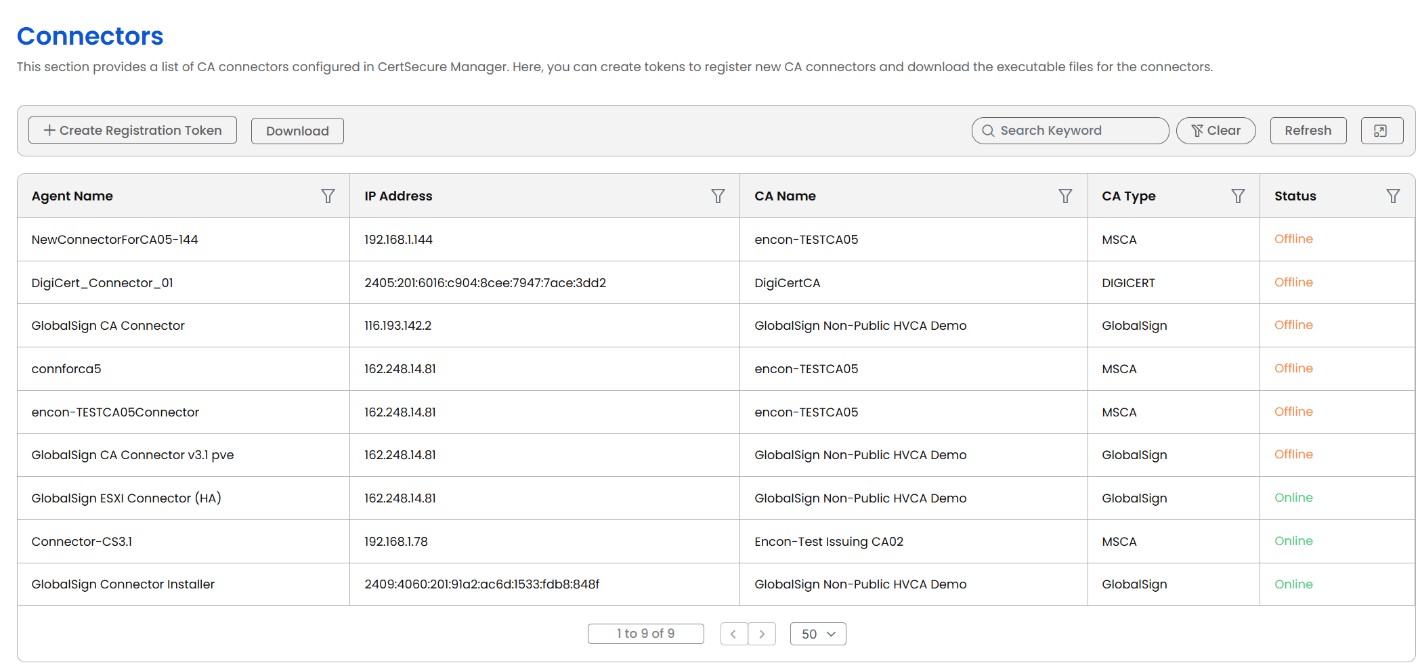
Once a connector is downloaded, you can register it by clicking on the View Status button. Once the connector is configured, it will appear here.
Connectors Table

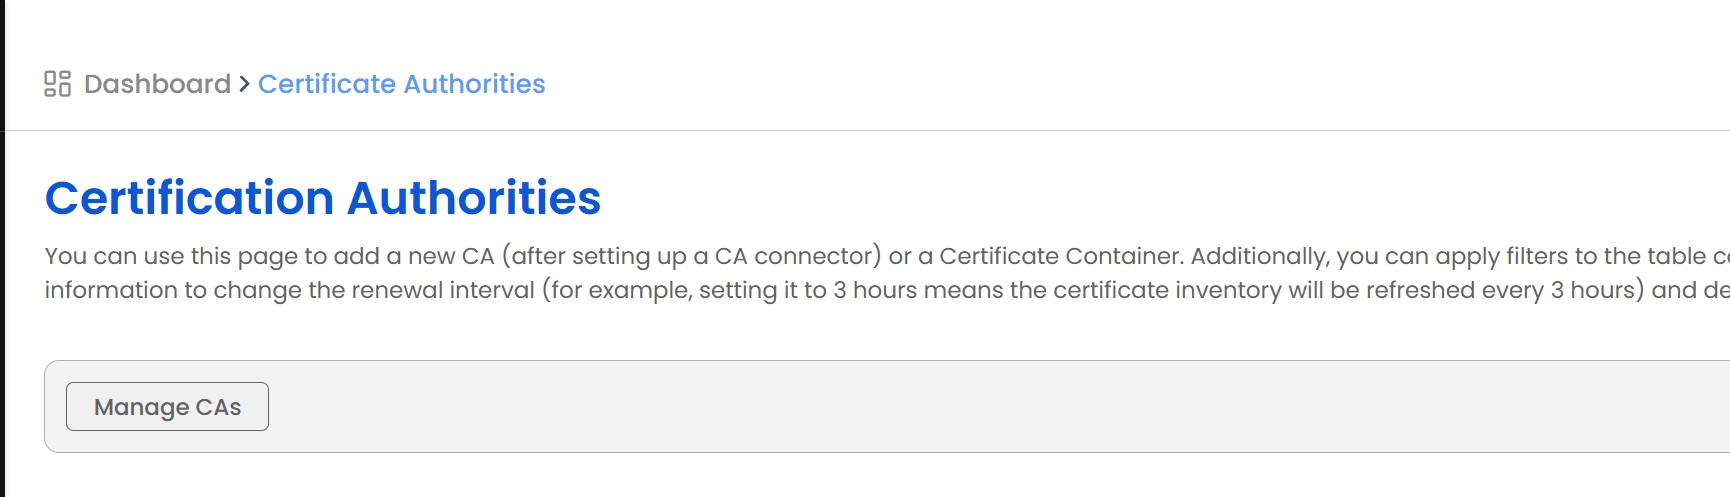
If the connector corresponds to a CA registered with CertSecure Manager, you can integrate the CA by going to Administration > Certificate Authorities > clicking Manage Cas. This opens the page to manage all Certificate Authorities registered with the CertSecure Manager. Click the Add CA button, then provide the required details, and then you can see your registered CA in the table.
Certificate Authorities

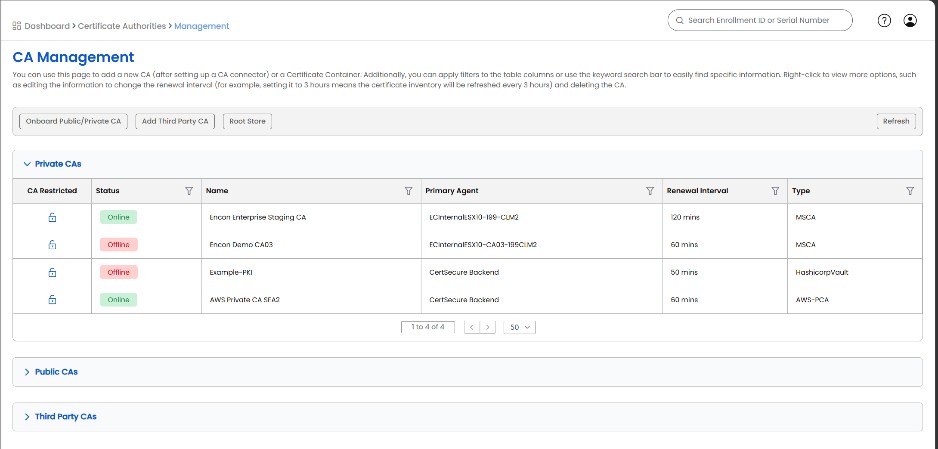
The CA Management section allows you to manage the Certificate Authorities (CAs) used by your organization. This settings console is accessible only to the admin and PKI admins, who can register new CAs.

Within the CA Management section, you can view and add the certificate authorities that your organization utilizes. At the top of the page, there is an "Onboard Public/Private CA" button, which, when clicked, presents options for providing the CA Name, selecting the type of CA, and specifying the Renewal Interval Time.

The CA Management section displays various details for enrolled certificate authorities, including the Name of the CA, Type of CA, and Renewal Interval. You can right-click for more options.

The Renewal Interval refers to the number of minutes after which the inventory of certificates is refreshed.

The right-click menu of a CA in the table also contains a Notifications action. It opens the Manage Notifications dialog described under Notifications below.

Onboarding an Agentless CA

Most agentless CAs are configured from their tile with the same steps. HashiCorp Vault, EJBCA and Sectigo-PS have their own dialogs without a default template; see HashiCorp Vault PKI, EJBCA and Sectigo-PS.

  1. Select Configure on the tile of the CA type.
  2. Enter the Name, an optional Description and the connection details of the CA, such as the API key and secret, or the directory URL and the External Account Binding credentials of an ACME CA.
  3. Under Default Certificate Template, select the test button. It reads Test credentials, Test credentials & read account, Test credentials & read authority, Test credentials & read policy or Read directory & policy, depending on the CA type. CertSecure Manager contacts the CA with the values entered, confirms that the CA accepts them, and loads the choices the account offers, such as products, validity periods and key types.
  4. Complete the template fields that appear and select Submit, Add or Save, depending on the CA.
Note: The Default Certificate Template is marked Required. A CA is always registered together with a certificate template, so the certificates found by its first inventory synchronization are tagged with a template straight away and certificate requests can be made as soon as the CA is added. The fields are the same as in Add Template under Certificate Templates, and the template can be changed there later. The template fields appear only after the credentials have been tested, because the allowed values depend on the account. CertSecure Manager checks the template against the CA's own policy when the CA is submitted and rejects a template the CA cannot issue.
Note: AWS Public CA (AWS-ACM) does not issue from a template, so its dialog shows the message "This CA does not issue from a template." instead of template fields. For AWS-PCA, select the Region, then List Private CAs to choose the Private CA, then Test credentials & read authority.

AWS regions: the Region list includes AWS GovCloud (US-West) and AWS GovCloud (US-East). For these regions CertSecure Manager automatically uses the arn:aws-us-gov partition for AWS Private CA template ARNs.

Managing a Configured CA

Each CA type page lists the connections that have been configured. The right-click menu of a connection offers the following actions:

Action Description
View Details Shows the stored configuration of the connection. Secrets are never displayed.
Check Credential Tests the stored credential against the CA immediately and reports the result in a notification: Credential accepted, Credential rejected, or Could not be checked.
Edit Opens the same dialog used for onboarding, titled Edit followed by the CA name. Leave a credential box empty to keep the stored value. Save Changes is available only after the credentials have been tested in the dialog (Test the credentials first).
Decommission Retires the connection. A decommissioned connection is listed only while the toggle for decommissioned connections is switched on.
Restore Shown for a decommissioned connection only. Re-creates the CA from a configuration you enter, keeping its name so that it reattaches to the certificates it already issued.
Note: The CA name, the CA type and the connector cannot be changed by editing. To use a different identity, decommission the CA and add a new one.
Note: If you change the endpoint of a CA (the API base URL, the directory URL or the customer URL), you must enter its secrets again. A stored credential is only ever sent to the endpoint it was saved for.
Credential Status

The Credential column of each CA type page (labelled Account for ACME CAs) shows whether the CA still accepts the credential that is stored for it. Previously a CA read as configured as soon as a credential had been entered, even after the key had been revoked or had expired.

Status Meaning
Configured The CA accepted the credential.
Expired The CA rejected the credential. Requests to this CA fail until the credential is replaced.
Unverified The credential could not be checked, for example because of a timeout or a network problem. This does not mean the credential is wrong.
Not set No credential has been configured for the CA.

Hover over the status to see the reason the CA gave and the time of the last check. The status is updated when the CA is onboarded, when a credential is edited, on every background refresh cycle (about every 50 minutes) and whenever Check Credential is selected.

Note: Only an answer from the CA itself turns the status to Expired. A timeout or a temporary CA error leaves it as Unverified.
Notifications

Select Notifications from the right-click menu of a CA in the CA Management table to open the Manage Notifications dialog for that CA. The dialog is titled Manage Notifications followed by the CA name. For each level of the CA chain that has been reported for the CA (Root CA, Intermediate CA and Issuing CA) it shows four switches:

Notification Sent when
PKI Health PKI health data for the CA is missing or corrupted.
Certificate Expiry A CA certificate at that level is close to expiry.
CRL Expiry The CRL published for that level is close to expiry.
CDP/AIA Outage A CDP or AIA location for that level cannot be reached.

Turn a switch off to stop that notification for that level. Select Submit to save, or Cancel to close the dialog. Submit is enabled after at least one switch is changed. All notifications are on by default, so CAs that existed before this setting keep alerting as before.
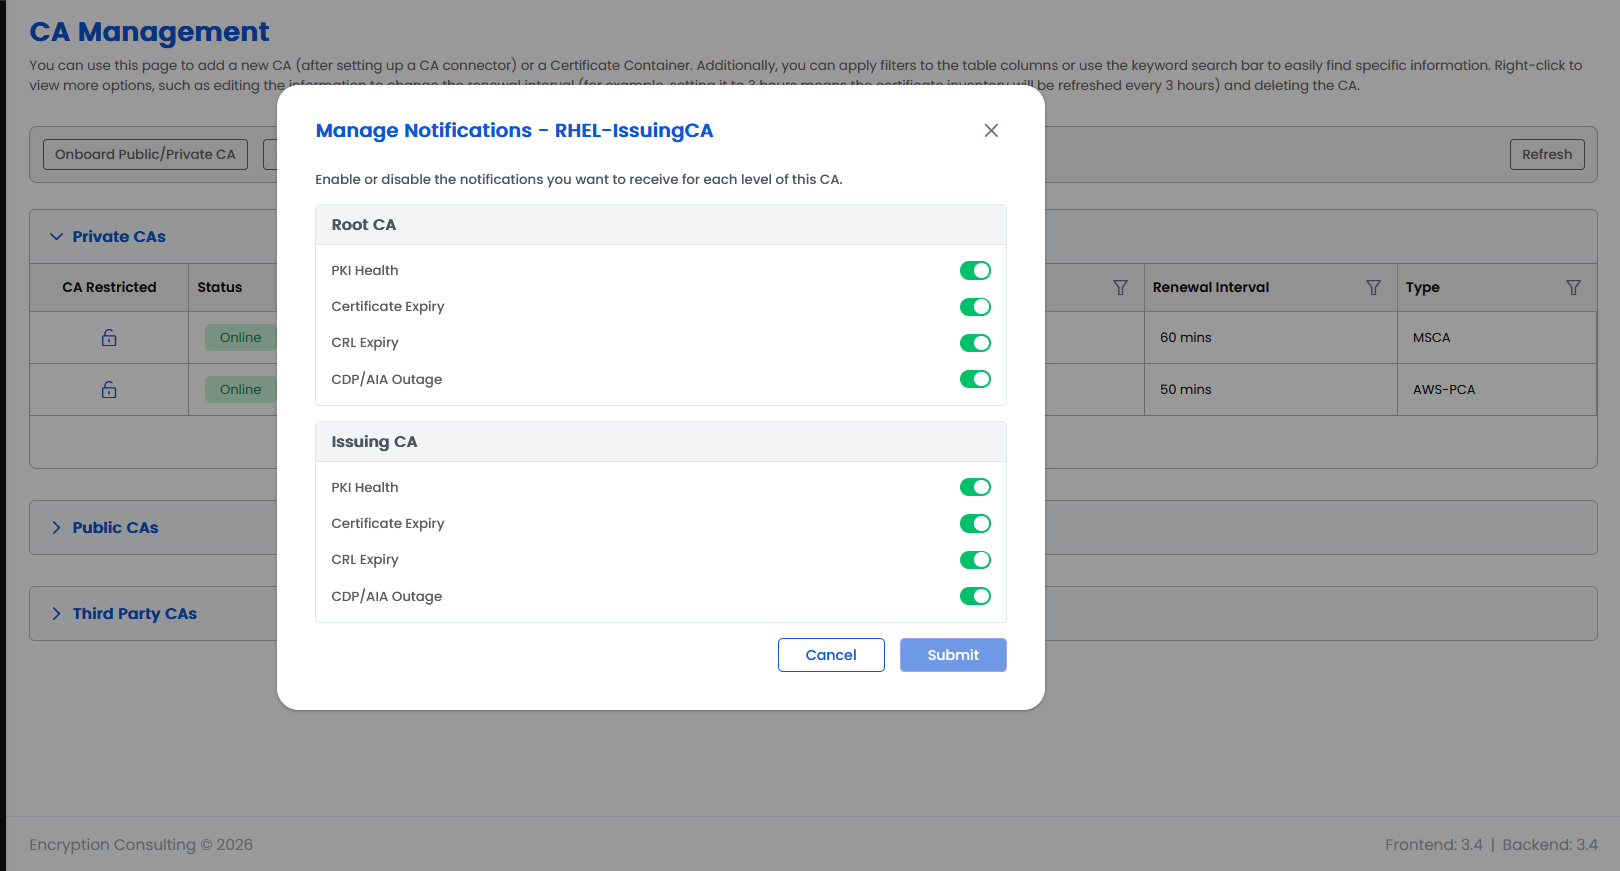
Manage Notifications dialog of a CA
Note: PKI Health information, and the notifications built on it, exist only for Microsoft CA (MSCA) and AWS Private CA. Other CAs, including public CAs, do not report PKI Health data. If no setting is available for a CA, the dialog shows "No notification setting is available for this CA". The CA heartbeat that sets Online or Offline in the Status column is separate from PKI Health and is not limited to these CAs.
Add Third Party CA

The Add Third Party CA section allows users to create and manage designated storage locations (containers) for certificates imported into the inventory. These containers help organize certificates based on specific criteria, such as purpose, department, or security level, ensuring streamlined management and accessibility.

Each container acts as a logical grouping, making it easier to track, manage, and apply policies to stored certificates. Users can assign permissions to different roles, ensuring that only authorized personnel can access or modify the certificates within a container. This feature enhances security, improves organization, and simplifies certificate lifecycle management.
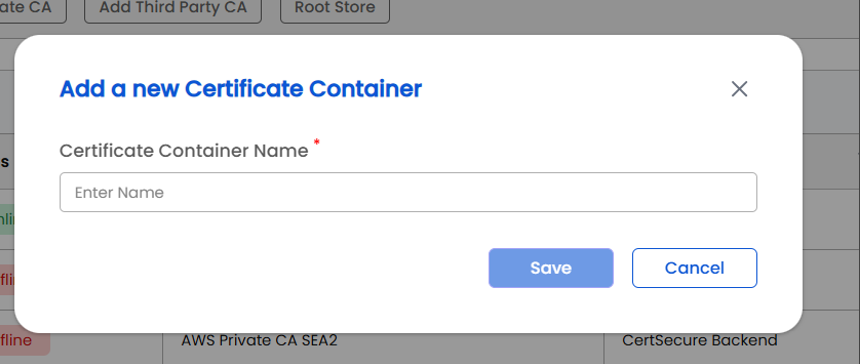
Add a new Certificate Container
Root Store

The Root Store provides a dedicated area to view and manage Trusted Root Certification Authorities within CertSecure Manager. It maintains the set of root CAs that the platform relies on to validate certificate chains issued by enterprise CAs as well as third-party trust anchors, ensuring that every certificate surfaced in the inventory can be traced back to a recognized and trusted root.
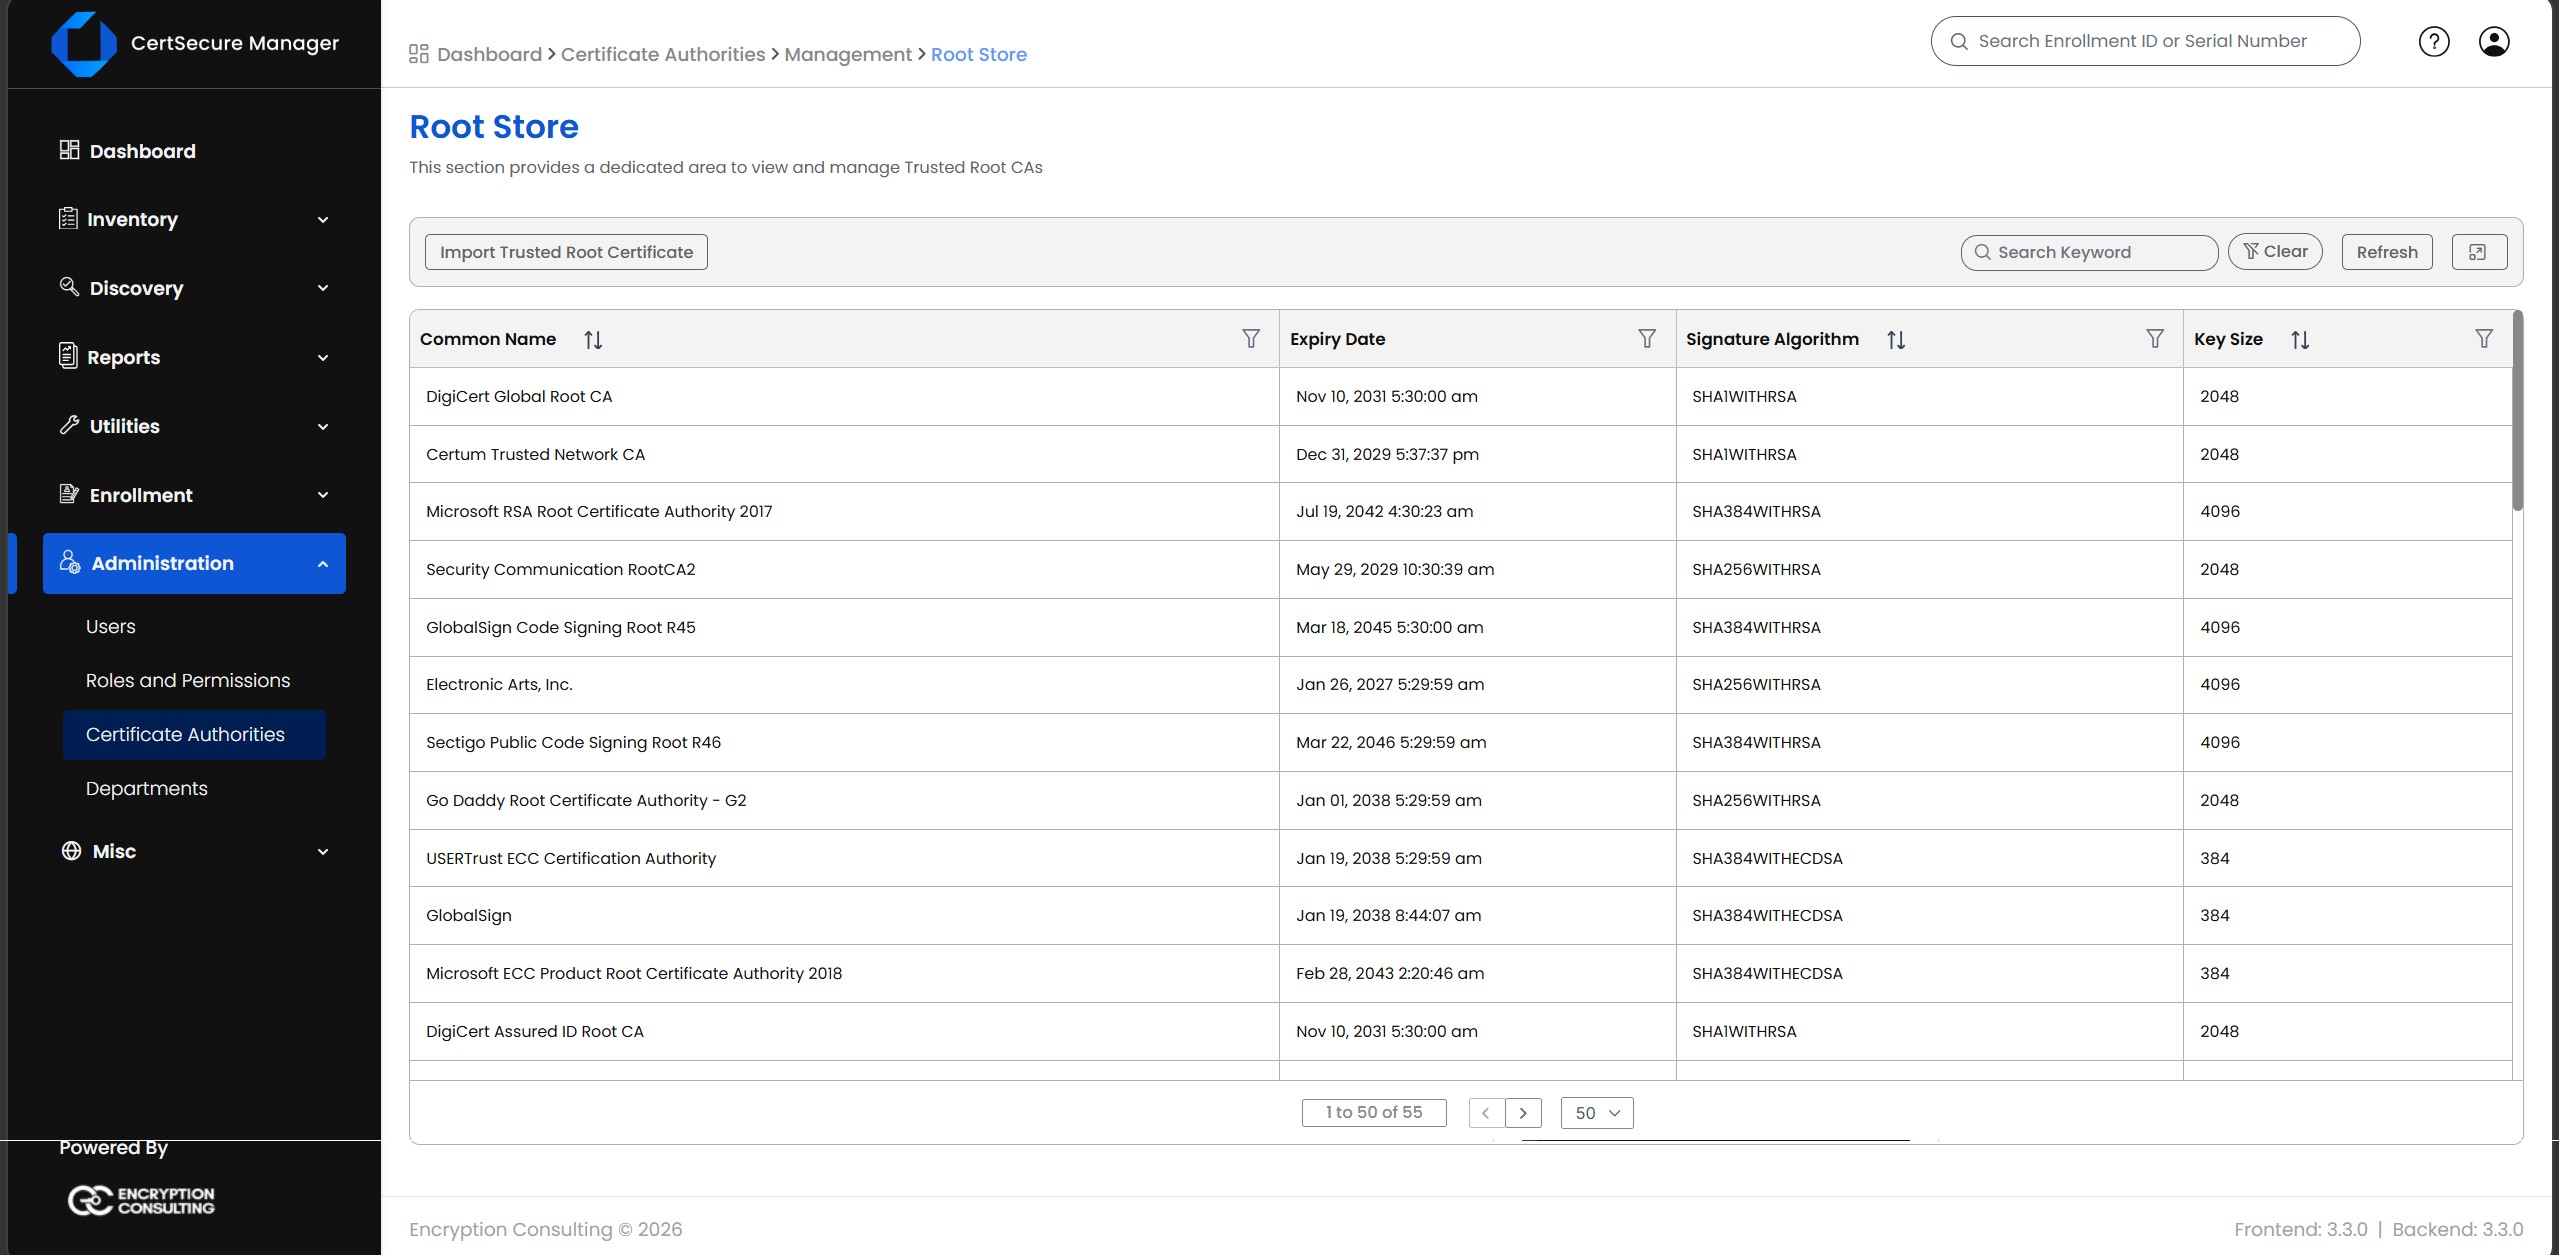
Import Certificate
Note: The Root Store is filled from the trust store of public root CAs that is installed with CertSecure Manager, so it does not need internet access and a new public root arrives with a product update. A root that you delete is marked as removed and is not added back by later updates. A bundled root that the public trust program later withdraws is kept for history and marked as distrusted, and chains that end only at it are no longer reported as trusted. Roots that you import yourself, for example an enterprise root, are never marked as distrusted because they are missing from the public store.
On this Page:
Support Privacy Policy Terms of Service

Copyright 2026 Encryption Consulting LLC. All rights reserved.