Renews certificates bound in IIS and updates the site bindings automatically.
Supported operating system(s): Windows
only.
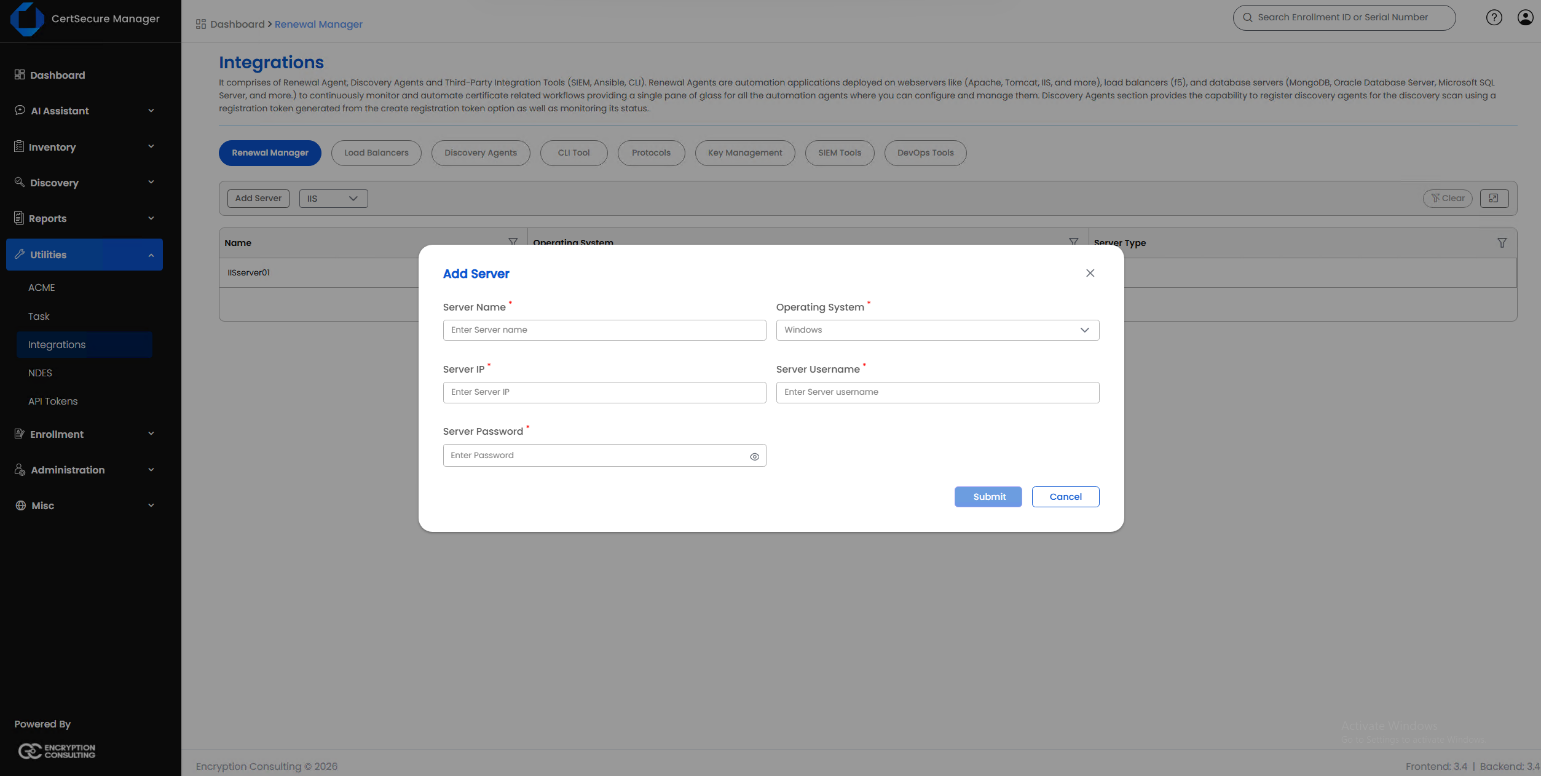
Adding an IIS Server
On the Renewal Manager tab, click Add Server (or click the IIS tile in the
connector grid).
Fill in the fields below.
Click Submit.
Field
Applies to
What it means
Server Name
Required, Add only
A unique display name for this server. Cannot be changed later.
Maximum 50 characters.
Operating System
Fixed to Windows
IIS only runs on Windows targets.
Server IP
Required
The IPv4 address CertSecure uses to reach this server.
Server Username
Required
The WinRM account used to connect to this server.
Server Password
Required
The password for Server Username. Stored encrypted. On Edit,
leave blank to keep the existing password.
IIS Server List Actions
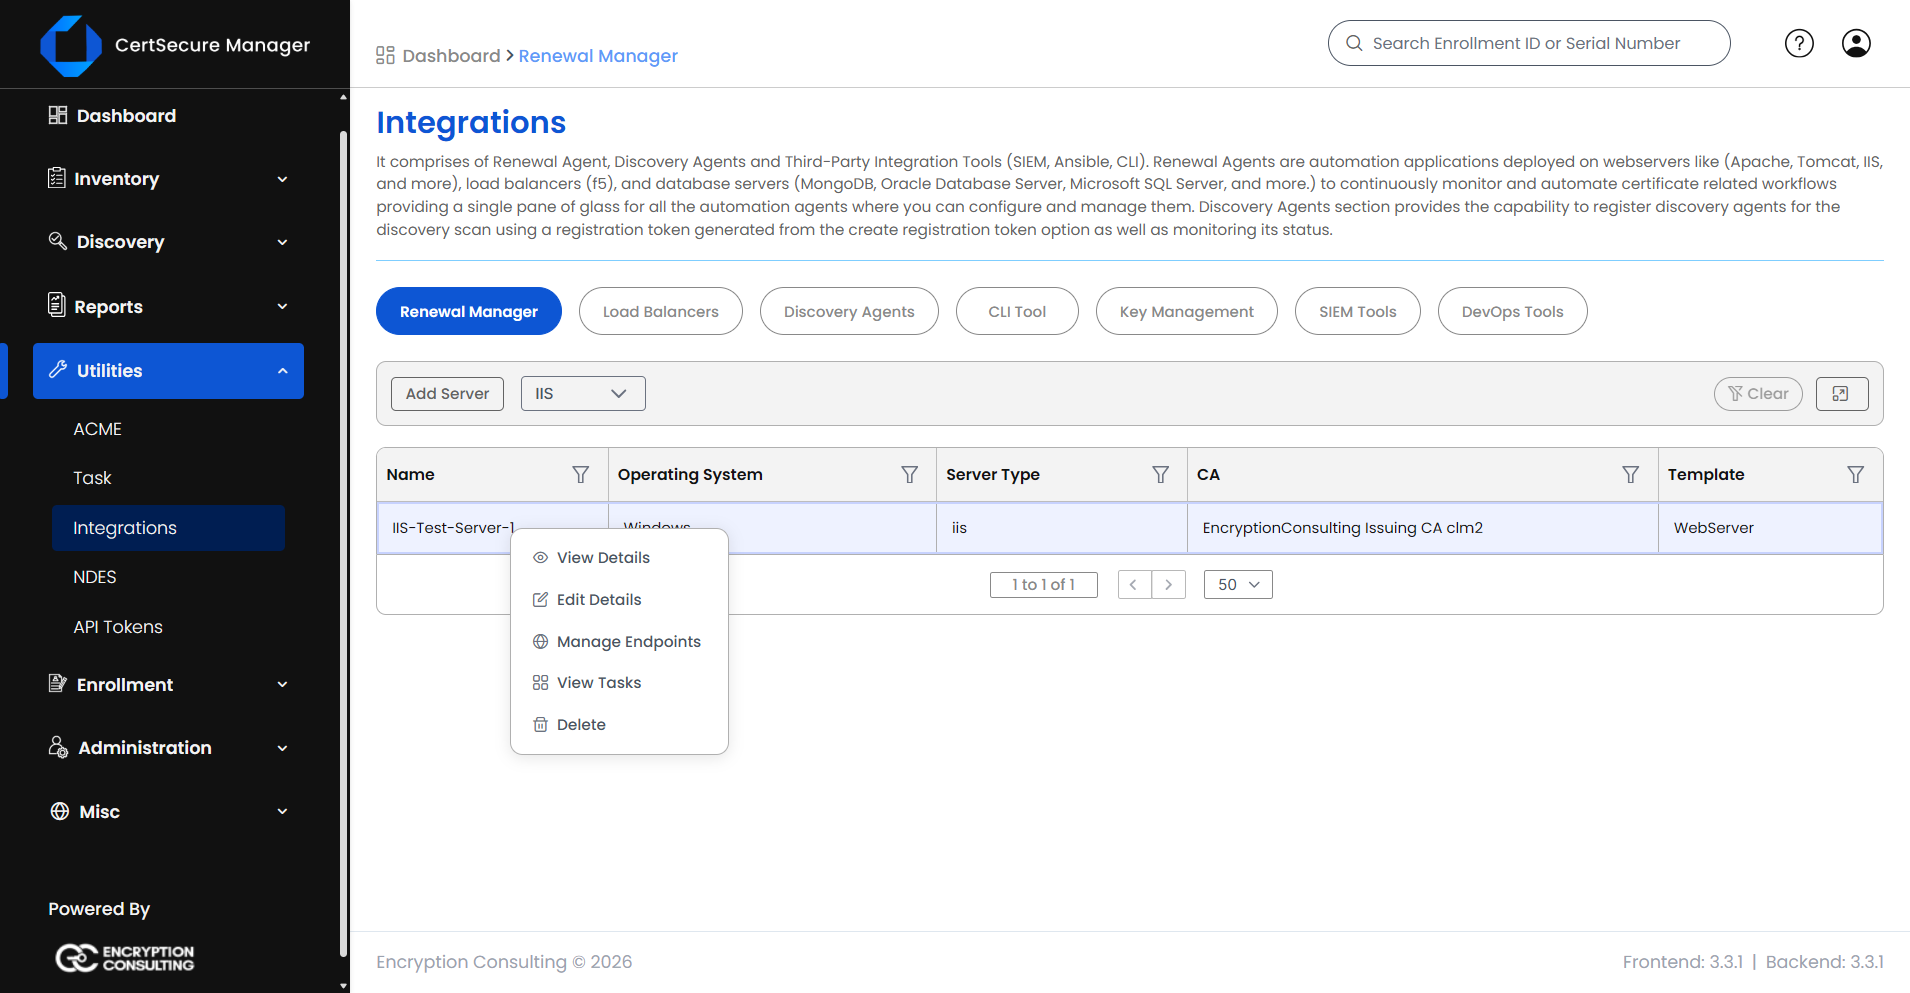
Right-click a server row (or open its actions menu) to see:
View Details – opens a read-only
summary of the server's configuration.
Edit Details – reopens the Add Server form pre-filled, so you can update credentials.
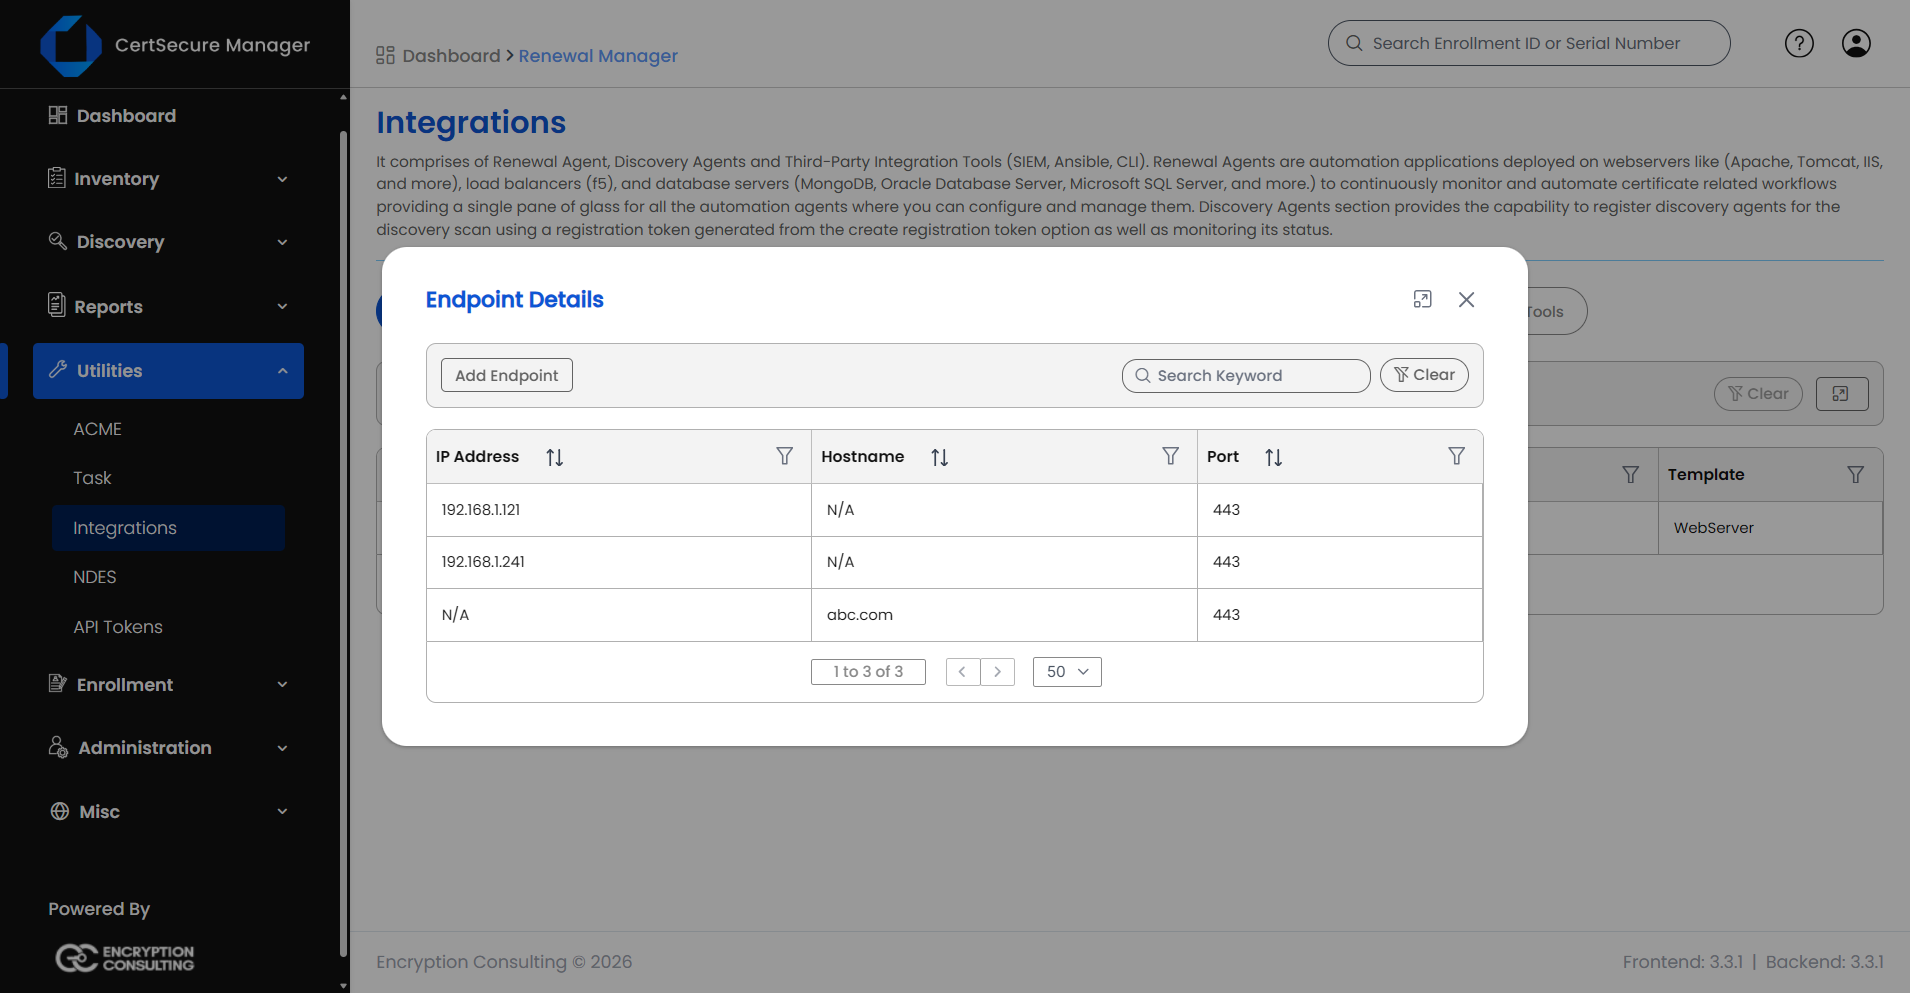
Manage Endpoints – opens the endpoint
list for this server.
Push Certificate – issues a new certificate for this server and installs it in the Local Machine Personal certificate store, without changing any site binding. See Pushing a Certificate.
View Tasks – opens the task history for
this server.
Delete – deletes the server after a
confirmation prompt. Deleting a server also removes every endpoint added
under it.
Adding an IIS Endpoint
From the server list, open Manage Endpoints on the server (right-click →
Manage Endpoints).
Click Add Endpoint.
Fill in the fields below.
Click Submit.
Field
Applies to
What it means
Certificate Authority
Required
The CA that will issue renewed certificates for this endpoint.
Template
Required
The certificate template/profile to request from the selected CA. Options depend on the CA chosen.
Address Type
Required
Whether you will identify this endpoint by IP Address or by Hostname.
IP Address / Hostname
Required
The exact address of the TLS service to watch.
Port
Required
The TCP port the TLS service listens on, for example 443.
Owner
Required
The person responsible for this endpoint. Select an organization user from the list.
Organization ID
Only when CA = DigiCert
The DigiCert organization ID to request the certificate under.
Order Validity
Only when CA = DigiCert
How many days the requested certificate should be valid for.
Endpoint Actions
From the endpoint list, use the row actions (right-click or the actions menu)
to:
View Details – opens a read-only summary of the endpoint.
Edit Details – reopens the Add Endpoint form pre-filled, so you can change the certificate settings (Certificate Authority, Template, Owner) and the other endpoint details. The address type, IP address / hostname and port cannot be changed; delete the endpoint and add it again to change them.
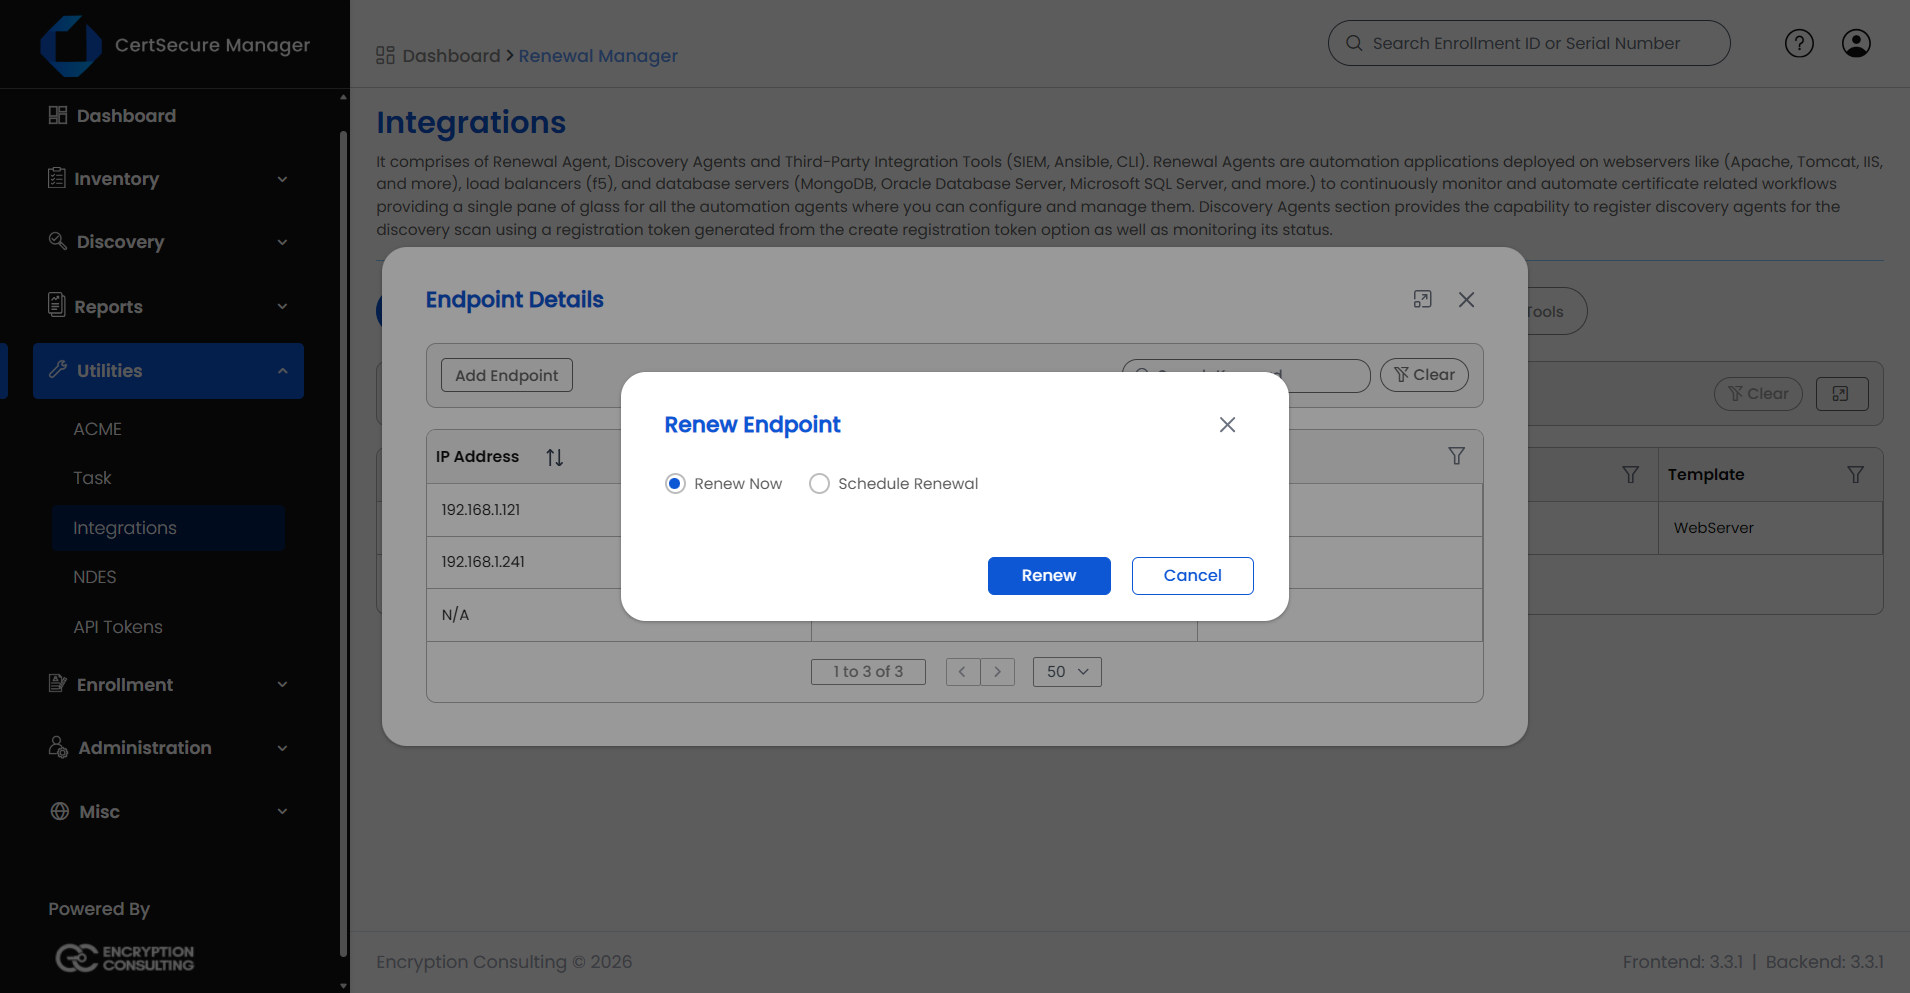
Renew – opens the Renew Endpoint dialog. Available only while automation is disabled for the endpoint.
Delete – removes this endpoint from the server. It does not affect other endpoints on the same server.
Open Manage Endpoints on the server, find the endpoint, right click and
choose Renew.
Pick one of:
Renew Now – queues the renewal immediately.
Schedule Renewal – pick a date and time at least 30 minutes from now
using Enter Schedule Time.
Click Renew (or Schedule if you chose to schedule it).
Before you can renew manually:
The Renewal Manager Agent must be Online.
Automation must be disabled for that endpoint (see Automatic Renewal). While automation is enabled for an endpoint, its Renew option is unavailable.
The endpoint must already exist under the server. Add it first if it
does not.
What Happens When You Renew
The agent generates a certificate request directly on the IIS server
(private key never leaves the server).
It submits the request to your configured CA and receives the new
certificate.
It imports the new certificate into the Local Machine Personal certificate
store, then finds every IIS binding currently using the old certificate by
matching the certificate that is live on the wire, and rebinds those
bindings to the new certificate.
Restart is not needed as IIS automatically serves the renewed cert to the
new connections.
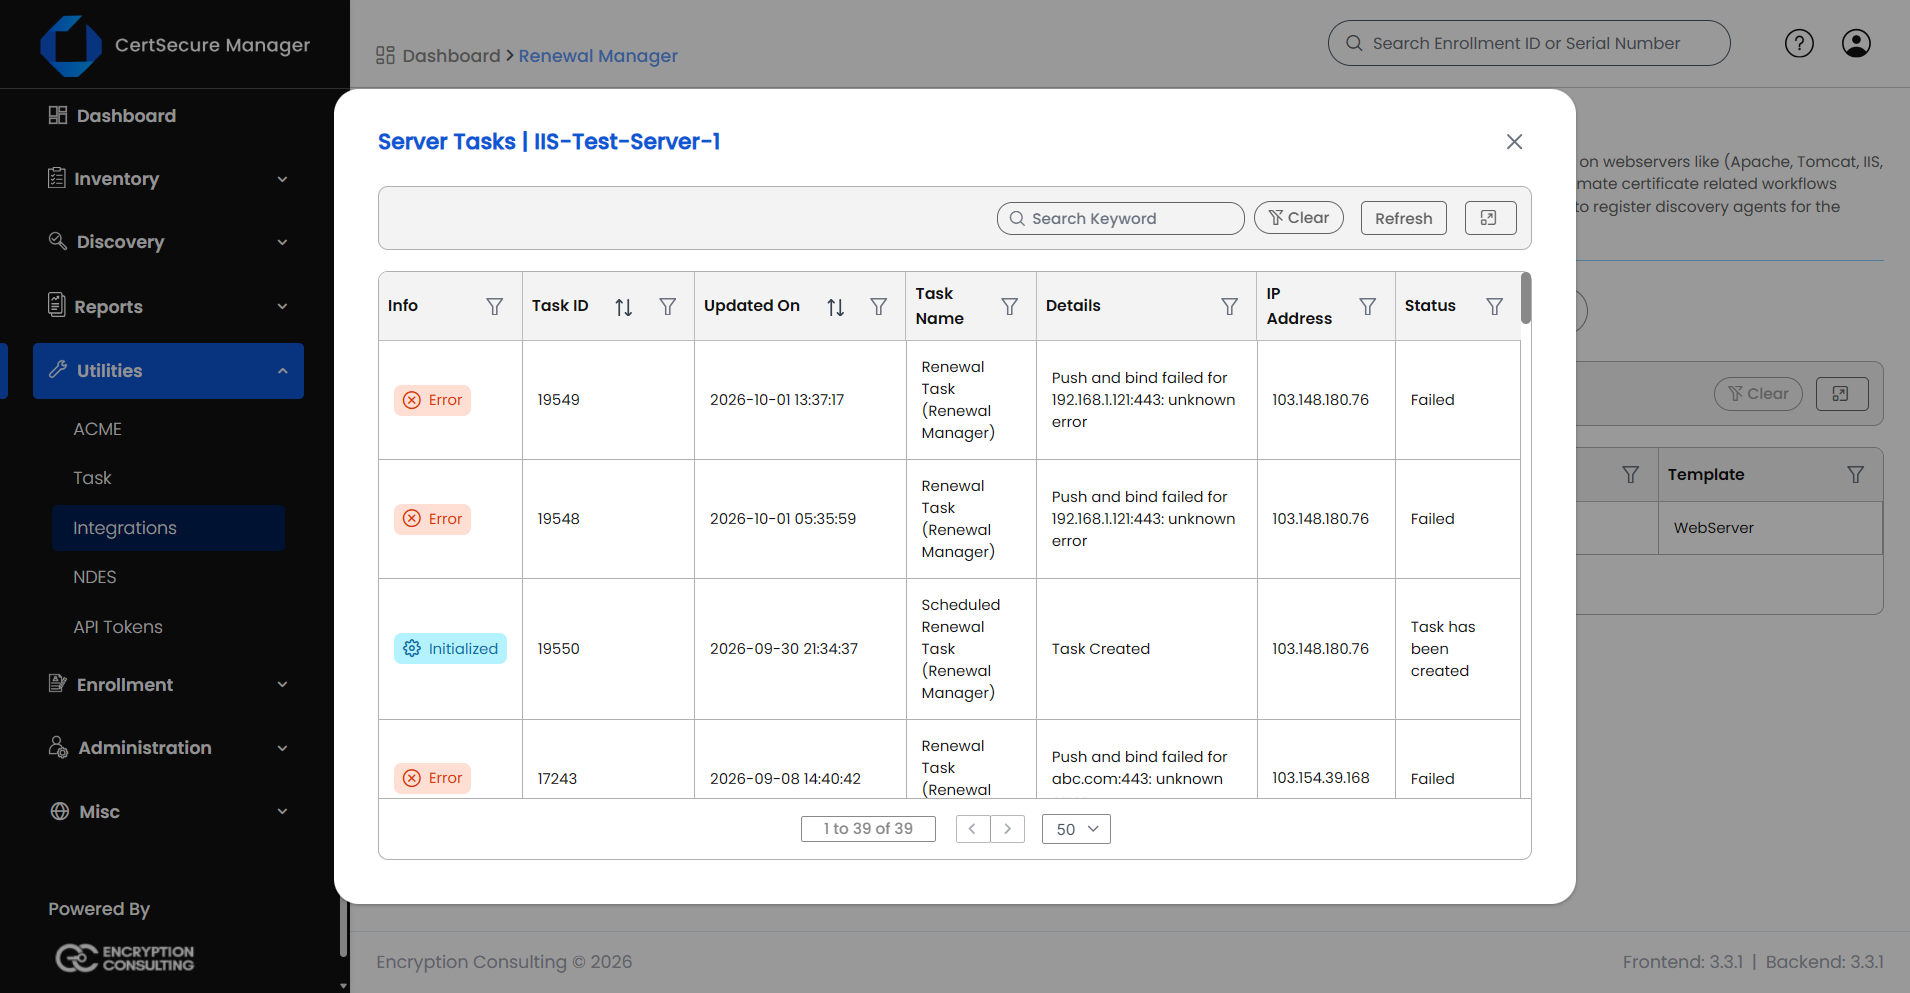
Viewing Tasks
Here’s how to check renewal progress:
Right-click a server → View Tasks.
Use Search Keyword, the column filters, or Refresh to find a specific task.
Task Columns
Column
What it shows
Info
A colored status badge: OK, ERROR, PROCESSING, PENDING, INITIALIZED,
or WARNING.
Task ID
The unique ID of this task.
Updated On
When the task status last changed. Filterable by date.
Task Name
What kind of task this is, for example a renewal or a scheduled TLS scan.
Details
A short description of the current status or the last error.
IP Address
The endpoint address(es) involved.
Status
The current status text.
Task Status Meanings
INITIALIZED – the task was just created
and is queued.
PENDING – waiting for the agent to pick
it up.
PROCESSING – the agent is actively
working on it.
OK – completed successfully.
WARNING – completed, but with something
worth checking.
ERROR – failed. Check Details for the
reason.
Before You Start
No Certificate Path, Key Path, or IIS site name needs to be entered. The
agent finds the binding automatically by matching the certificate currently
being served.