
Build the Root CA
EC builds the customer's trust anchor as an offline, standalone AD CS Root CA. The Root CA signs only subordinate (Issuing) CA certificates and its own CRL; it never issues user, device or server certificates. It is powered on only for controlled signing or CRL publication, which keeps the trust anchor out of reach of network attacks. The steps below are the high-level procedure EC follows. All names, validity periods, algorithms, URLs and HSM settings come from the approved Client Intake Form and PKI design.

Step 1: Prepare the server
Prepare and harden a dedicated Windows Server for the Root CA. Keep it outside any domain and restrict its network access according to the offline Root CA operating procedure. Install the approved HSM client software and confirm that the designated HSM partition is available before any key is generated.
Step 2: Create CAPolicy.inf
Create the file C:\Windows\CAPolicy.inf before installing AD CS. The file defines the renewal key length, the renewal validity and other CA policy settings.
[Version]
Signature="$Windows NT$"

[Certsrv_Server]
RenewalKeyLength=4096
RenewalValidityPeriod=Years
RenewalValidityPeriodUnits=20
AlternateSignatureAlgorithm=0
The values above are examples. The actual Root CA validity, key size, signing algorithm and renewal settings are taken from the Client Intake Form, the customer security and compliance requirements, and the agreed PKI design.
Step 3: Install and configure AD CS
- Open Server Manager > Manage > Add Roles and Features and select Active Directory Certificate Services with the Certification Authority role service.
- After installation, select Configure Active Directory Certificate Services on the destination server and complete the wizard as follows:
| Wizard page | Selection |
|---|---|
| Role Services | Certification Authority |
| Setup Type | Standalone CA |
| CA Type | Root CA |
| Private Key | Create a new private key |
| Cryptography | The approved HSM Key Storage Provider, key length (for example 4096) and hash algorithm (for example SHA-256) |
| CA Name | The Root CA common name from the Client Intake Form |
| Validity Period | The approved Root CA validity (for example 20 years) |
| Certificate Database | Default locations, unless the design specifies otherwise |
Because the HSM Key Storage Provider is selected, the Root CA private key is generated directly inside the EC datacenter HSM. After configuration, inspect the self-signed Root CA certificate and confirm Basic Constraints, key usage, name, validity, key size and signature algorithm against the design.
Step 4: Set CRL and validity periods
Run the following commands in an elevated Command Prompt. Delta CRLs are disabled for the Root CA because it issues very few certificates. ValidityPeriod sets the maximum validity of the Issuing CA certificate that the Root CA will sign.
certutil -setreg CA\CRLPeriodUnits 52
certutil -setreg CA\CRLPeriod "Weeks"
certutil -setreg CA\CRLDeltaPeriodUnits 0
certutil -setreg CA\CRLOverlapPeriodUnits 12
certutil -setreg CA\CRLOverlapPeriod "Hours"
certutil -setreg CA\ValidityPeriodUnits 10
certutil -setreg CA\ValidityPeriod "Years"
Step 5: Configure the CDP and AIA locations
Configure the CDP and AIA with the approved HTTP host name only. These URLs are written into every certificate the Root CA signs, so they are set before the Issuing CA is signed.
certutil -setreg CA\CRLPublicationURLs "1:C:\Windows\system32\CertSrv\CertEnroll\%3%8%9.crl\n2:http://pki.example.com/pki/%3%8%9.crl"
certutil -setreg CA\CACertPublicationURLs "1:C:\Windows\system32\CertSrv\CertEnroll\%1_%3%4.crt\n2:http://pki.example.com/pki/%1_%3%4.crt"
After the change, open the CA properties > Extensions tab and confirm that only the local path and the HTTP URL are listed for both the CDP and the AIA.
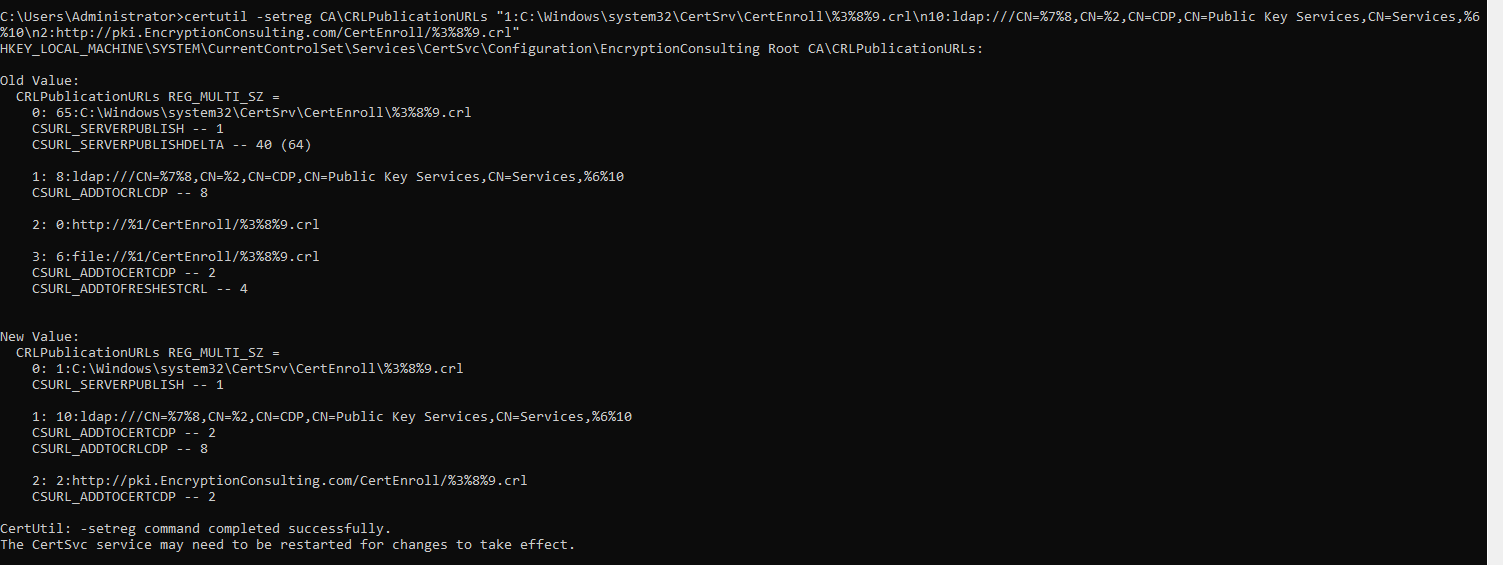
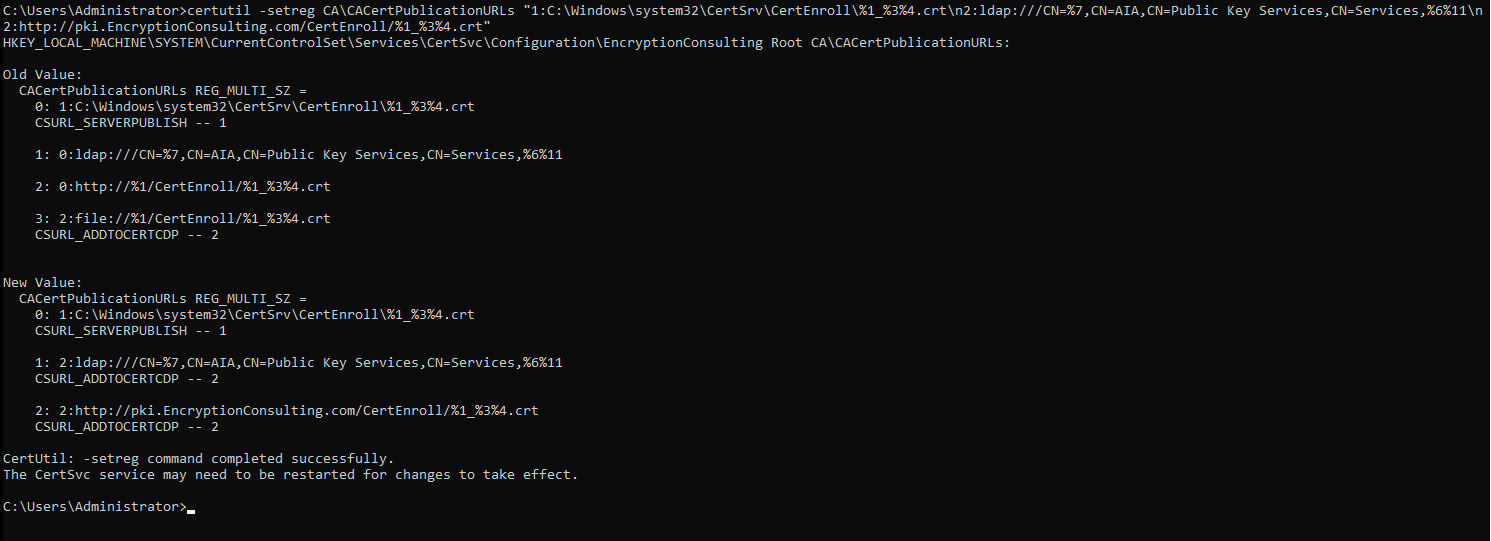
Why HTTP only, with no LDAP: in a standard AD CS design, CDP and AIA are also published to LDAP in Active Directory. In PKI-as-a-Service, the EC CA and the customer domain controllers are in different directories, so an LDAP path would point to a directory the customer clients cannot reach. HTTP is therefore the primary and only CDP and AIA location, served from Azure Blob Storage.
Step 6: Enable auditing and publish the first CRL
Enable CA auditing and Windows security auditing (Local Security Policy > Audit object access, Success and Failure), so that configuration changes, CRL publication and certificate issuance are recorded. Then restart the service and publish the initial Root CRL.
certutil -setreg CA\AuditFilter 127
net stop certsvc && net start certsvc
certutil -crl
Inspect the CRL and confirm its issuer, This Update, Next Update and CRL number.
Step 7: Publish the Root CA certificate and CRL
-
Go to
C:\Windows\System32\CertSrv\CertEnrollon the Root CA. This folder holds the Root CA certificate (.crt) and CRL (.crl).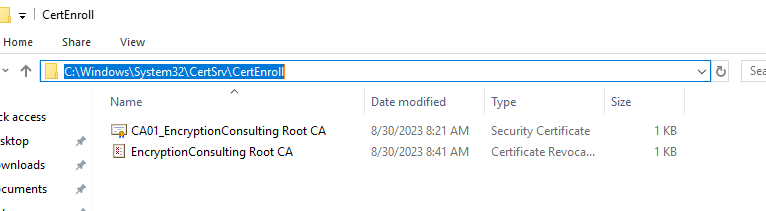
Root CA certificate and CRL -
Copy both files through the approved transfer process to the Issuing CA server (needed in Build the Issuing CA).
-
Upload both files to the Azure Blob Storage container: select Upload, browse to the files, select Overwrite if files already exist and select Upload.
-
From a customer-side client, open
http://pki.example.com/pki/<Root CA name>.crtand the CRL URL and confirm that both download.
Step 8: Sign the Issuing CA and take the Root CA offline
During a documented key ceremony, bring the Root CA online to review and sign the Issuing CA certificate request (see Build the Issuing CA, step 5). After the Issuing CA certificate is issued and all files are published, back up the CA database and the protected HSM recovery material, and return the Root CA to its offline state. It is brought online again only to renew the Issuing CA or publish a new Root CRL before the current one expires.