- Overview
- Reference Guide
- Setup & Architecture
- Release Notes
- Workflow
- API Reference
- Integration Guide
- Discovery Agent Setup Guide
This section explains how to install CertSecure Manager v3.3 on Windows Server 2025 with the CertSecure Manager Installer 3.3 wizard. The whole stack (backend, frontend, Keycloak and Nginx) is installed on a single server, and the installation runs offline.
The installation has four stages:
When the installation is finished, continue with First Login to create the administrator account and activate the license. To upgrade an existing installation, see Upgrade > Windows.
This section covers preparation, every page of the wizard, what the installer configures, and how to check the result.
It is written for system administrators who install and run CertSecure Manager. You should be comfortable with Windows Server administration, DNS, and TLS certificates.
The installer sets up the complete CertSecure Manager stack on one server. It works offline: every component is on the installation media, and no internet access is required.
Table 1: Installed Components
| Component | Purpose | Installed when |
|---|---|---|
| CertSecure Manager Backend | API server for certificate lifecycle management | Always (fresh install or upgrade) |
| CertSecure Manager Frontend | Web user interface, served by Nginx | Always (ships with the backend) |
| Keycloak | Identity server that handles sign-in and access control | Always, unless an existing Keycloak is reused |
| Nginx | Reverse proxy. Handles TLS on port 443 for the frontend, the API and Keycloak | Always |
| MongoDB Server and MongoDB Shell | Database for CertSecure Manager | Only if not already present |
| OpenSSL (64-bit) | Cryptographic toolkit used by CertSecure Manager | Only if not already present |
| Java (JDK) | Runtime required by Keycloak | Only if not already present |
| Python 3.12 | Runtime for the backend's Python environment | Only if the matching version is not present |
Note: All third-party components install silently. You do not need to click through separate MongoDB, OpenSSL, Java or Python setup wizards.
Users reach CertSecure Manager only through Nginx on port 443. Nginx picks the destination by host name, so the frontend, the API and Keycloak each need their own host name:
Table 2: Host Names and Routing
| Host name (example) | Nginx forwards to | Listens on |
|---|---|---|
| certsecure.com (frontend) | Static web UI files | Served directly by Nginx |
| api.certsecure.com (backend) | CertSecure backend | https://127.0.0.1:5000 (local only) |
| auth.certsecure.com (Keycloak) | Keycloak | https://127.0.0.1:8443 |
MongoDB listens on localhost:27017. The examples in this section use the host names above; replace them with your own.
Table 3: Requirements Checklist
| Requirement | Details |
|---|---|
| Operating system | Windows Server 2025 (Standard or Datacenter). These steps were validated on Windows Server 2025 Datacenter, build 26100. |
| Hardware | One server with at least 16 CPU cores, 16 GB RAM and 100 GB free disk space. |
| Account | A local or domain account in the Administrators group. The installer asks for elevation (UAC) when it starts. |
| .NET Framework | 4.7.2 or later. Windows Server 2025 includes this by default. |
| Port 443 | Must be free. If IIS or another web server is bound to 443, stop it or move it before you install. The installer stops at the Nginx step if port 443 is in use. |
| Ports 5000, 8080, 8443, 9000, 27017 | Must be free on the server. They are used locally by the backend, Keycloak and MongoDB. |
| Host names | Three different host names: frontend, backend (API) and Keycloak. See Plan Your Host Names. |
| TLS certificate | Optional at install time. You can replace the default certificate afterwards. See TLS Certificate. |
| Installation media | CertSecure Manager v3.3 - Windows Installation Suite.iso, about 2 GB. |
| Internet access | Not required. |
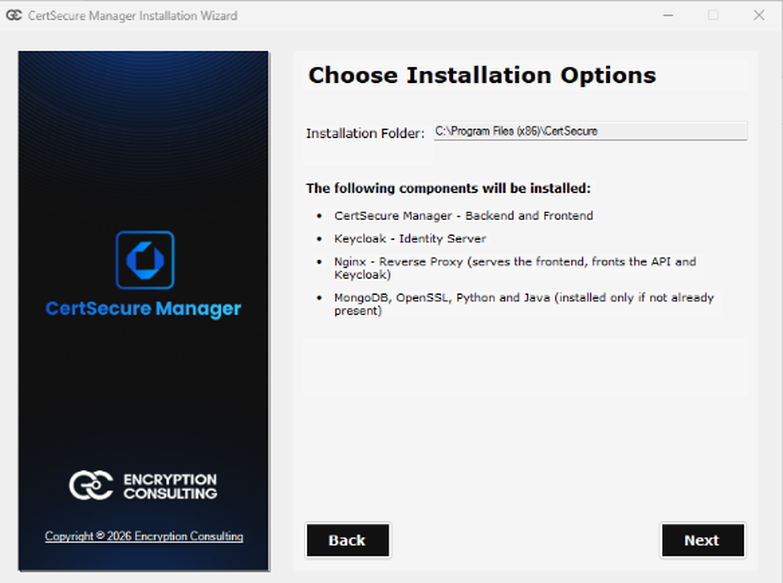
Important: The installation folder is fixed at C:\Program Files (x86)\CertSecure and cannot be changed in the wizard. Make sure drive C: has enough free space for the application, MongoDB data and logs.
For the configuration steps after installation, also have these ready:
Decide the three host names before you start. You type them on the Configure Server Settings page of the wizard.
Table 4: Host Name Settings
| Setting | Example value | Rules |
|---|---|---|
| Frontend URL | https://certsecure.com | Must be an absolute https URL. The port (if any) becomes the public Nginx port; 443 if omitted. |
| Backend URL | https://api.certsecure.com | Must use a different host name from the frontend. The port (if any) is the backend's local port; 5000 if omitted. |
| Keycloak URL | https://auth.certsecure.com | Must use https, have no port of its own, and use a host name different from the frontend and backend. |
| Keycloak realm name | auth.certsecure.com | Letters, digits, dot, dash and underscore only. |
Important: The wizard pre-fills https://localhost:443 and https://localhost:5000. These defaults share the same host name and are rejected. Replace them with your own host names.
Users' browsers and the server itself must resolve all three names to this server. The recommended approach for production is to create DNS A records (or CNAMEs) that point to the server's IP address.
During installation, the installer also checks name resolution on the server itself:
For a lab or a single-server evaluation, you can add the entries yourself before you install:
Add one line per host name, as shown below, and save the file.
127.0.0.1    certsecure.com
127.0.0.1    api.certsecure.com
127.0.0.1    auth.certsecure.com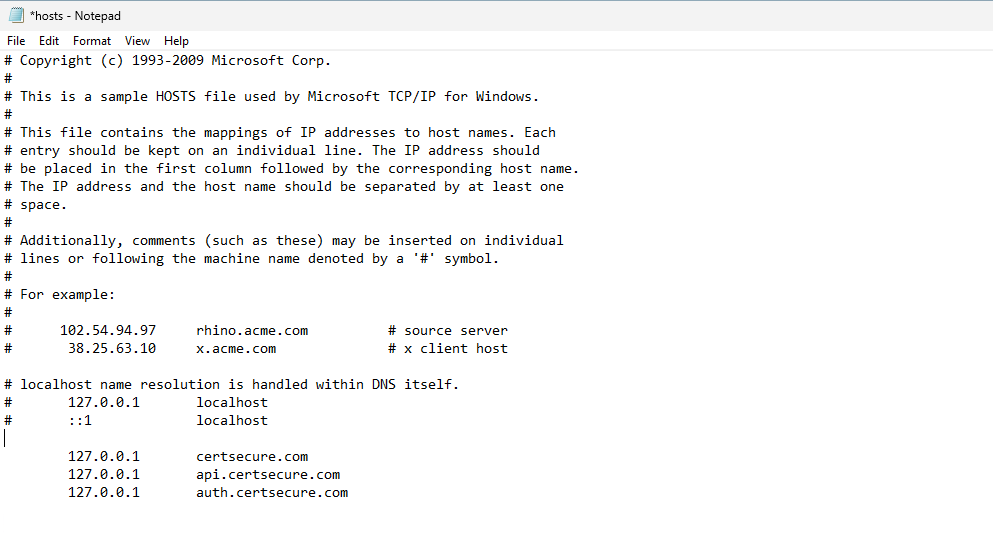
Note: Hosts file entries only affect the computer they are on. Client computers that browse to CertSecure Manager need DNS records or their own hosts file entries that point to the server's IP address, not 127.0.0.1.
Nginx terminates TLS for all three host names with a single certificate. The installer does not create a certificate. It uses the first certificate it finds, in this order:
On a fresh install, the certificate included in the package is used, so browsers may show a certificate warning. For production, replace it after installation with a certificate from your organization's CA. The certificate must cover all three host names, for example through Subject Alternative Names or a wildcard. Replace the TLS Certificate explains how.
Table 5: Ports Used
| Port | Used by | Exposure |
|---|---|---|
| 443 (TCP) | Nginx: frontend, API and Keycloak | Public. The installer adds an inbound firewall rule. |
| 5000 (TCP) | CertSecure backend (default) | Local only (127.0.0.1) |
| 8080 (TCP) | Keycloak HTTP | Local only (127.0.0.1) |
| 8443 (TCP) | Keycloak HTTPS (reached through Nginx) | No firewall rule is added. Keep it blocked inbound. |
| 9000 (TCP) | Keycloak health and management | Used locally for health checks |
| 27017 (TCP) | MongoDB | Local (default connection string) |
Port 80 is not used. There is no HTTP listener and no HTTP-to-HTTPS redirect.
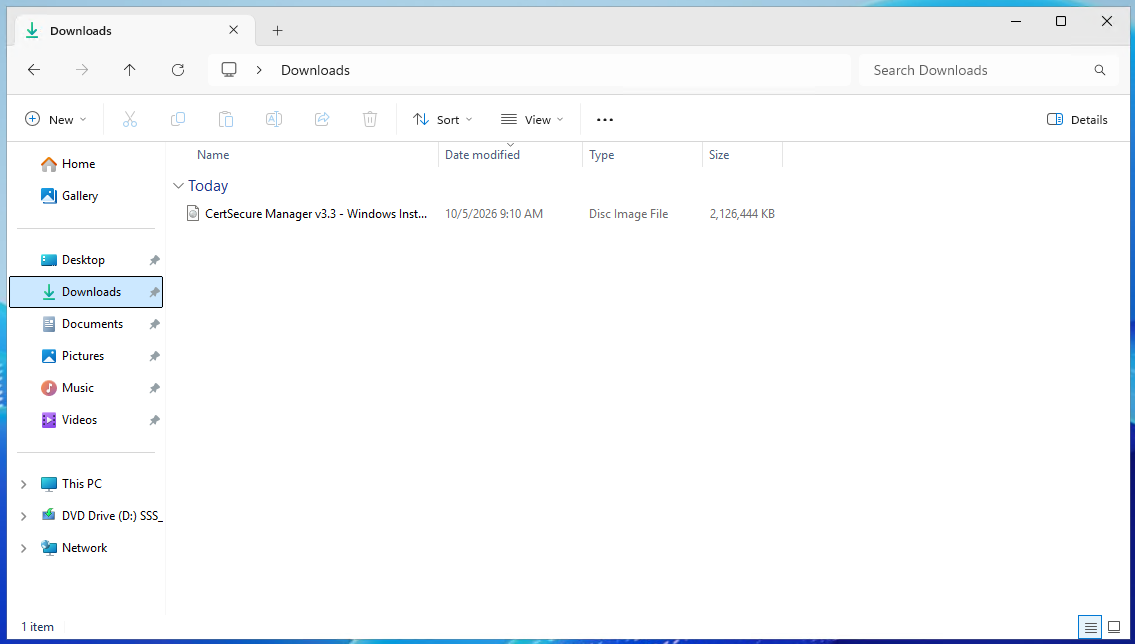
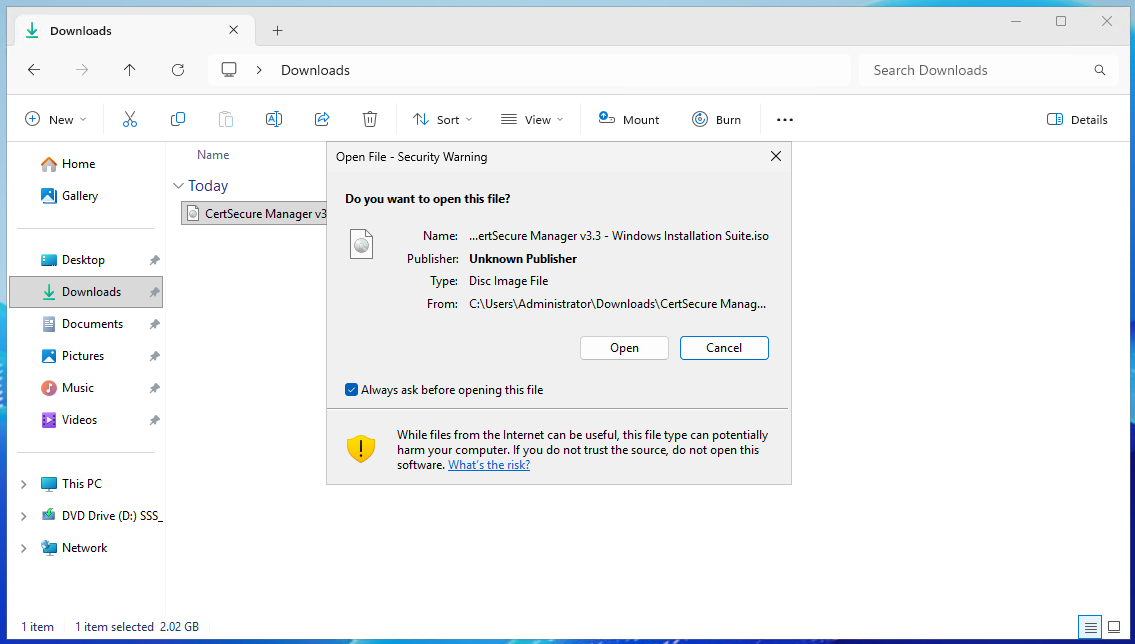
Windows mounts the image as a new DVD drive labelled CSM-CLM (for example E:) and opens it. The root of the drive contains:
Table 6: Contents of the Installation Media
| Item | Description |
|---|---|
| CertSecure Manager Installer 3.3.exe | The installation wizard |
| src\ | Component packages: CertSecure, MongoDB, OpenSSL, Java, Python, Nginx, Keycloak |
| icons\ | Images used by the wizard |
| install\ | Keycloak realm template |
| LICENSE, manifest.json | License text and build manifest |
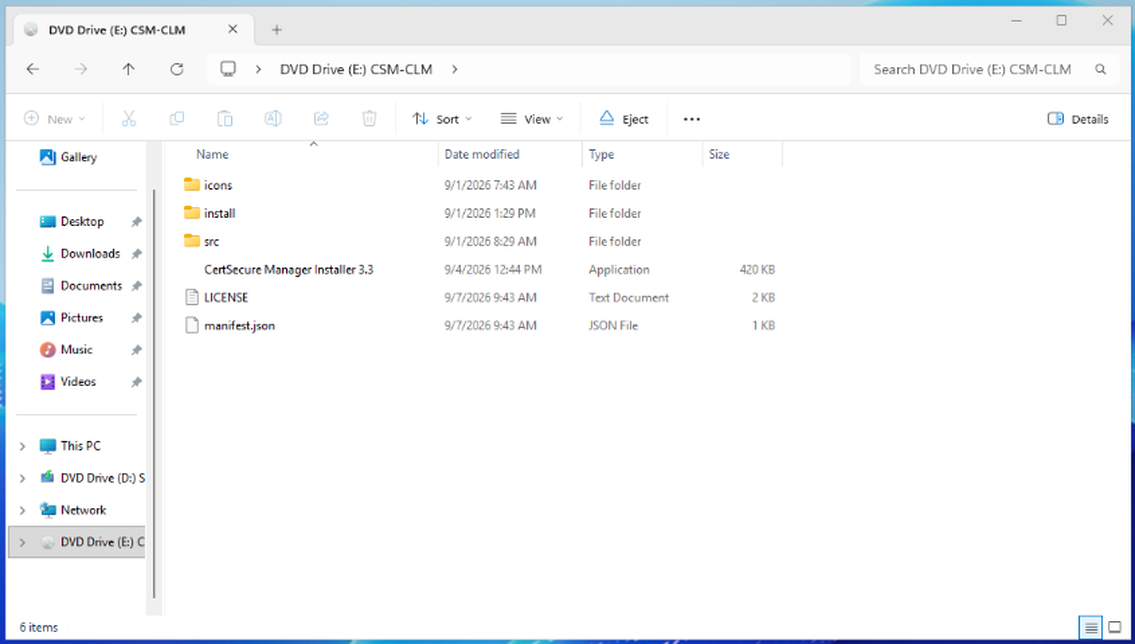
Tip: If a .sha256 checksum file came with the ISO, check the image before you mount it. Run the command below in PowerShell, then compare the result with the value in the file.
Get-FileHash .\<iso-name>.iso -Algorithm SHA256Important: Run the installer from the root of the mounted drive. Do not copy the .exe to another folder on its own, because it reads its packages from the src and install folders next to it.
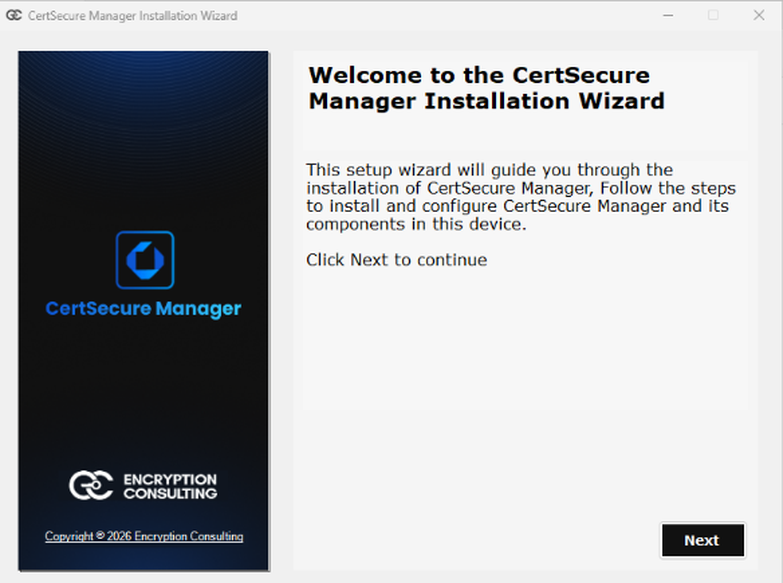
The CertSecure Manager Installation Wizard window opens. If you close the window at any point, the wizard asks you to confirm before it exits.
Note: The installer starts writing a log as soon as it opens, to C:\Users\Public\Documents\CertSecureLogs\<date-time>\InstallationLog.log.
Read the welcome text and click Next.
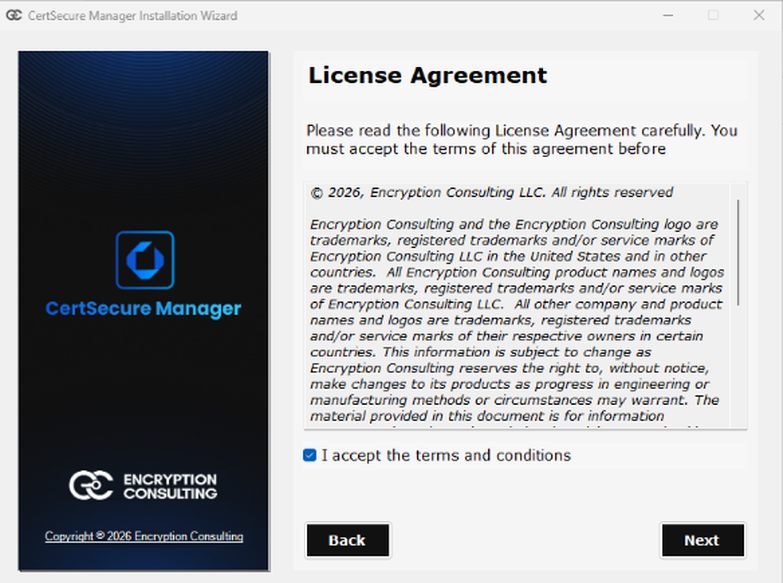
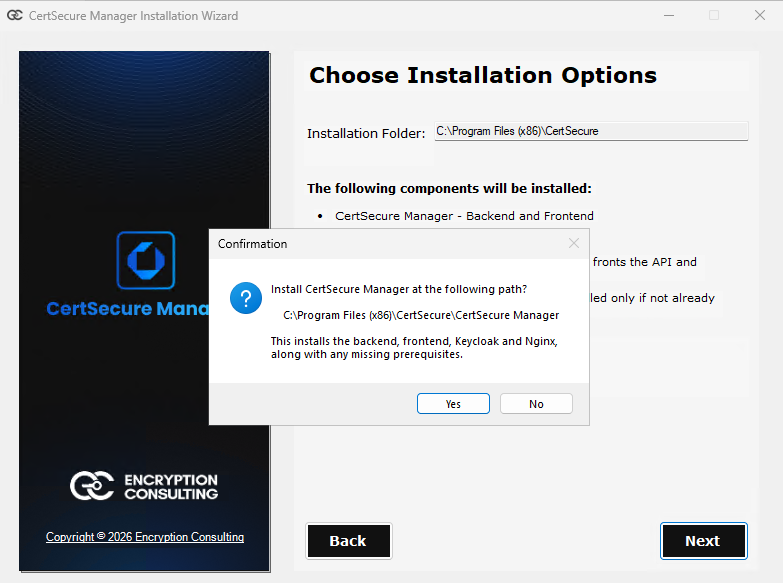
This page shows the installation folder and the components that will be installed:
You cannot deselect components; all of them are required.
If an Existing Installation Is Found
If CertSecure Manager is already installed, an Existing Installation Found dialog appears when this page opens:
Confirm
Enter the connection details planned in Plan Your Host Names.
Table 7: Server Settings
| Field | What to enter | Default |
|---|---|---|
| MongoDB Connection String | URI of the MongoDB server. Keep the default to use the local MongoDB the installer sets up. | mongodb://localhost:27017 |
| CertSecure Frontend URL | Public URL of the web interface, e.g. https://certsecure.com | https://localhost:443 (must be changed) |
| CertSecure Backend URL | Public URL of the API, e.g. https://api.certsecure.com | https://localhost:5000 (must be changed) |
| Keycloak URL | Public URL of Keycloak, e.g. https://auth.certsecure.com | Filled in automatically as https://kc.<base domain> |
| Keycloak Realm Name | Name of the Keycloak realm, e.g. auth.certsecure.com | Filled in automatically as <base domain> |
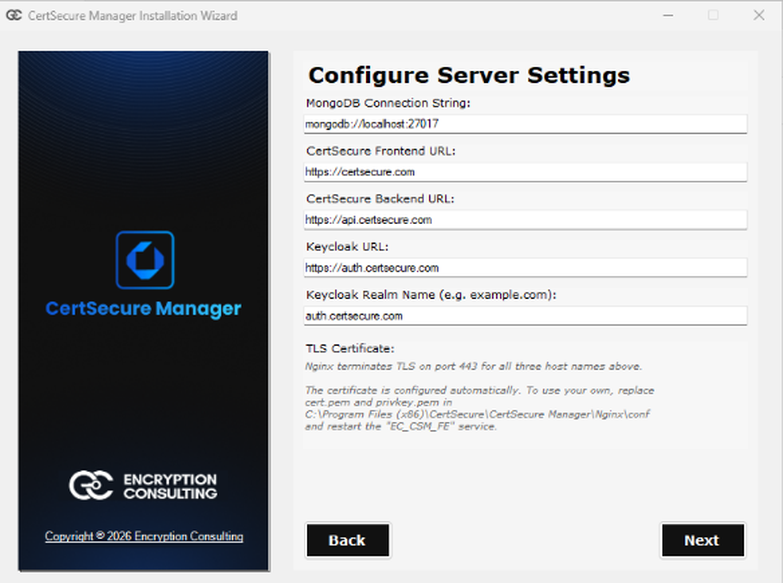
Table 8: Validation Messages
| Message | How to fix it |
|---|---|
| The MongoDB connection string is not a valid URI. | Use the form mongodb://host:port. |
| The frontend / backend URL is not a valid absolute URL. | Include https:// and a host name. |
| The frontend and backend host names must differ - nginx routes between them by server_name. | Use different host names, e.g. certsecure.com and api.certsecure.com. |
| The Keycloak URL must use https. | Start the URL with https://. |
| Nginx serves Keycloak on port 443 ... Remove the ':port' from the Keycloak URL ... | Remove the port from the Keycloak URL. |
| The Keycloak realm name may only contain letters, digits, dot, dash and underscore. | Remove spaces and other characters. |
| The Keycloak host name must differ from the frontend and backend host names. | Give Keycloak its own host name, e.g. auth.certsecure.com. |
The Installing CertSecure Manager page shows a progress bar and a live log.
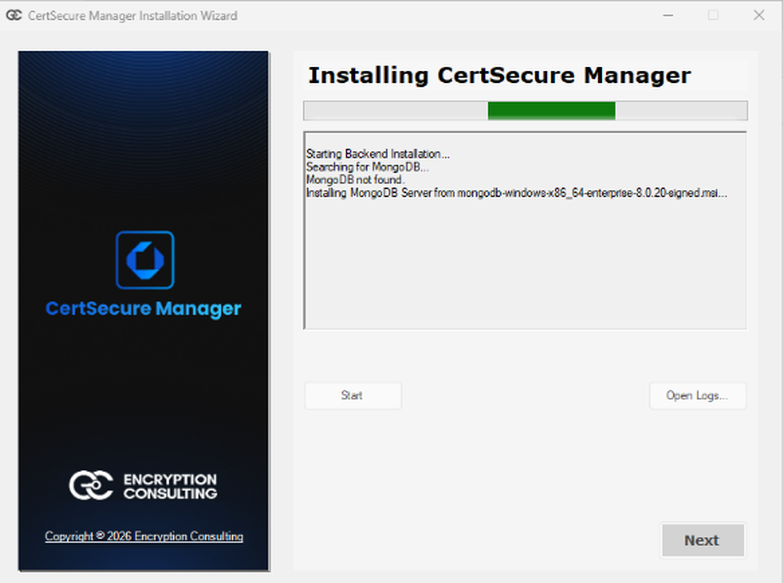
The installer works through these stages. Every stage is written to the log box and to InstallationLog.log.
Table 9: Installation Stages
| # | Stage | What happens |
|---|---|---|
| 1 | MongoDB | Installs MongoDB Server 8.0 as the MongoDB Windows service (data in C:\Program Files\MongoDB\data) and the MongoDB Shell, if not already present. |
| 2 | OpenSSL | Installs OpenSSL 64-bit to C:\Program Files\OpenSSL-Win64 and adds it to the system PATH, if not already present. |
| 3 | Java | Finds an existing JDK, or installs the bundled one for Keycloak. |
| 4 | Python | Installs Python 3.12 for all users and adds it to the system PATH, if not already present. |
| 5 | CertSecure application | Extracts the backend and frontend to ...\CertSecure Manager\Backend. |
| 6 | Nginx | Checks that port 443 is free, extracts Nginx, deploys the TLS certificate, writes the site configuration, tests it, and registers the EC_CSM_FE service and a firewall rule. |
| 7 | Keycloak | Extracts Keycloak, builds it, imports the realm, creates the administrator accounts, registers the EC_CSM_KC service, and waits until it reports healthy (up to 5 minutes). |
| 8 | Configuration | Writes the backend configuration, creates the Python environment, registers the EC_CSM_BE service, runs pre-flight checks, starts all services, checks host names and sets up log rotation. |
Dialogs That May Appear During Installation
| Dialog | Meaning and action |
|---|---|
| Host Names Point Elsewhere | One or more host names resolve to an address that is not on this server. Click Yes to add local hosts-file overrides that point them to 127.0.0.1. Click No if your DNS is intentionally pointing elsewhere, for example to a load balancer. |
| Pre-flight Check Failed | A prerequisite was not met, so the backend service was not started. The dialog lists the failed checks. Fix them, then start the service from Services. |
| Service Start Failed | One or more CertSecure services did not start. Check the installer log (C:\Users\Public\Documents\CertSecureLogs\<date-time>\InstallationLog.log) for the cause. |
When installation succeeds, the log shows ===== All services started successfully =====, confirms that each host name resolves on this machine, and prints Browse to https://certsecure.com/ (your frontend URL). The message CertSecure Manager was successfully installed! appears. Click OK, then Next.
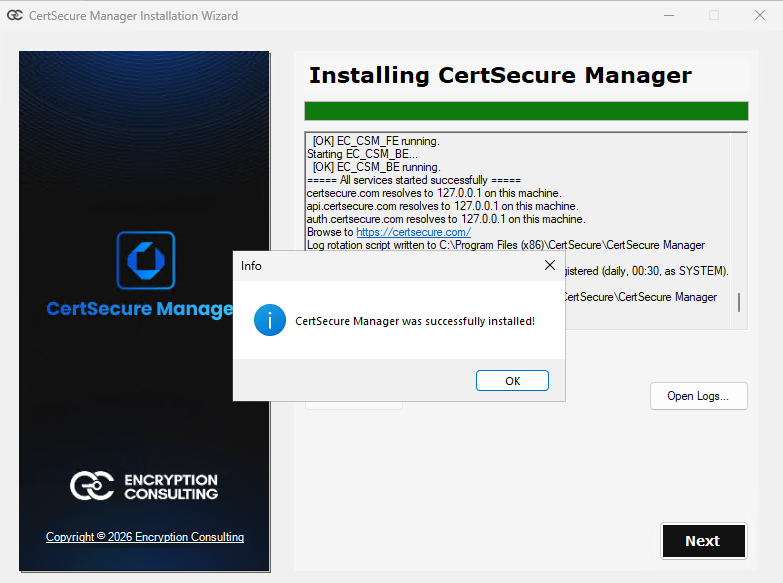
Tip: Click Open Logs... at any time after the run finishes to open the folder with this run's log files.
The Installation Completed Successfully page confirms the installation. Click Finish to close the wizard, then eject the mounted ISO.
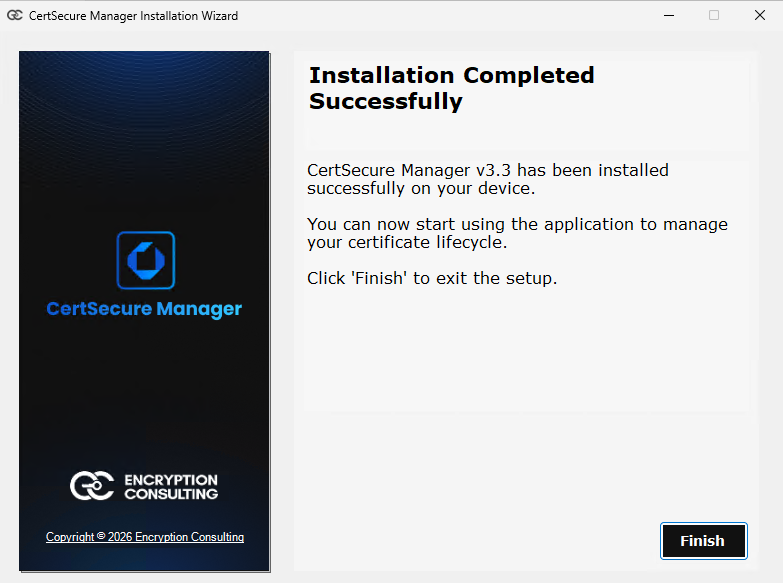
If installation failed, the Installation Failed page appears instead. Click Open Logs... on the previous page to review the logs, then click Close.
Important: A failed fresh installation is not rolled back automatically. Components installed before the failure remain on the server. Fix the cause and run the installer again; it skips components that are already present.
Table 10: Windows Services
| Service name | Display name | Runs |
|---|---|---|
| MongoDB | MongoDB Database Server (MongoDB) | MongoDB database |
| EC_CSM_KC | EC_CertSecure_Keycloak_Service | Keycloak identity server |
| EC_CSM_FE | EC_CertSecure_Frontend_Service | Nginx (web UI and reverse proxy) |
| EC_CSM_BE | EC_CertSecure_Backend_Service | CertSecure Manager backend |
Installation root: C:\Program Files (x86)\CertSecure\CertSecure Manager
Table 11: Folders and Files
| Path | Contents |
|---|---|
| Backend\ | CertSecure application, Python environment (venv) and configuration |
| Backend\conf.ini, Backend\conf\server.yaml | Backend settings (database, URLs, ports, identity server) |
| Backend\conf\certsecure-nginx.conf | Nginx site configuration for the three host names |
| Backend\conf\keycloak-credentials.txt | Generated Keycloak credentials (Administrators and SYSTEM only) |
| Backend\UI\cert-secure-manager\ | Frontend web files (config.js holds the URLs) |
| Nginx\conf\cert.pem, privkey.pem | TLS certificate and private key used by Nginx, Keycloak and the backend |
| Nginx\logs\ | Nginx access and error logs |
| Keycloak\conf\keycloak.conf | Keycloak settings |
| Keycloak\logs\keycloak.log | Keycloak log |
| rotate-logs.ps1, uninstall.ps1 | Log rotation and uninstall scripts |
Other locations:
Table 12: Other System Changes
| Change | Details |
|---|---|
| Firewall rule | CertSecure Manager (HTTPS): inbound TCP on the frontend port (443 by default) |
| Scheduled task | CertSecure Manager Log Rotation: runs daily at 00:30 as SYSTEM. Rotates MongoDB and Nginx logs once they reach 20 MB, keeping 10 copies, and keeps the 10 newest installer log folders. |
| System PATH | OpenSSL bin, Python and Python Scripts folders added |
| Hosts file | Entries for any host names that did not resolve, marked # Added by the CertSecure installer |
| Apps & Features | CertSecure Manager entry (publisher Encryption Consulting LLC) with an uninstall option |
Open Services (services.msc) and check that MongoDB, EC_CSM_KC, EC_CSM_FE and EC_CSM_BE are Running with startup type Automatic. Or run this in PowerShell:
Get-Service MongoDB, EC_CSM_KC, EC_CSM_FE, EC_CSM_BE |
    Format-Table Name, Status, StartType
Optional health checks from the server:
# Keycloak readiness (expect HTTP 200)
curl.exe -k https://127.0.0.1:9000/health/ready

# Backend (expect HTTP 200; use your backend port if not 5000)
curl.exe -k https://localhost:5000/checkTable 13: Access URLs
| What | URL (example) |
|---|---|
| CertSecure Manager web interface | https://certsecure.com/ |
| CertSecure API | https://api.certsecure.com/ |
| Keycloak administration console | https://auth.certsecure.com/admin/ |
Open the frontend URL in a browser. If the default certificate is still in use, the browser shows a certificate warning until you install a trusted certificate (see Replace the TLS Certificate).
The installer generates all Keycloak passwords and secrets at random. There are no default passwords. They are saved in:
C:\Program Files (x86)\CertSecure\CertSecure Manager\Backend\conf\keycloak-credentials.txtOnly Administrators and SYSTEM can read this file. It contains:
Important: Store these credentials in your organization's password vault, then restrict or remove the file. Changing the admin-svc password or the client secret in Keycloak also requires updating the backend configuration (server.yaml).
Sign in to the Keycloak admin console as admin-certsecure to create CertSecure Manager users and set up identity federation (for example Active Directory/LDAP or SSO) as your organization needs.
To use a certificate issued by your organization:
Restart the services so that Nginx, Keycloak and the backend all load the new certificate:
Restart-Service EC_CSM_KC, EC_CSM_FE, EC_CSM_BEMake sure client computers trust the issuing CA, then browse to the frontend URL and confirm that no warning appears.
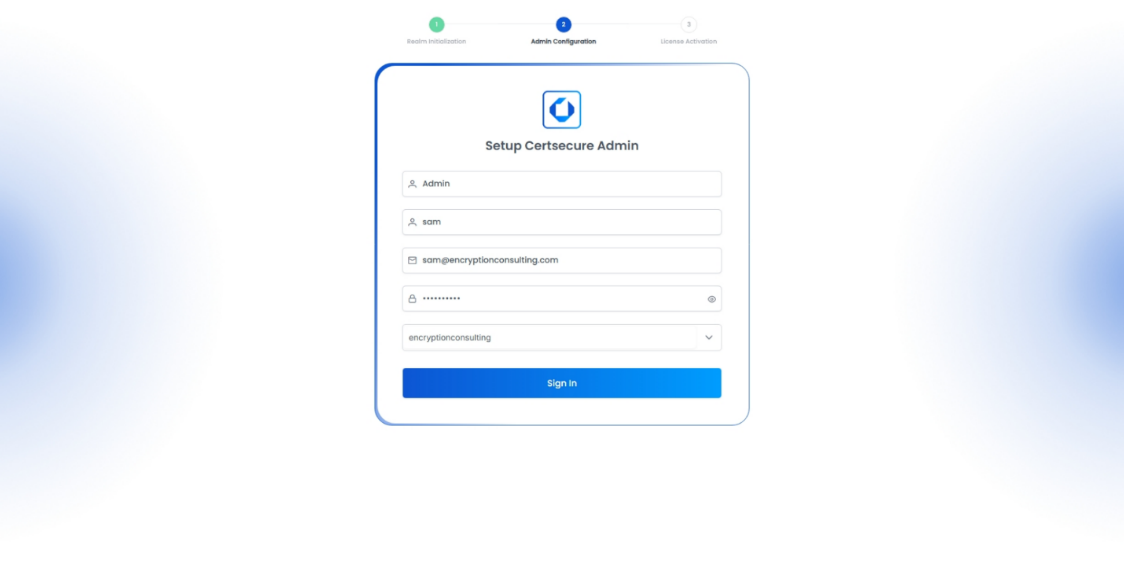
Page 2: Admin Configuration
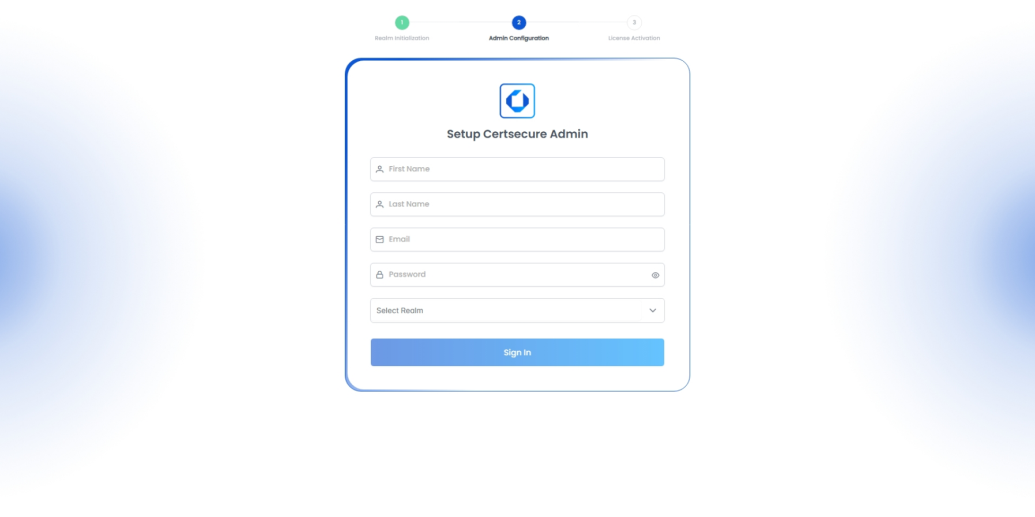
| Field | Description |
|---|---|
| First Name | The administrator's first name. |
| Last Name | The administrator's last name. |
| The administrator's email address. This becomes the login username. | |
| Password | Create a strong password for the admin account. |
| Select Realm | Choose the realm created during installation. |
Page 3: License Activation
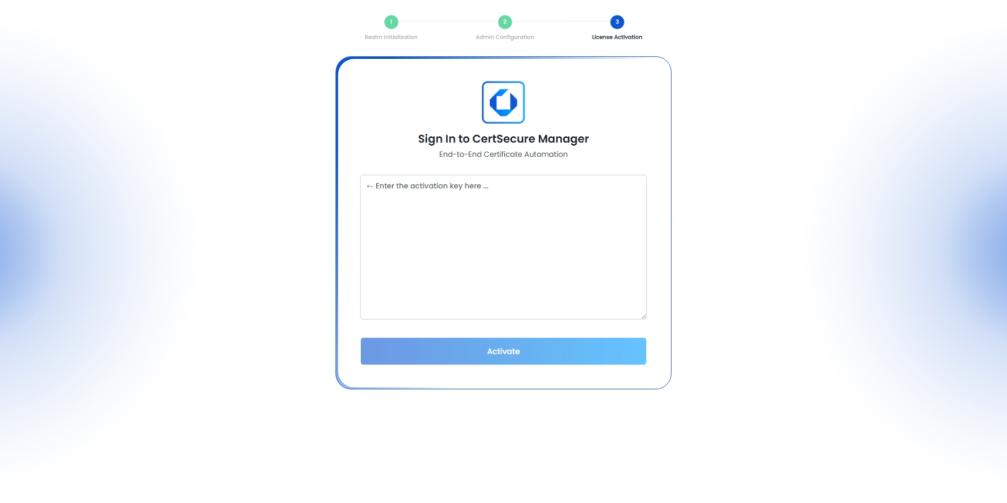
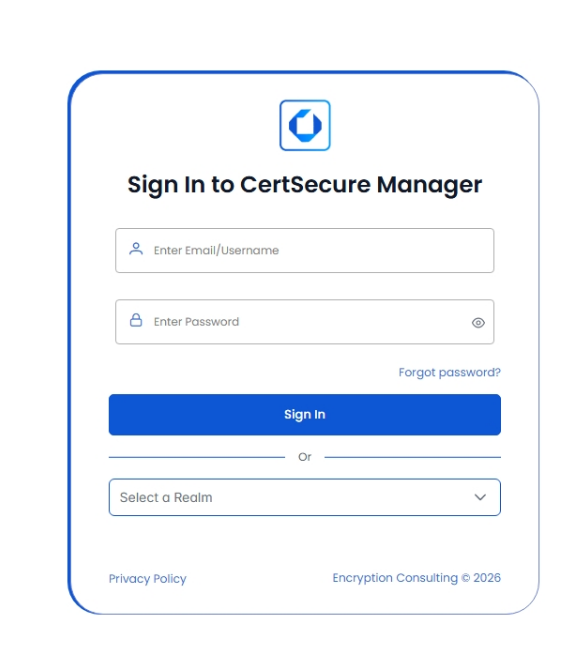
Post Setup: Sign In to CertSecure Manager
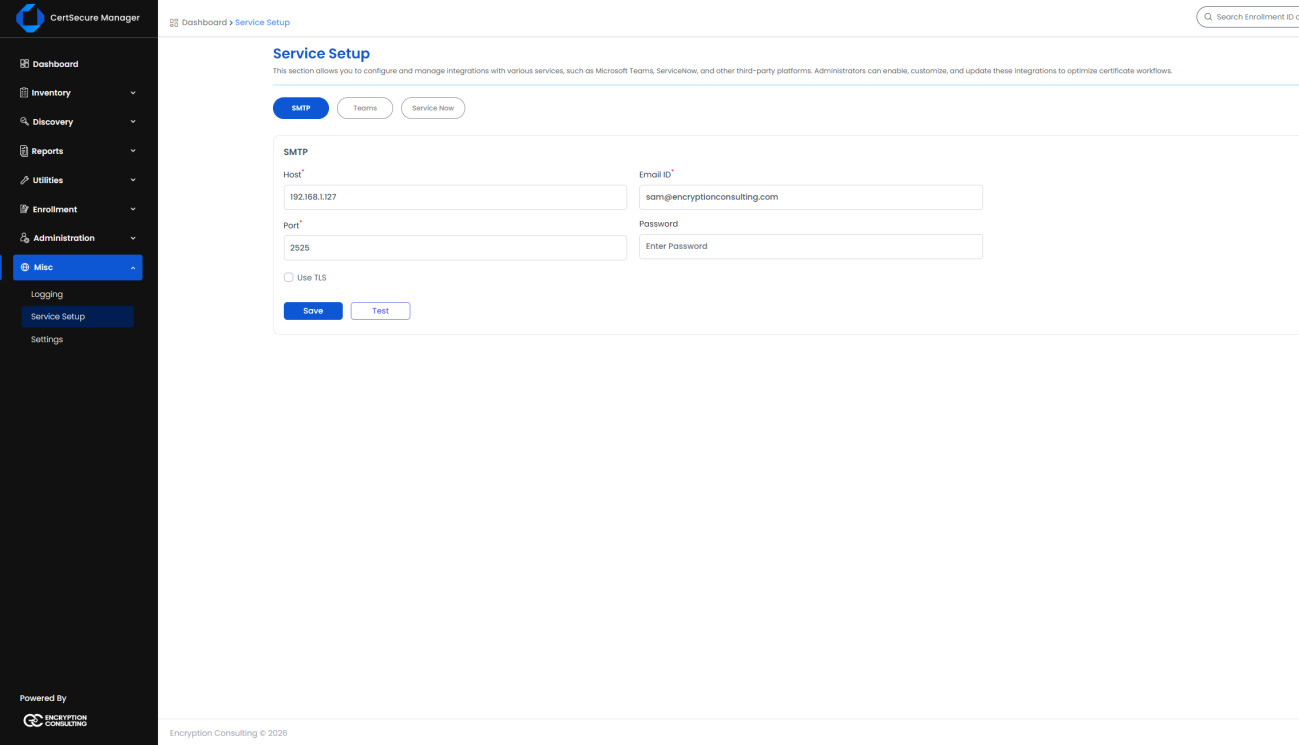
CertSecure Manager supports two types of SMTP servers:
Authenticated SMTP servers require a username and password, such as Office 365 or Gmail, and typically operate on port 587 with TLS.
Anonymous relays are internal mail relays that require no credentials and instead control access by sender IP address. Common in enterprise environments, these typically operate on port 25 without TLS.
To configure:
| Setting | Description |
|---|---|
| SMTP Host | Your email server or relay hostname (for example, smtp.office365.com or relay.corp.local). |
| Port | SMTP port number. Typically 587 for authenticated servers with TLS, or 25 for internal anonymous relays. |
| The sender ("From") address for all CertSecure notifications. For authenticated servers this is the login mailbox with MFA disabled; for anonymous relays it must be permitted by the relay's sender policy. | |
| Password | The email account password. Leave blank for anonymous relays. When no password is provided, CertSecure connects without authenticating. |
| Use TLS (STARTTLS) | Enabled by default. Disable for internal relays that do not support STARTTLS, including most port-25 anonymous relays. Leaving it enabled against such a relay will cause sends to fail. |
Notes:
The SMTP server must be reachable from the CertSecure Manager backend server on
the configured port. Verify both host and network firewall rules.
For
anonymous relays, the backend server's IP address must be added to the relay's
permitted-senders list: the receive connector's remote IP ranges on Microsoft
Exchange, or mynetworks on Postfix. Without this, sends fail with "550 5.7.1
Unable to relay".
SSL-only ports such as 465/SMTPS are not supported. Use
STARTTLS on port 587 instead.
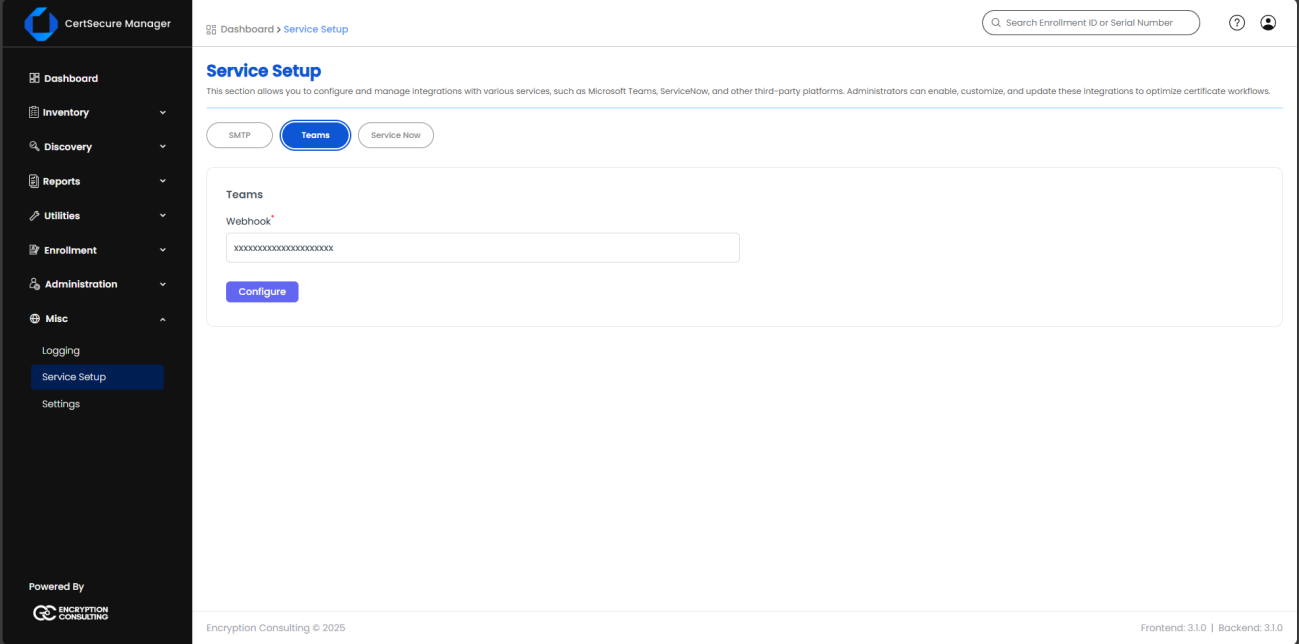
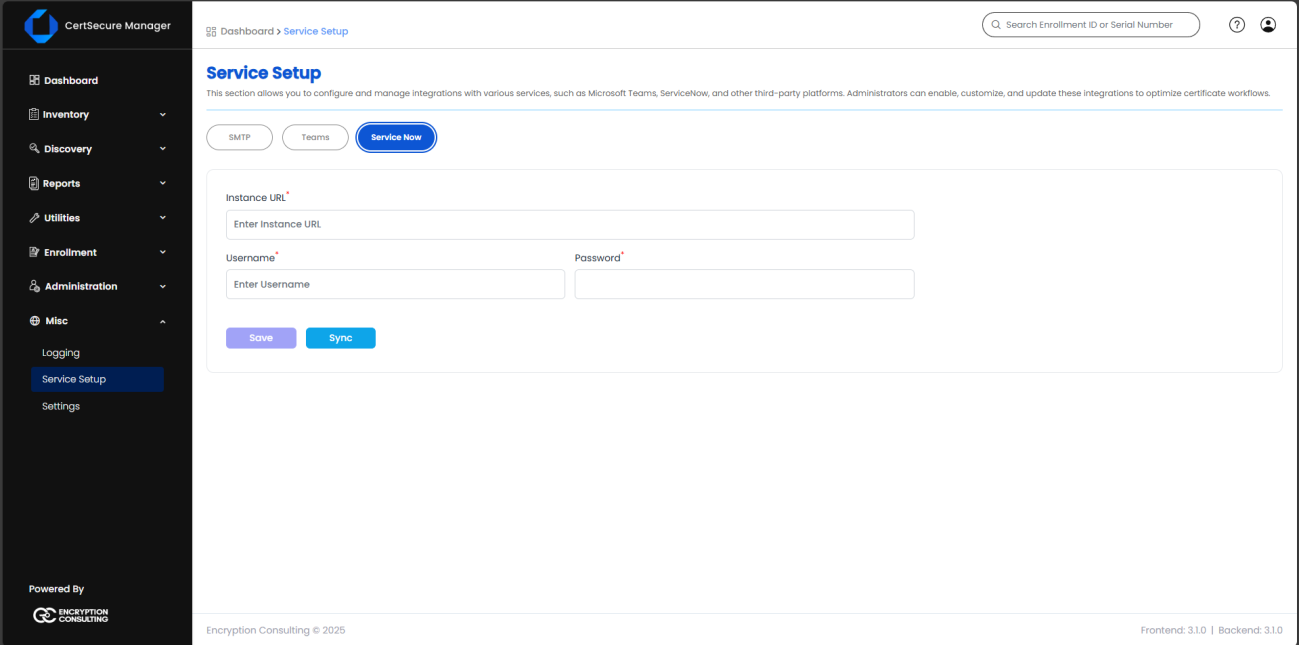
| Field | Description |
|---|---|
| Service Now Instance URL | Your ServiceNow instance URL (for example, https://yourinstance.servicenow.com). |
| Username | ServiceNow service account username. |
| Password | ServiceNow service account password. |
Generate Azure AD Credentials
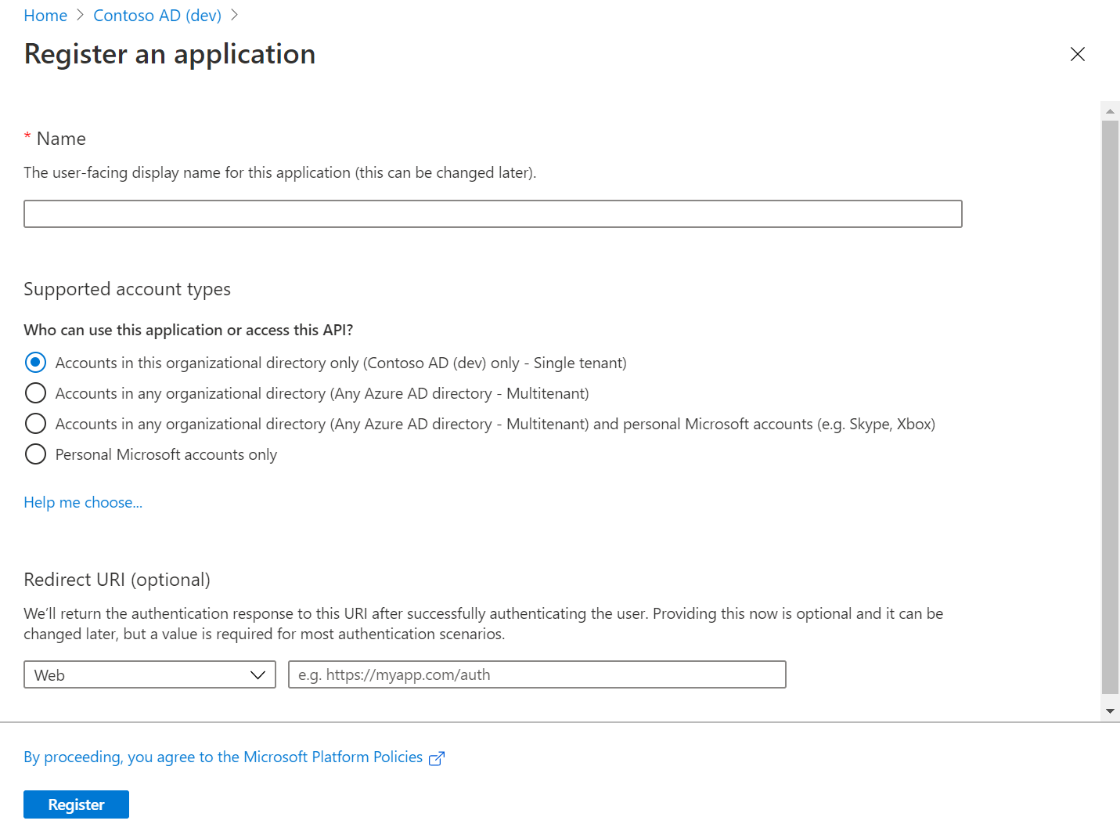
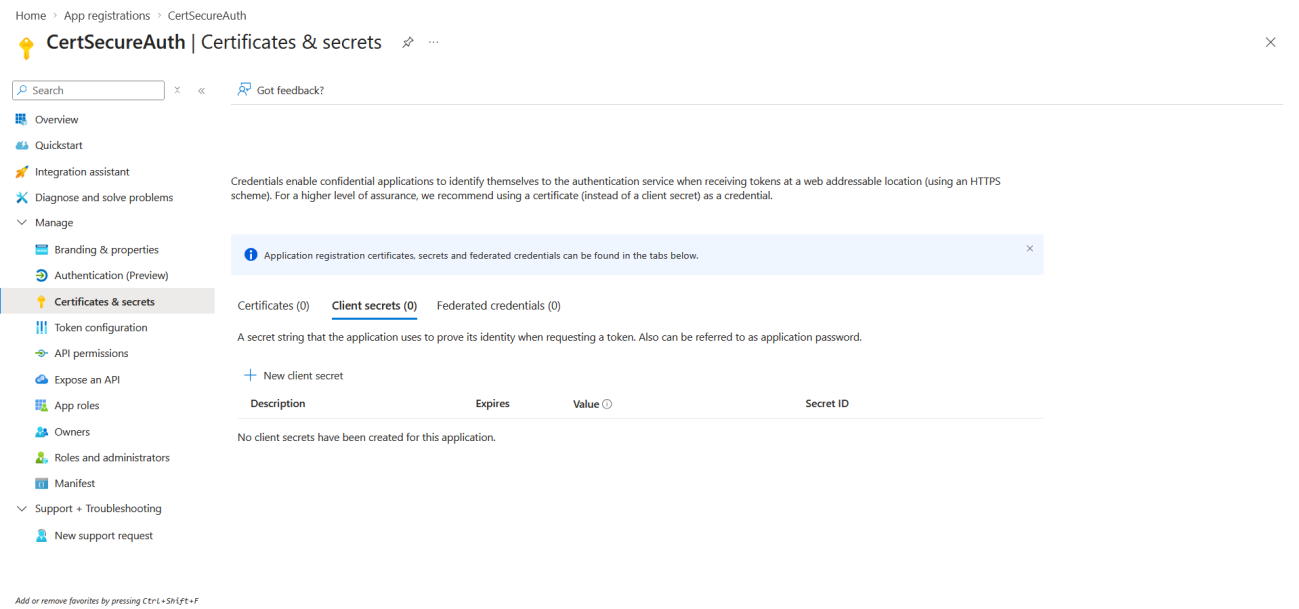
API Permissions
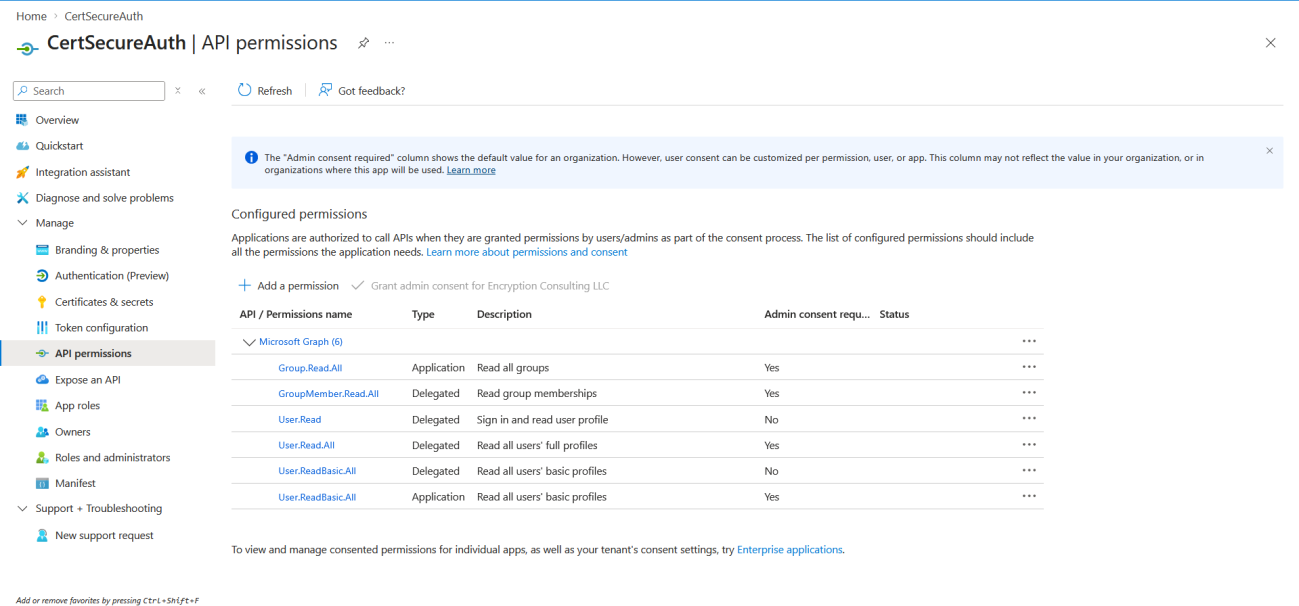
Add the following Delegated permissions
Add the following Application permissions
Grant Admin Consent
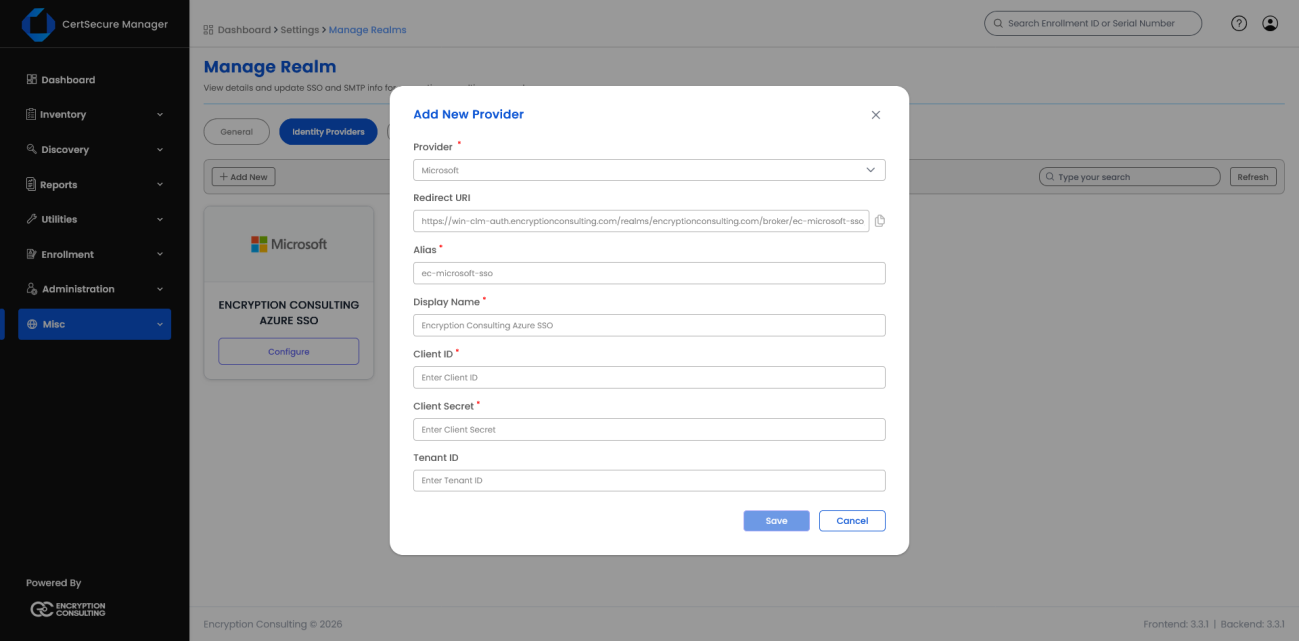
Setting up on CertSecure Manager
| Field | Description |
|---|---|
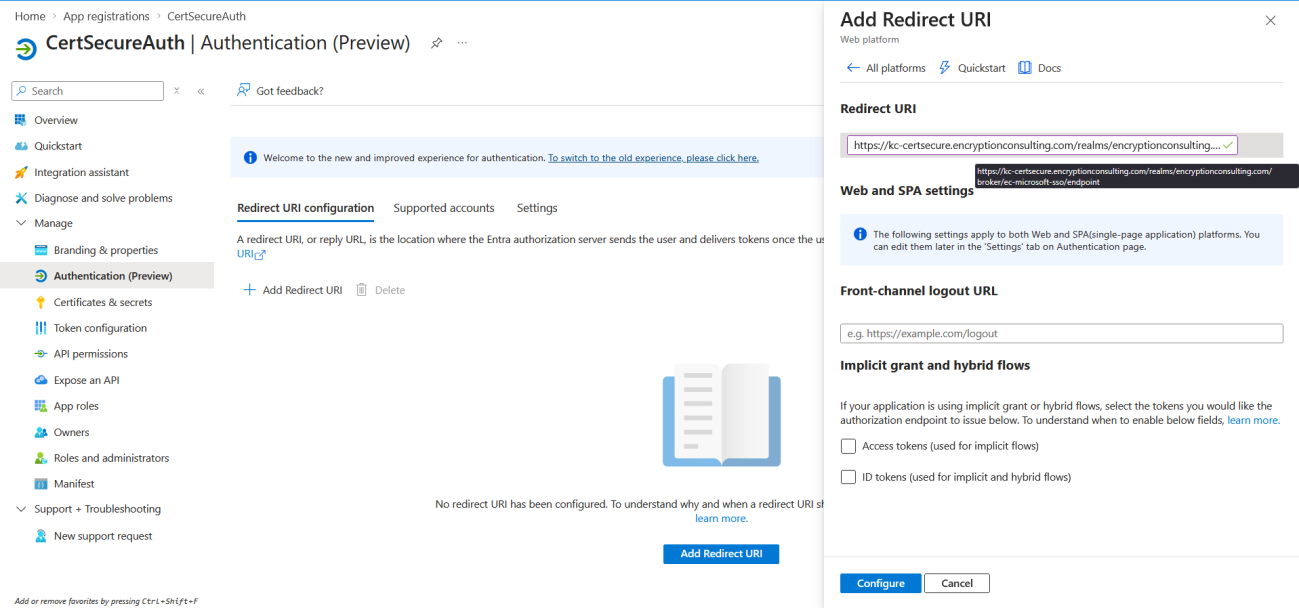
| Redirect URI | Auto-generated by the CertSecure Manager Keycloak setup. Copy this value and add it as the Redirect URI in your Azure app registration. |
| Alias | A unique internal identifier for the identity provider (for example, ec-microsoft-sso). |
| Display Name | The name shown on the CertSecure Manager login page (for example, Encryption Consulting Azure SSO). |
| Client ID | Your Azure application (client) ID. |
| Client Secret | The client secret value you recorded from Azure. |
| Tenant ID | Your Azure directory (tenant) ID. |
Note: An AD admin may be required to log in to CertSecure Manager to grant necessary permissions before anyone else can log in.
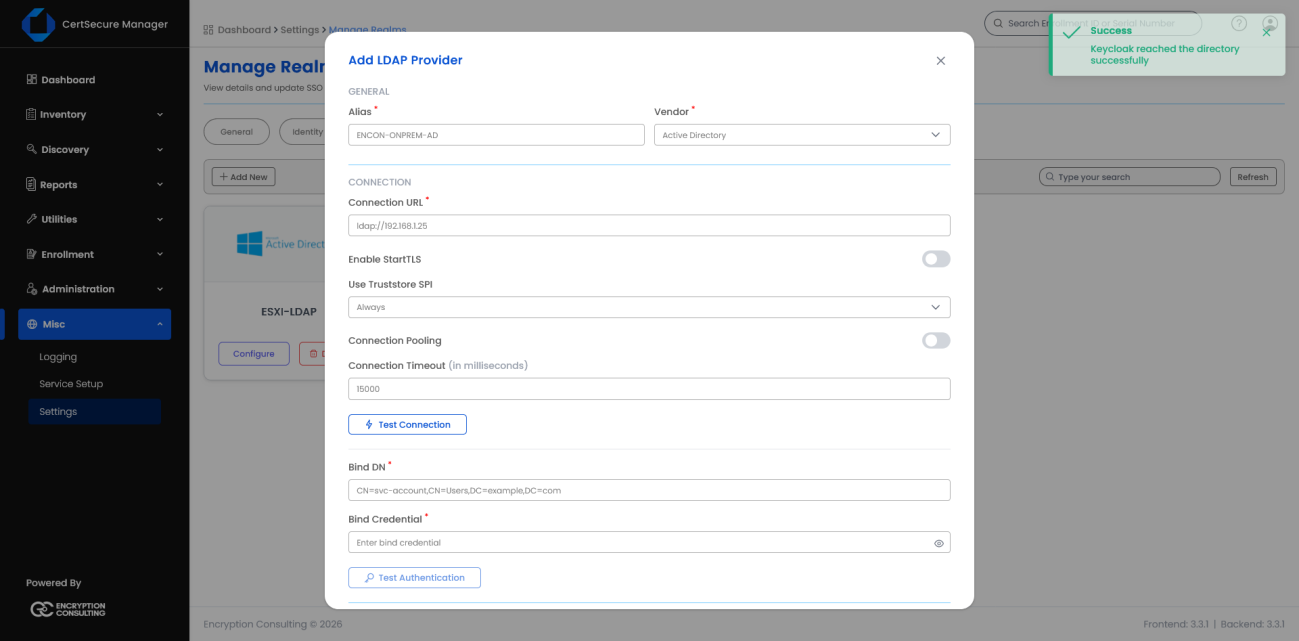
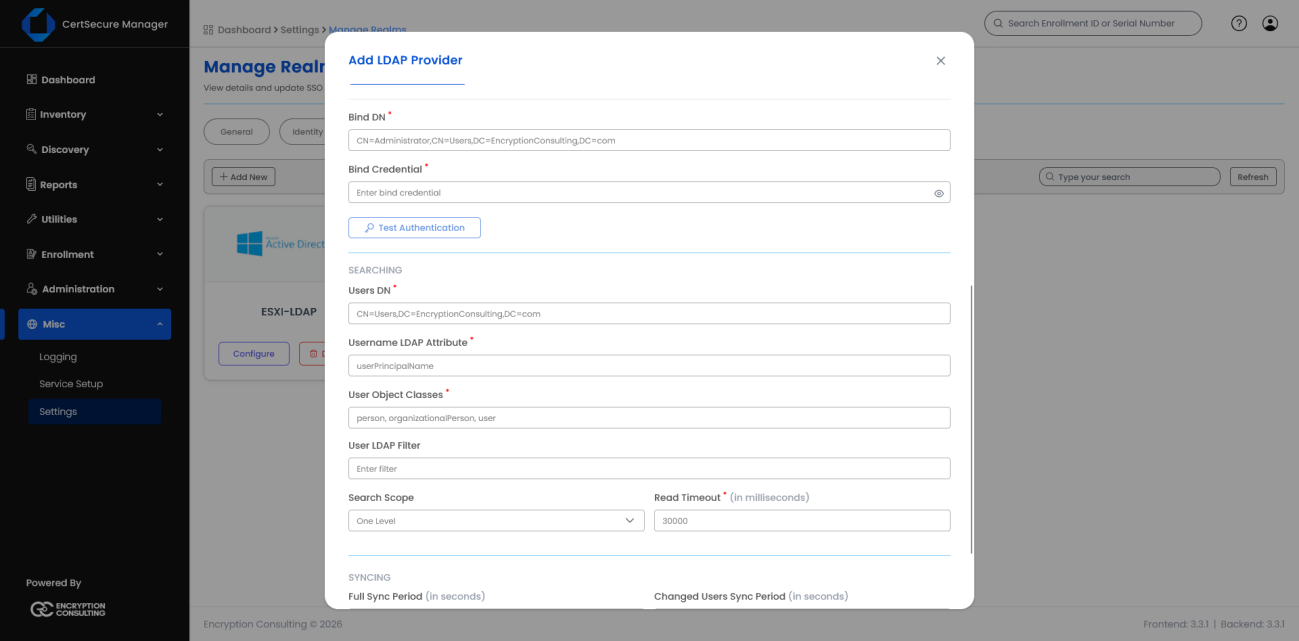
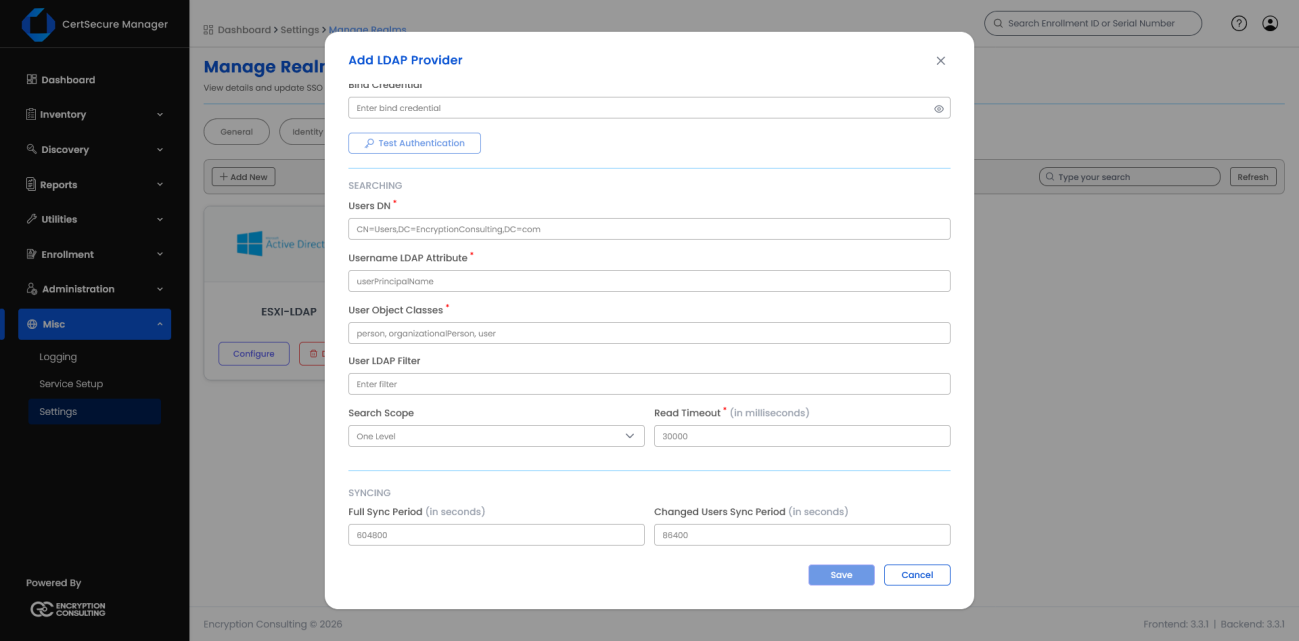
This is the post-initialization configuration for Keycloak. In this section you connect the CertSecure Manager realm to Azure AD to enable single sign-on, then bind the realm to Active Directory over LDAP so users and groups synchronize automatically.
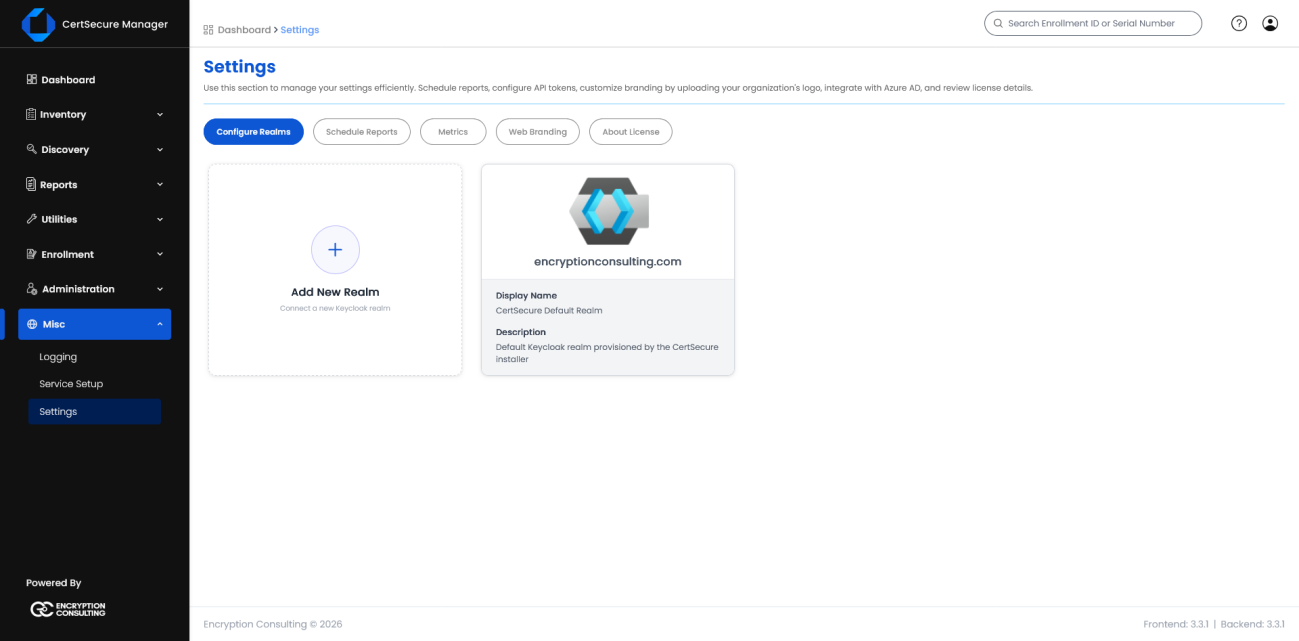
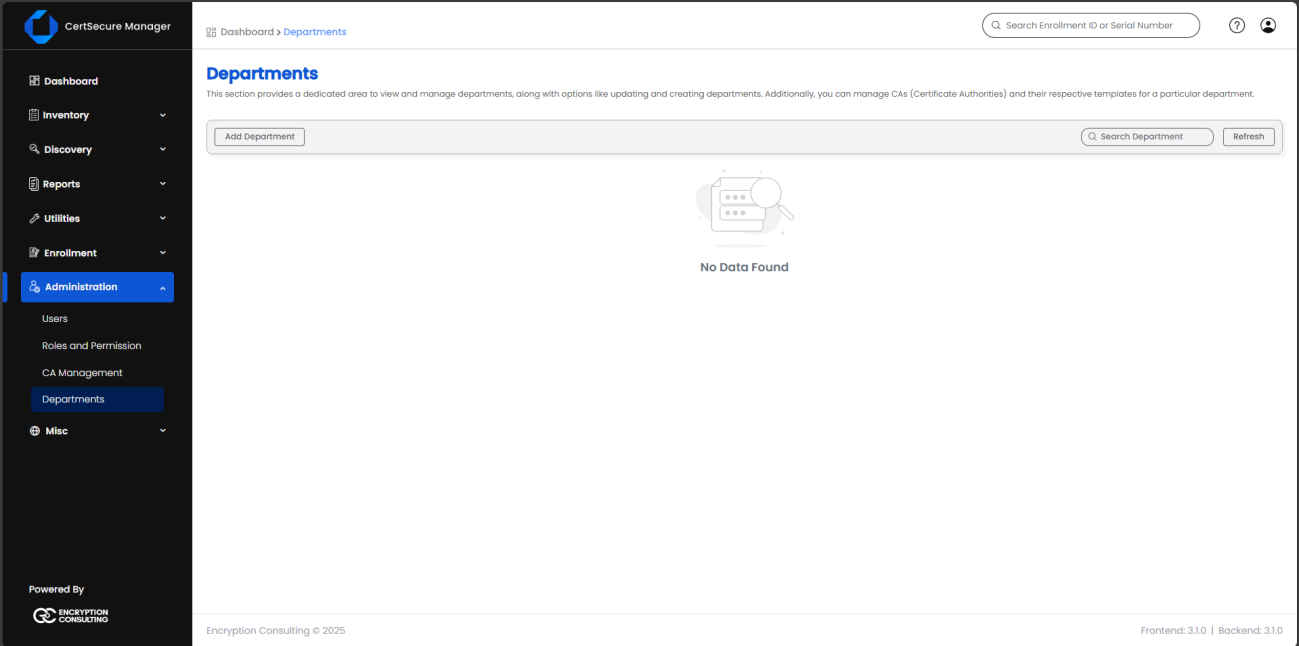
Before any user can be added, a department must be created.
Page 1: Access Department Management
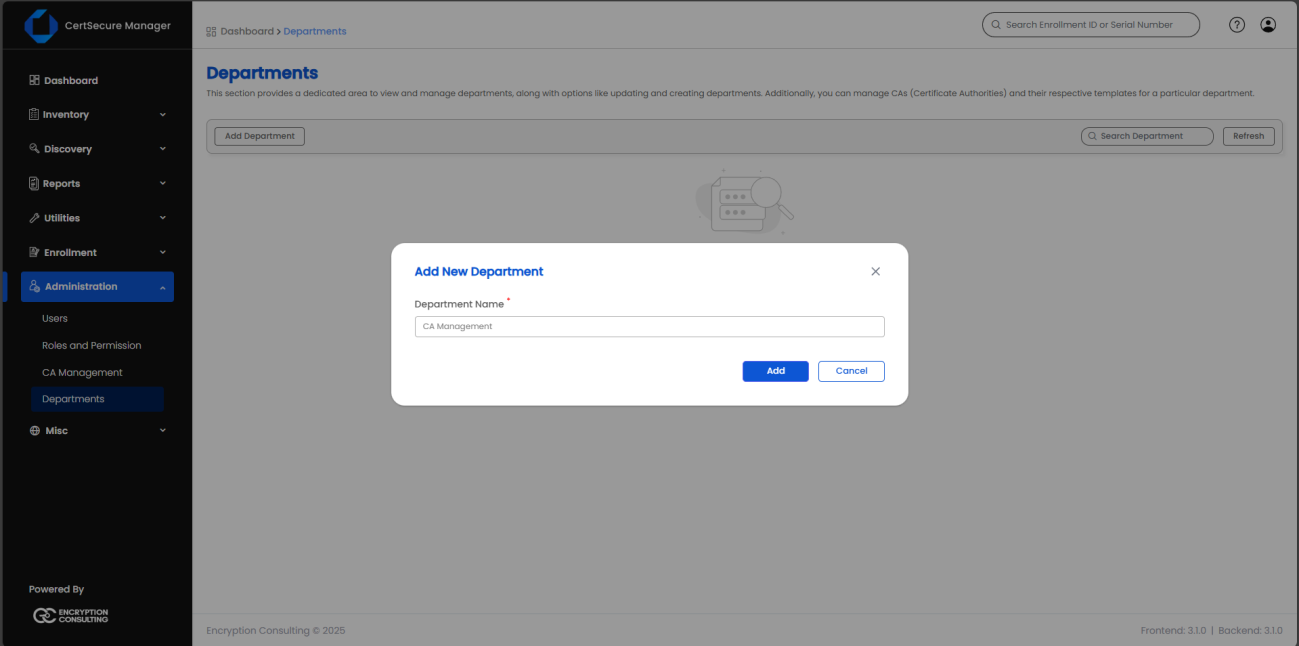
Page 2: Create New Department
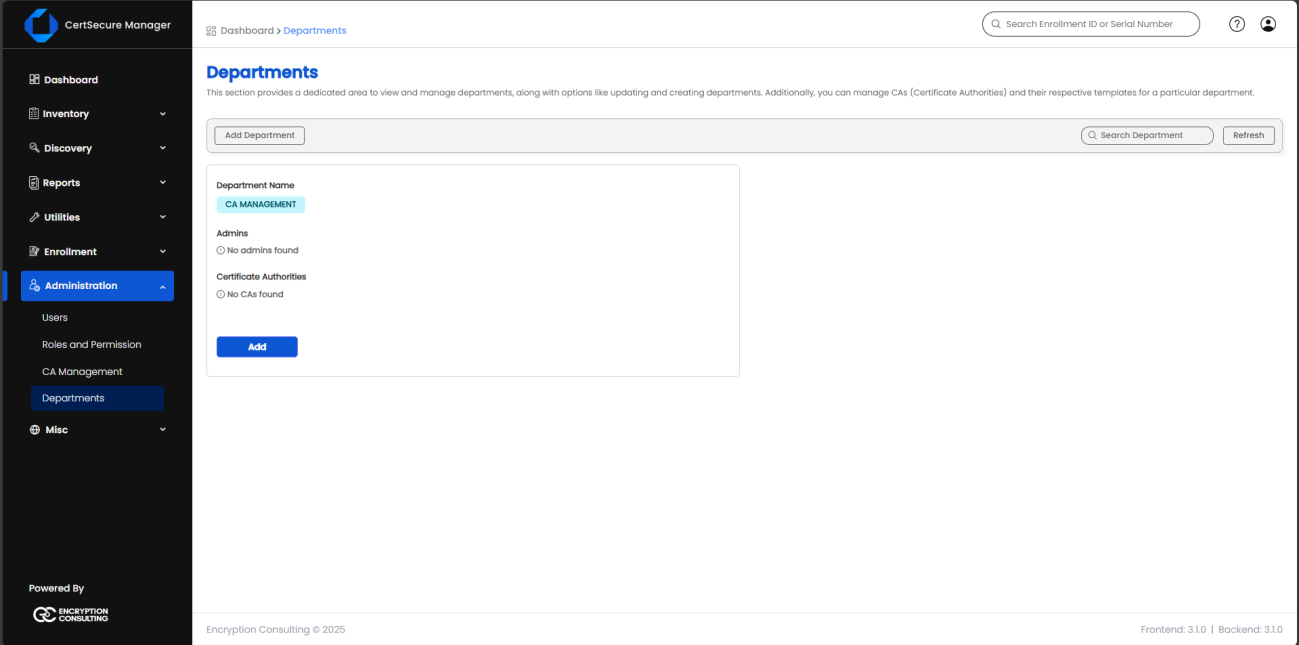
Page 1: Access User Management
Click Add User button to create a new user account
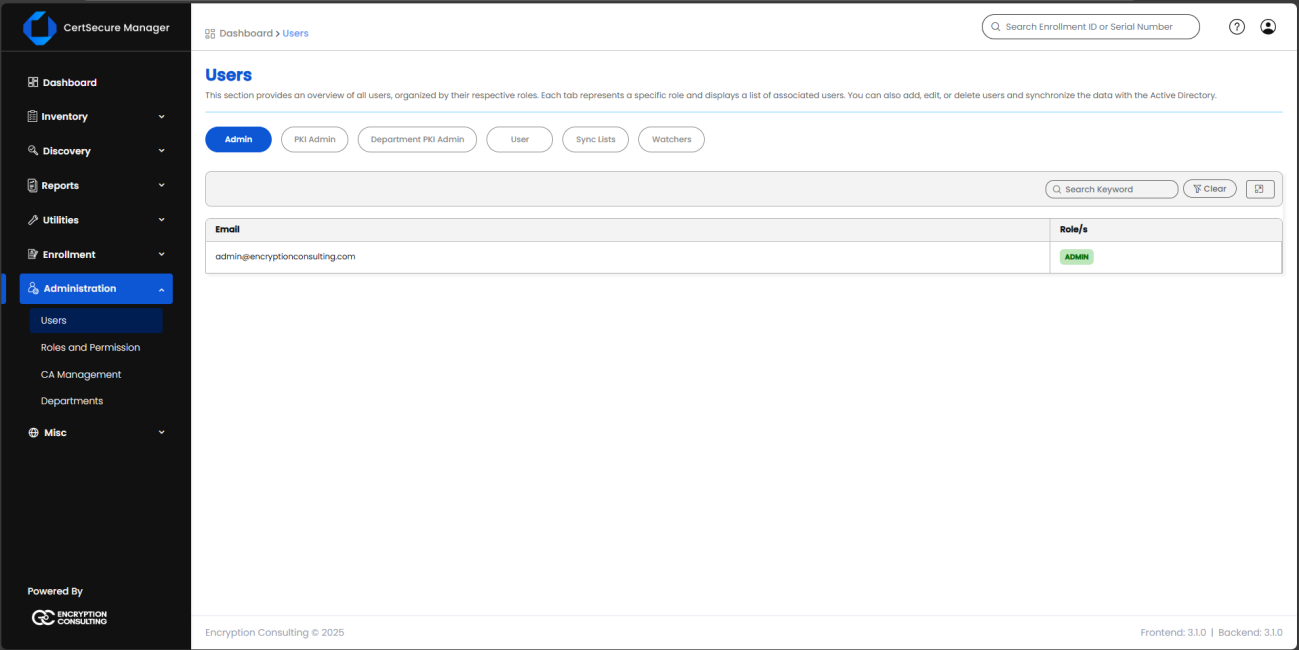
Page 2: Create New User
| Field | Description |
|---|---|
| First Name | The user's first name. |
| Last Name | The user's last name. |
| The user's email address. This becomes their login username. | |
| Roles | Select the appropriate roles for the user from the dropdown menu. |
| Department | Assign the user to a department from the available options. |